
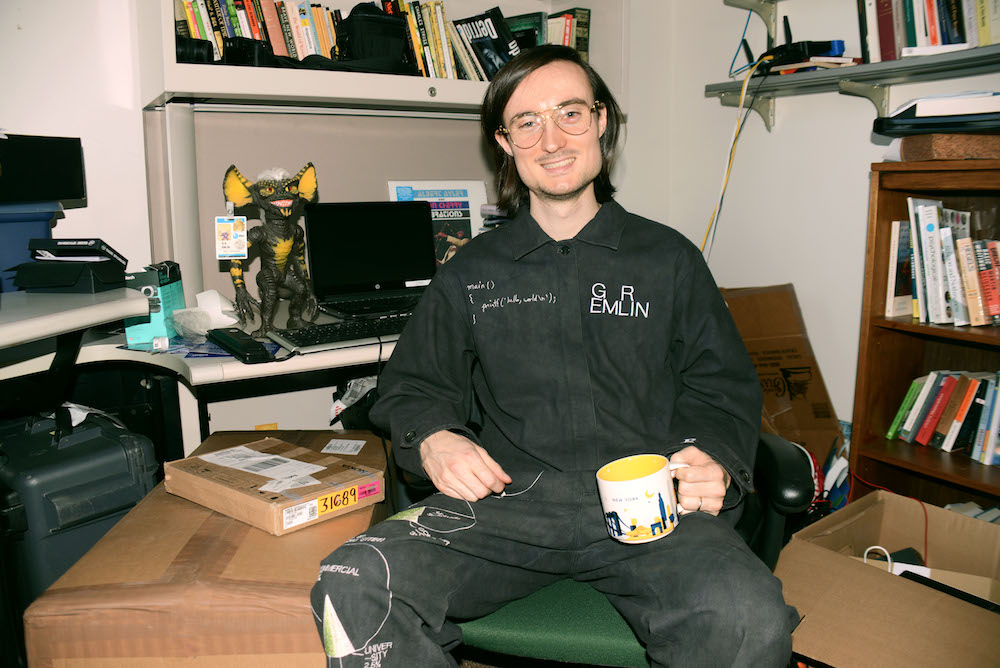
an introduction to the bell system
Last week we (Foreign Objects) presented the project An Introduction To The Bell Systemtaken from the title of an internal employee handbook that we came across in the Bell Labs archives as part of a talk hosted by Rhizome and the New Museum. The piece consists of a series of 5 embroidered jumpsuits, each themed around a particular strand of Bell Labs’ Computing Sciences Research Center work/folk history. As Gary and I are currently in the UK, and Kalli and Sam in Canada, with the work itself in New York, it was something of a weirdly disembodied experience (though perhaps a snapshot of life as a successful international artist on the cheap, ha ha).
I’m hopeful that this isn’t a hard end to the project – more of an inflection point that allows us to explore other areas – though I’m also proud of the work that we did, along with collaborators Eliza Collin (who handled the non-embroidery parts of garment production and fabrication, including natural-dyeing all of the fabric), and Genie Kausto (who did all of the styling, photography and filming onsite at Bell).
Because of COVID, what could have been very collaborative parts of the project became more of a textile-relay-race, which was a shame as, especially with the work between ourselves and Eliza, it felt like there was a lot we could have all learned from one another about the processes involved. Even without that aspect though, I learned a lot working on this project, and I wanted to write about 2 things: firstly, the material process of making the suits, and secondly the research process at bell. I haven’t decided yet whether to make the second part a separate post or add it to the end here: check back in a couple of weeks, I guess.
part 1: making the suits
pre embroidery
The original plan for this project was to use recycled fabrics (e.g. other clothing repurposed into a patchwork fabric), a technique Eliza uses a lot in her work. This aim was cut short by the November lockdown as we had no access to charity shops, so we instead got hold of some unbleached organic cotton in half panama, which Eliza then hand-dyed.
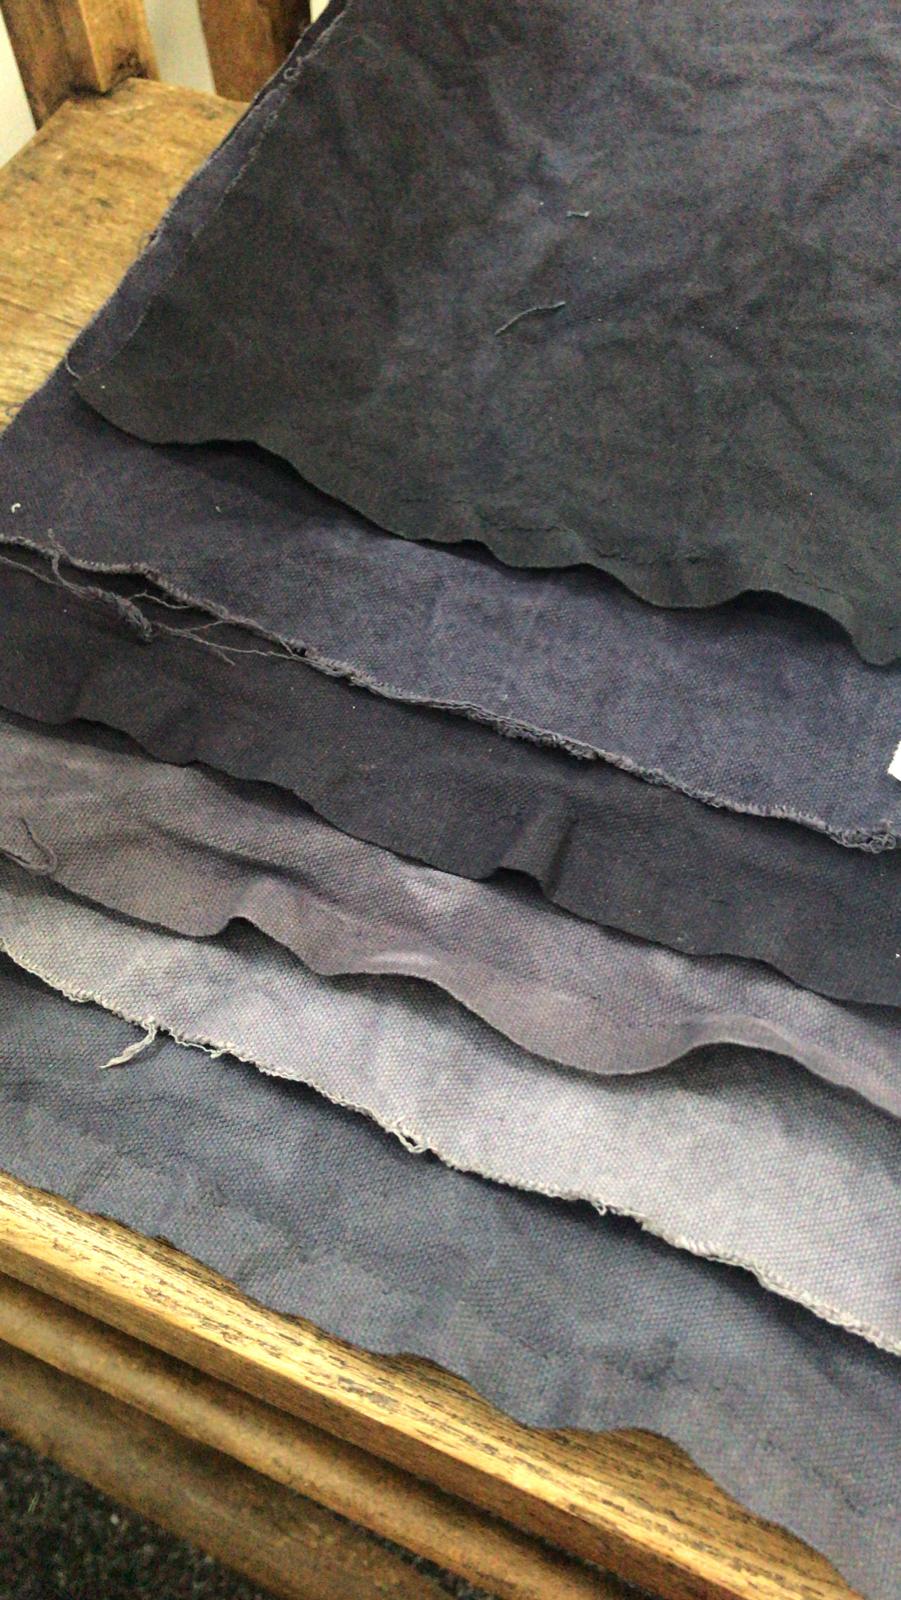 test swatches made by eliza (the darker ones had been treated with iron more times than the lighter ones)
dyeing
Eliza did all of the dyeing of the fabric, but it was a nice opportunity to learn about natural dyeing techniques and results. We decided from the start on quite a dark fabric. She made a bunch of tests, using either gall nut extract, myrobalan extract, or tannic acid, along with iron sulphate to produce dark colours.
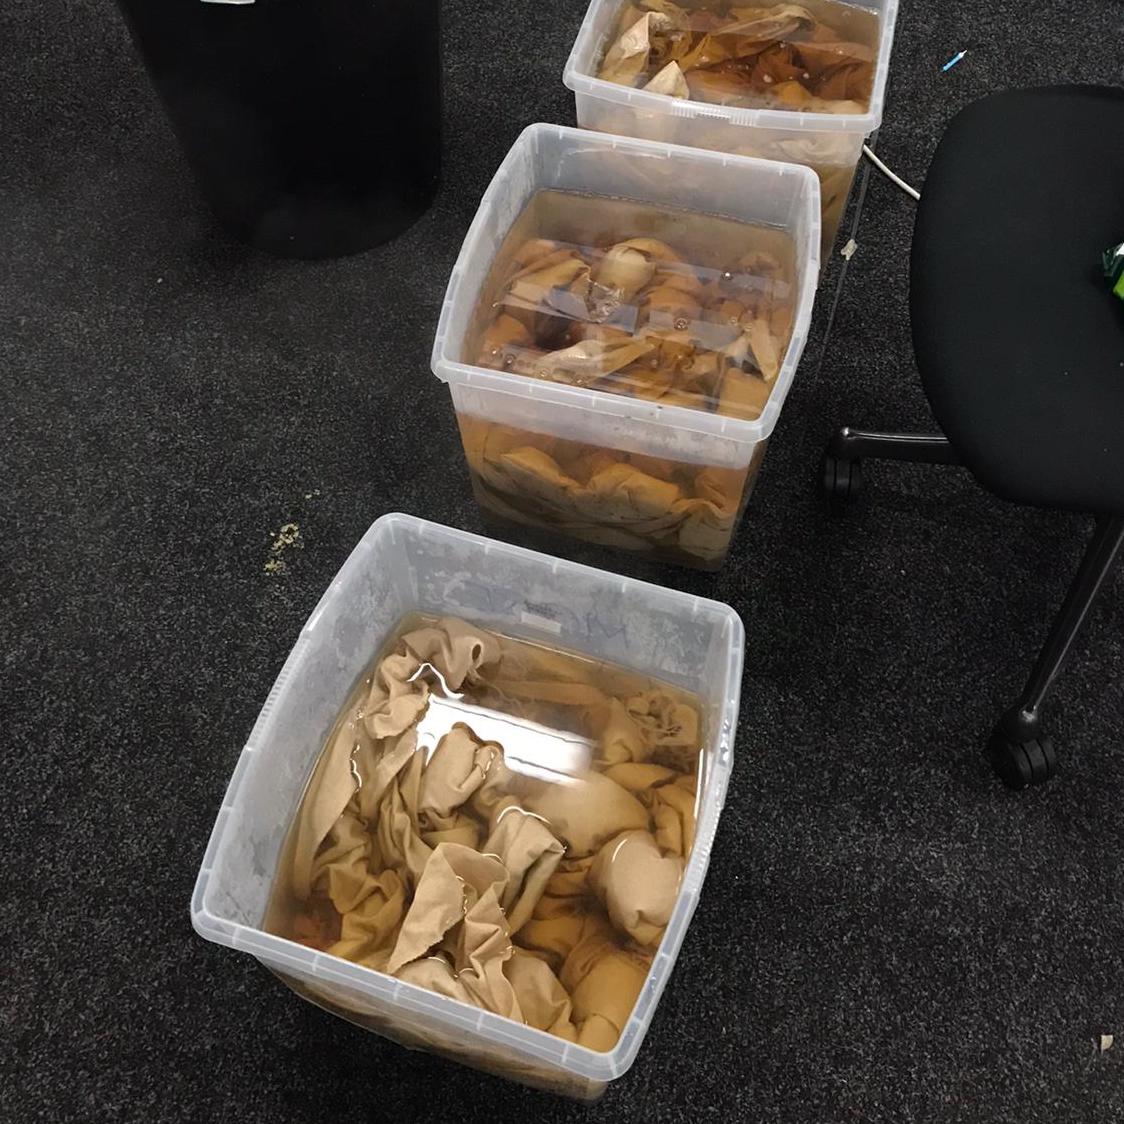 mordanting with the tannin
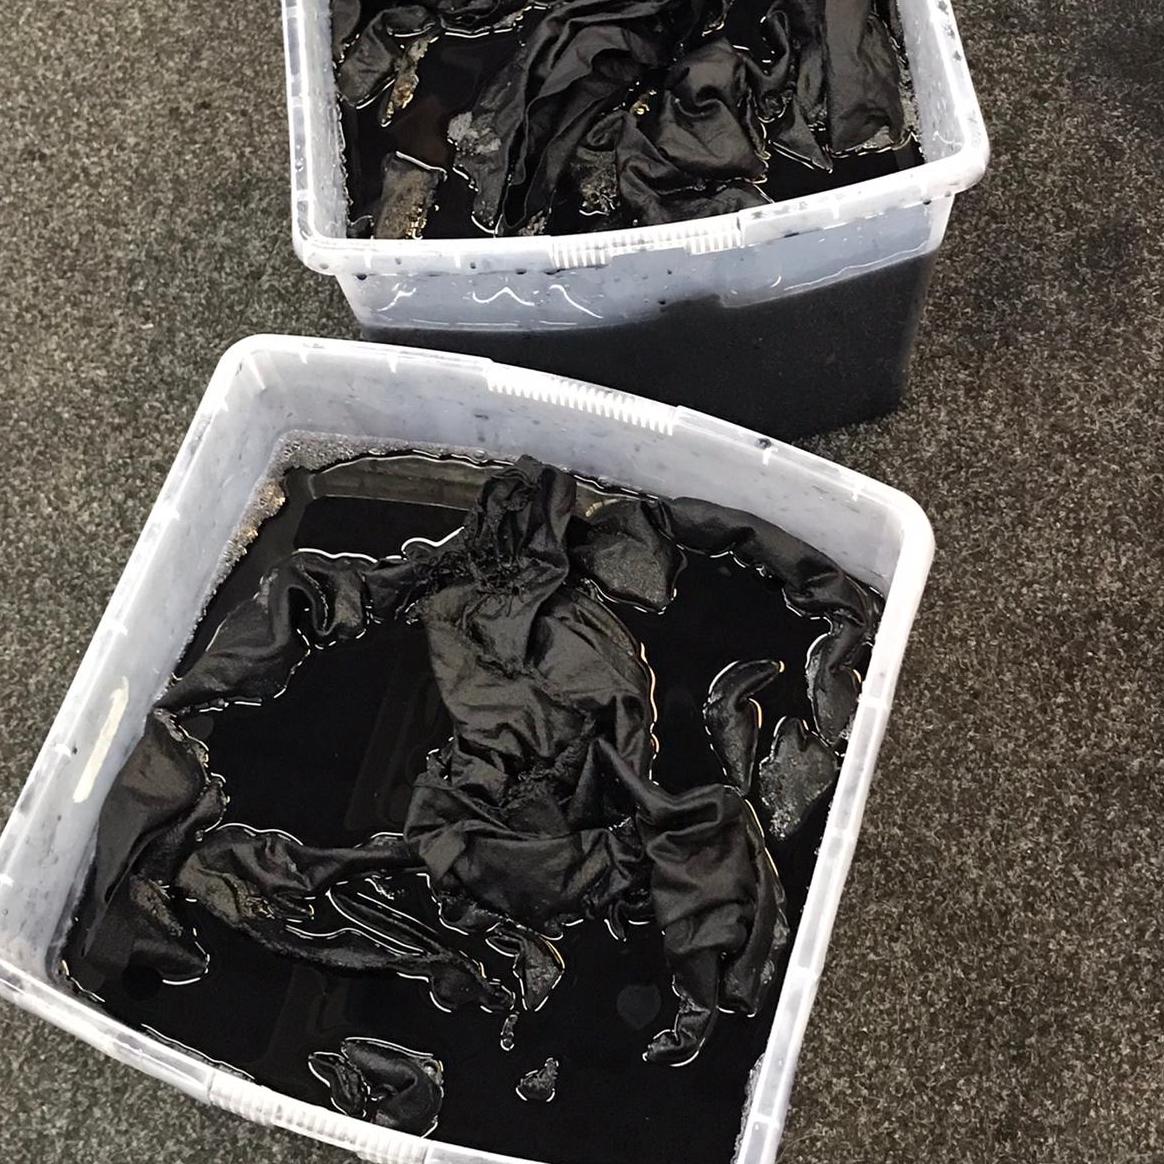 dyeing with the iron sulphate
After a lot of tests, the formula we settled on was gall nut extract + iron sulphate, with 3 baths in the iron sulphate to produce an intense dark colour.
csm dye workshop
Eliza’s studio was in the old CSM building, which is imminently being demolished and was an amazing space to walk around in, albeit pretty trashed. We went to help rinse out and dry all the fabric, which was extremely cold and wet, and pretty full on. We managed to get the sinks in the old dyeing workshop to work, though the hot water did come out a pretty unattractive bright orange.
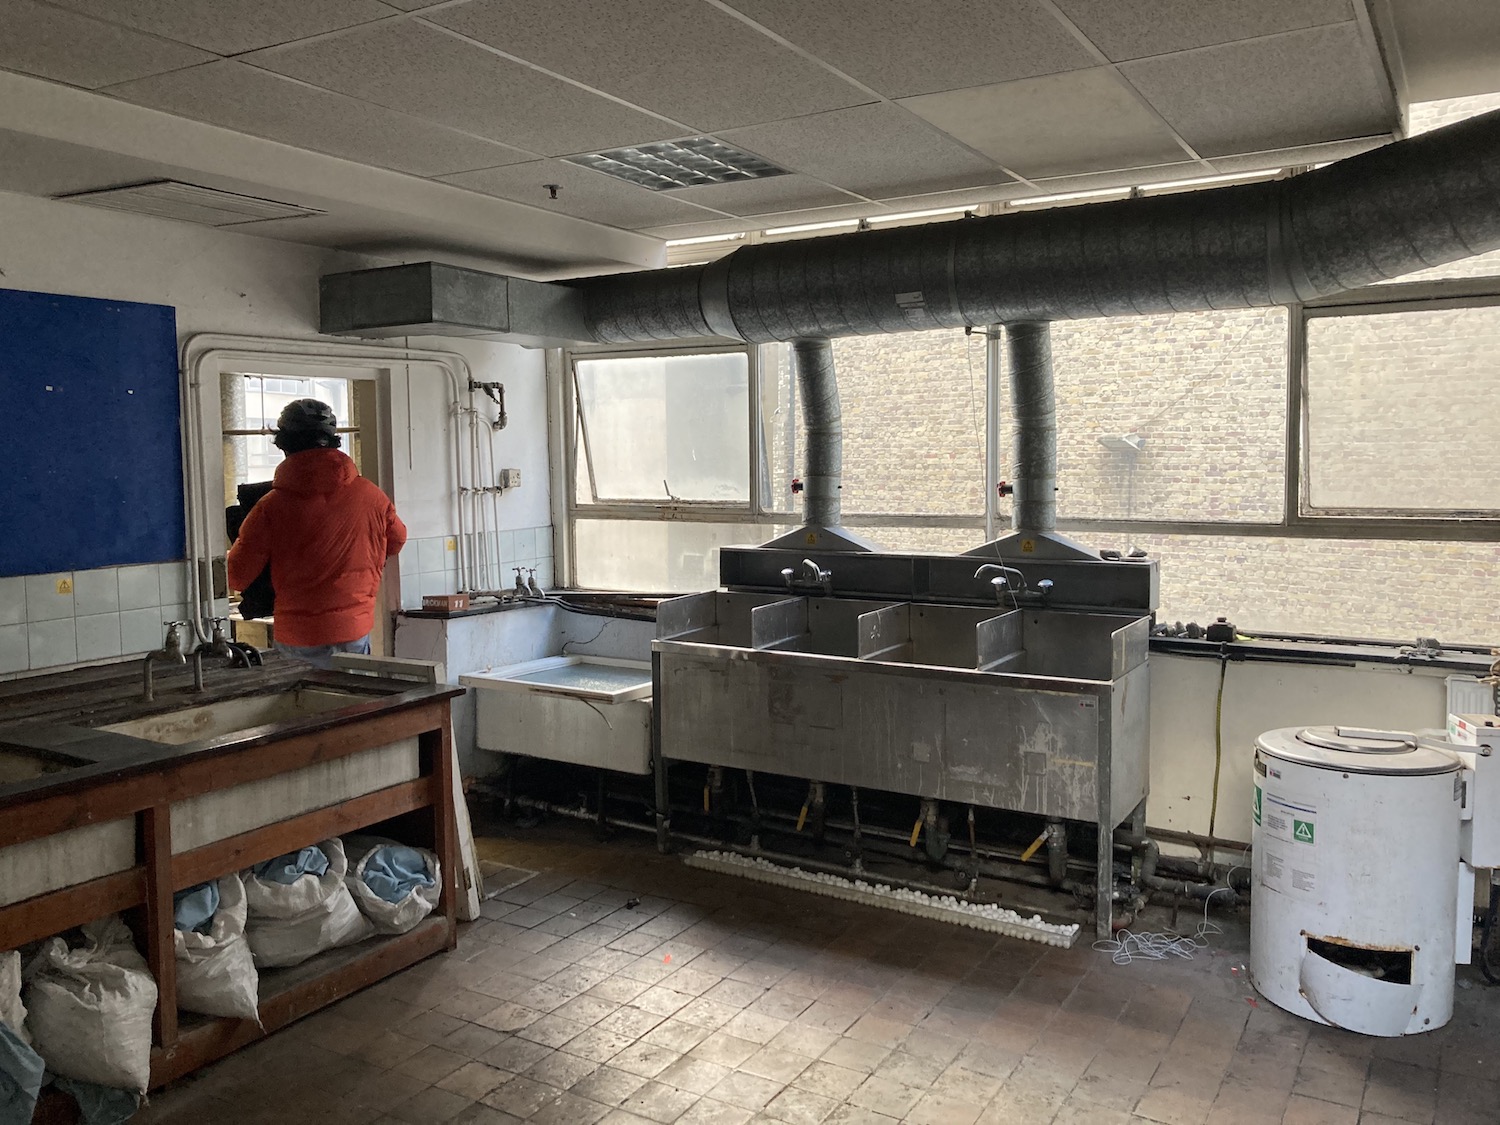 the csm dye room
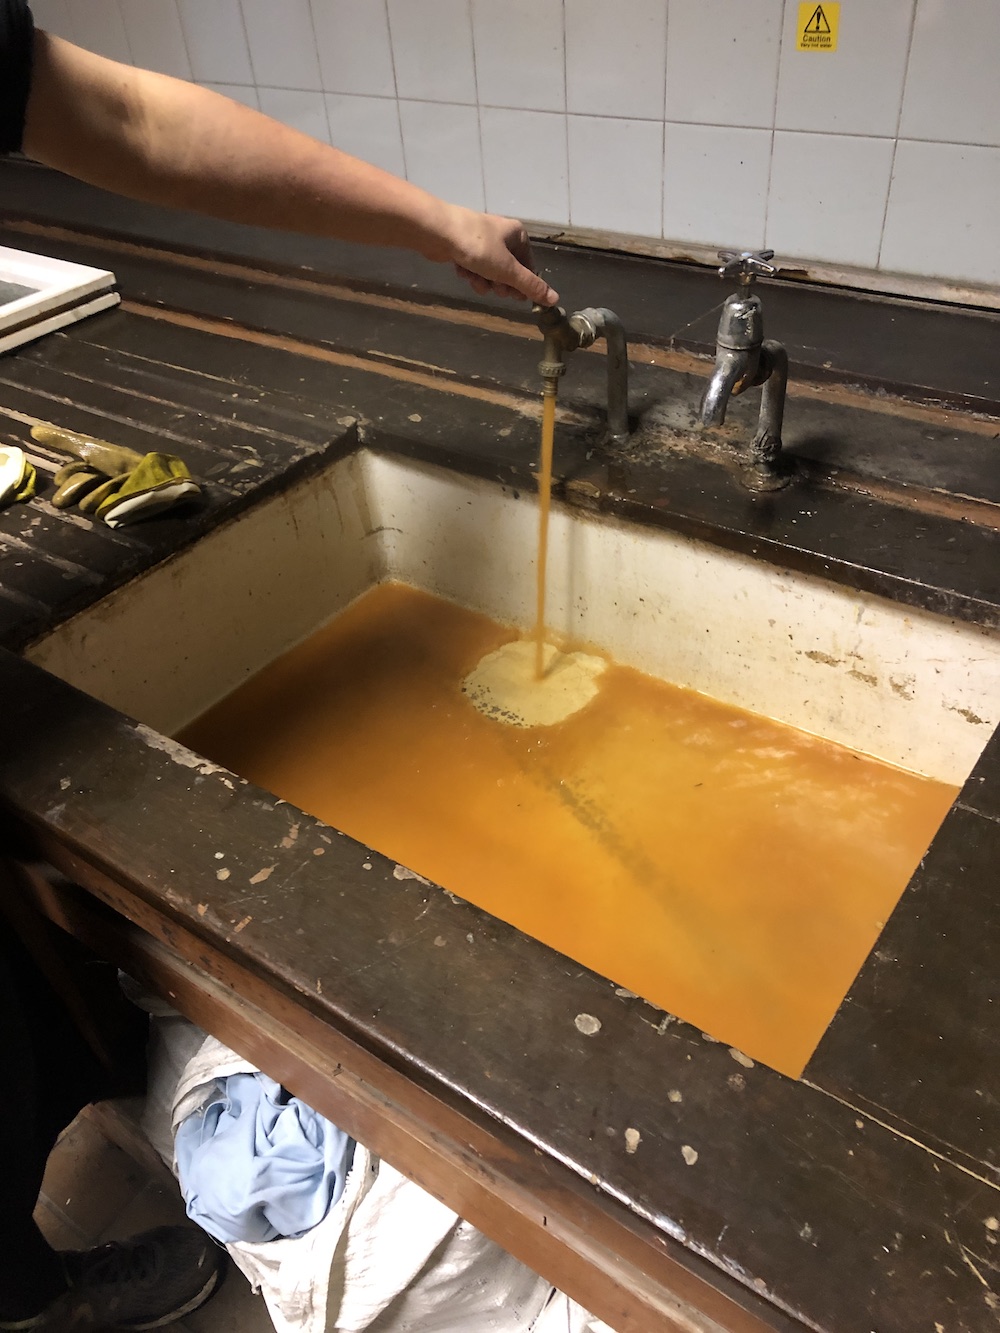 the hot tap
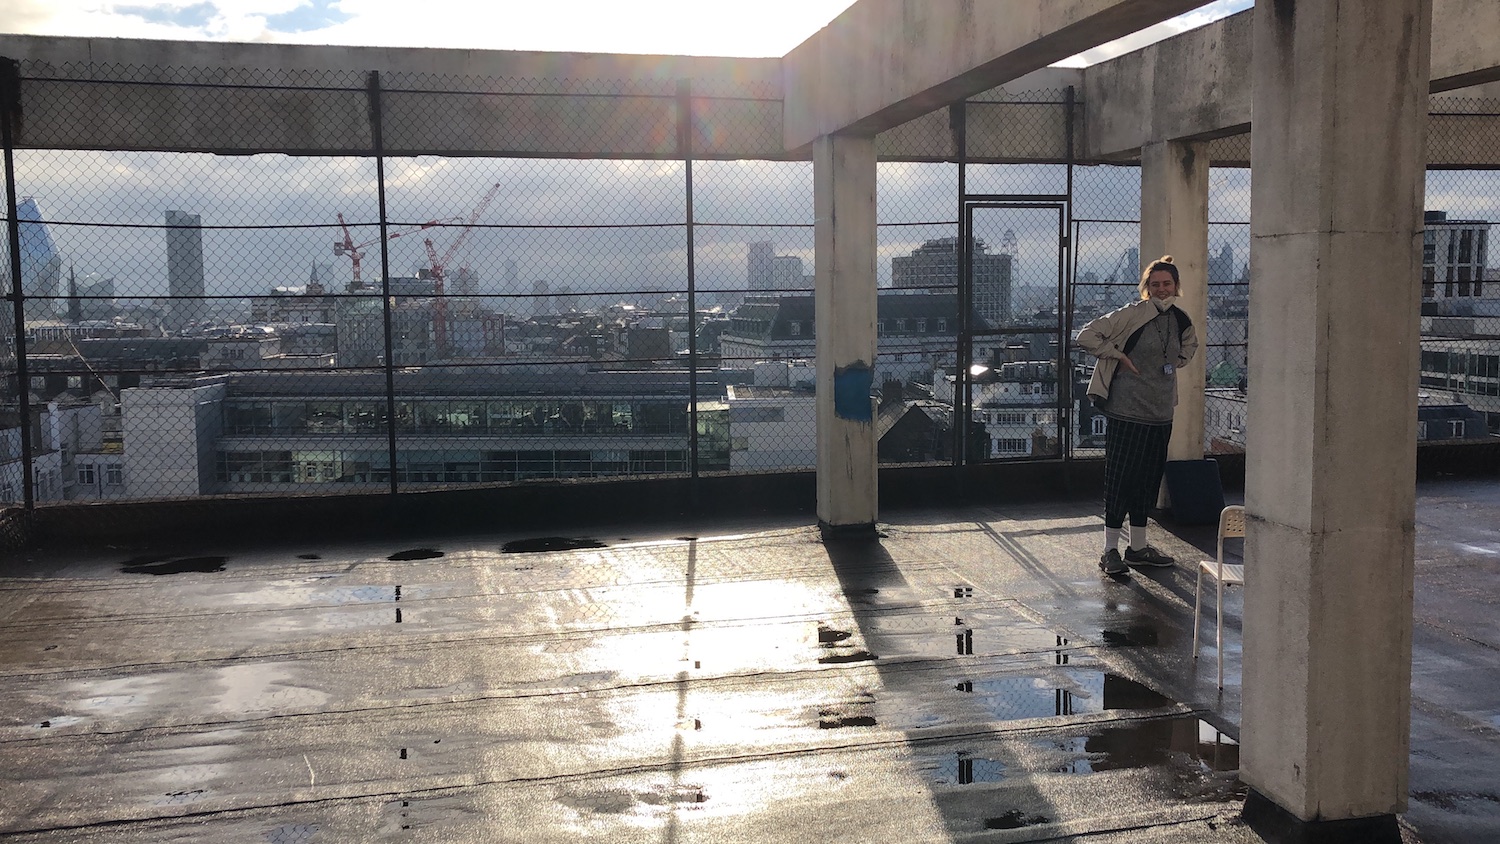
The whole building was amazing actually – we got onto some other floors and had a good wander around, even finding a tiny lemon tree on the roof. It was also just nice to be in a big institutional school building again, though weirdly quiet and empty.
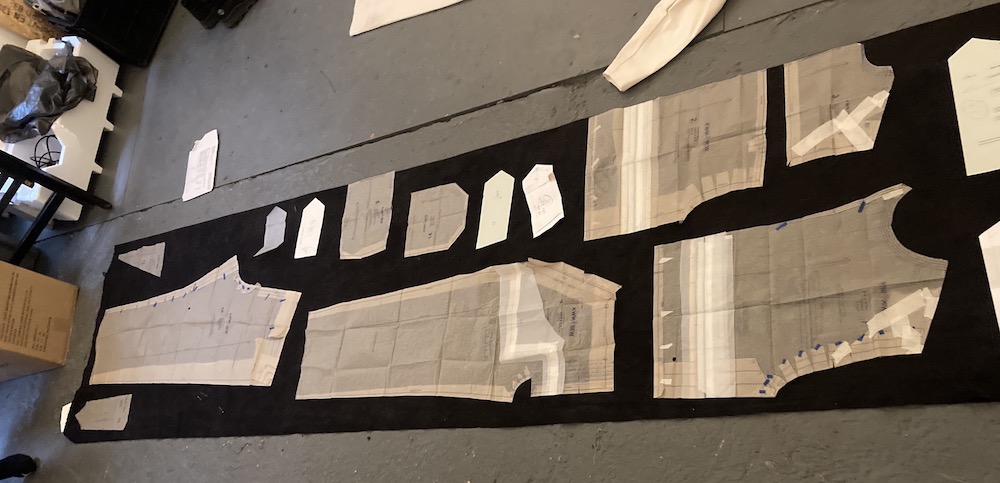
toiling
Eliza made a test version of the suit from calico, editing the pattern for a slightly higher and more tailored waist, and got rid of belt hoops and added cuff, waist and ankle tabs to allow it to be worn more fitted. it would’ve been nice to do this part together as it’s a really interesting process – pinning the suit, then adding in edits to the pattern on greaseproof paper. The end result was a really lovely fit on both myself and gary.
cutting and planning
Due to time lost from not being able to be in the same room, Gary and I cut the dyed fabric under helpful instruction from Eliza. This took a very long time, as we hand-tacked each piece to prevent warping, but it was actually a nice way to get a really good sense of the construction and probably contributed to us not fucking anything up later on.
While trying to waste as little fabric as possible, we also gave longer, thinner and irregularly shaped pieces enough of a border so they could be comfortably clamped by the embroidery hoop.
embroidery
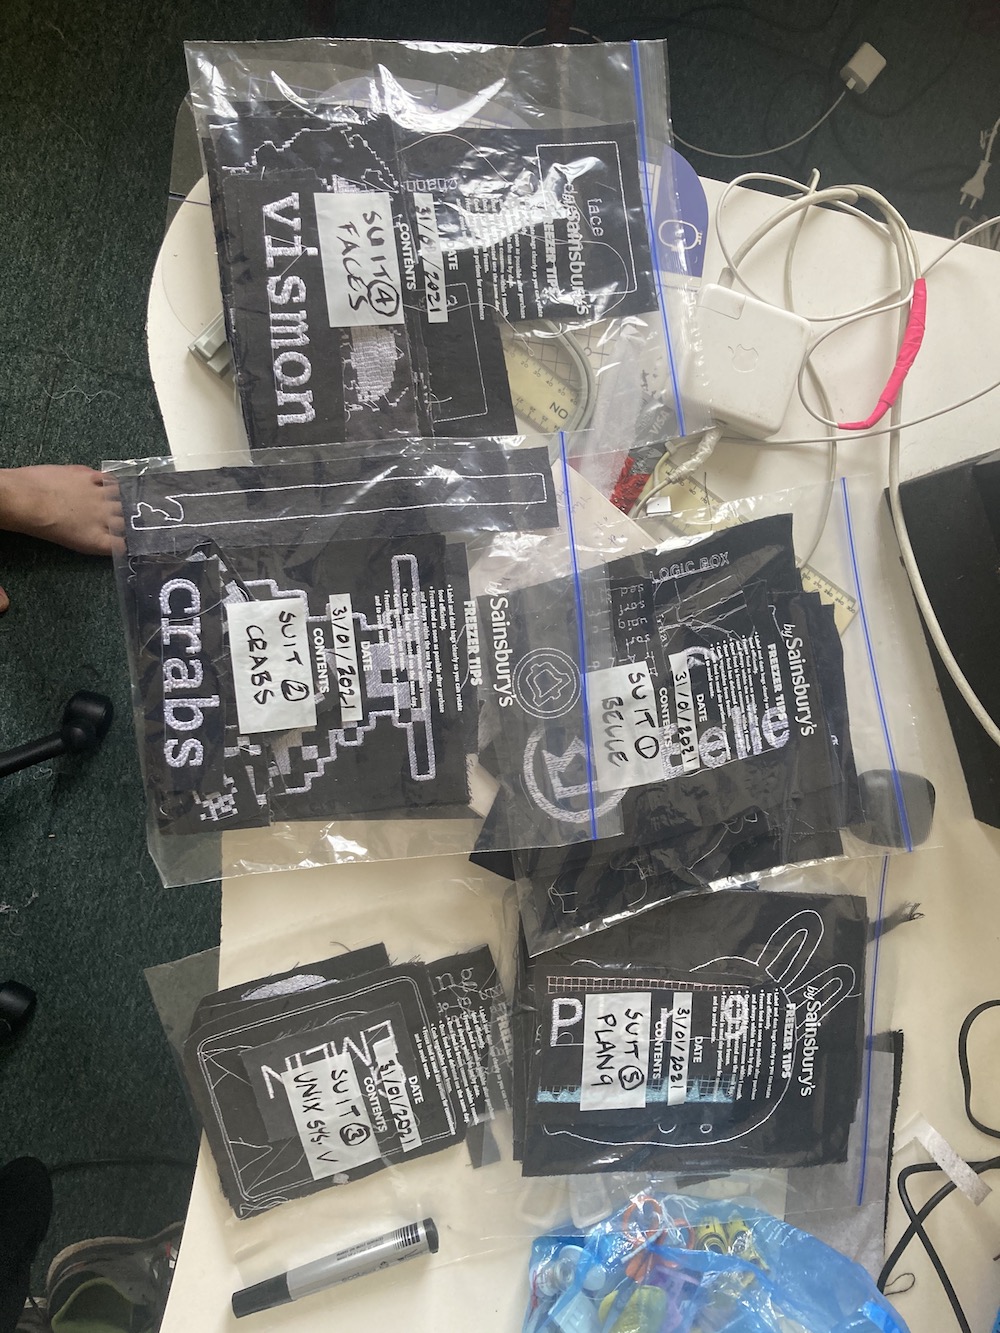 sample patches sorted by suit
It became clear from fairly early in the design process that the embroidery was going to take a long time, and require a fair bit of testing. I ended up making at least one sample patch for each design that’s on the suits, including a bunch that didn’t make the cut. To see how they’d look, we pinned them to the toiled suit and took pictures in them. I was not always in a great mood during this process:
an aside: buying second hand embroidery machines
In order to do this project (and out of a general desire to do more of this kind of work), I invested in a second-hand brother innovis nv-800e, a large-formatI think this model is about as large-hoop as you can get before you get into the light-industrial range embroidery-only model of the popular Brother domestic machines. I’ve actually only used Brother machines, though I did look into the Huqsvarnas when I was trying to find a one.
I bought the machine from a seller on eBay, which in the UK is probably the best place to look. (I get the impression that there are actually quite a few more circulating in cities like NYC on craigslist, and for cheaper, too). After a couple of disappointments, where a machine that looked great turned out to have a fatal flaw that the sellers weren’t aware of (including one visit to luton to see a very sad machine), and a lot of descriptive back-and-forth with some sellers who were selling on machines they hadn’t used, I would always:
- get whoever’s selling it to send you a video of them turning it on and going through some of the menus (if they’ve not used the machine it might take a bit of back and forth, but otherwise you have no way of knowing if there’s even a cable / it works)
- if you’re going to pick up, take spare needles, thread, fabric, USB stick, wound bobbin in order to test when you’re there (and check with them if they have hoops/cables etc)
- make sure you get a picture of the ports, and the part number so that you can be sure you’ll be able to use a format that’s not a weird proprietary floppy disk (CC most older machines)
software
PE design 6
Brother’s PE Design 6 software is a bit like an old friend that you talk to and realise why you no longer hang out, and then talk to some more and realise that there is actually a reason you like each other. I taught a couple of workshops with this software a while back, which resulted in this meme:
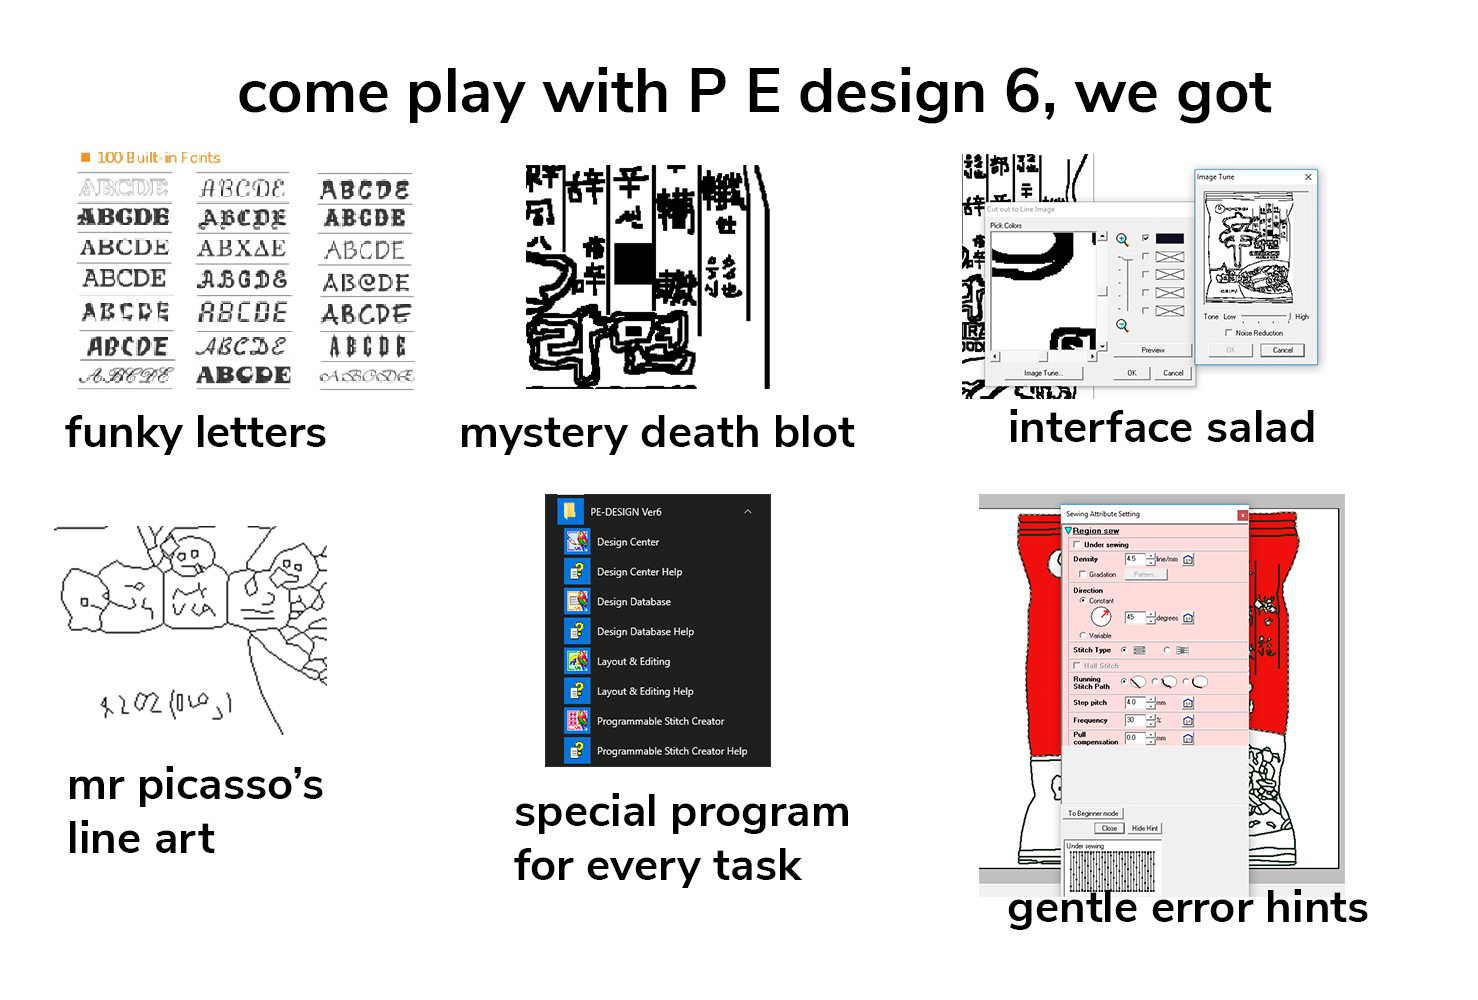
PE Design 6 is one of those pieces of software that you encounter and you realise it was not made to be used the way you would like to use itUsing dialogflow was a similar experience, though considerably more sinister: PE Design 6 is just very heavily geared towards 1990’s housewives that Brother seem to think would not appreciate the option for a vector file format, or any nice typefaces. It won’t accept any CAD file formats, instead requiring a (fairly low-res) scalar image that you then vectorise over a series of steps denoted by a parrot graphic.
However, there are some things it does really well, and these are worth noting. Despite not handling vectors, it does a great job of getting object outlines provided they’re clear, and it was what I used as a default while making simple line drawings and fills. It does a decent job of optimising toolpaths as well – though that can sometimes result in some very weird looking decisions when it comes to stitching grids. It is not the proprietary embroidery software that we want; it might be the proprietary embroidery software that we deserve.
PEMbroider
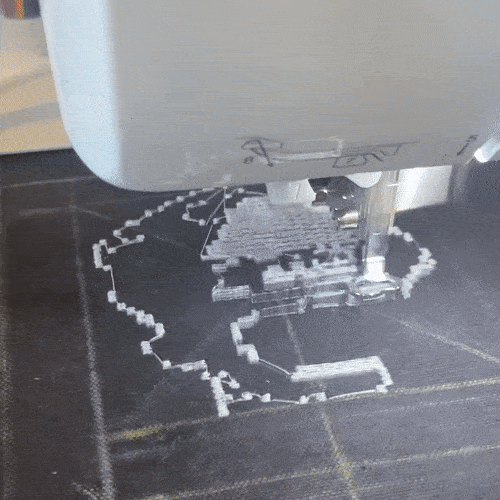 embroidering a design made by PEMbroider
At the opposite end of the spectrum is PEMbroider, an open-source embroidery library written for Processing by a group from the CMU Studio for Creative Inquiry. They also cite some software called EmbroidePy, which I’ve yet to test out.
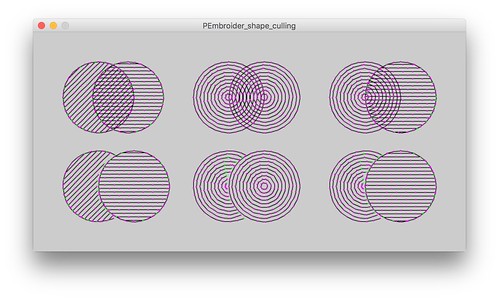 the pembroider interface, showing different shape culling options
As making the toolpaths is basically just Java, with a bunch of helper functions, you’re afforded a really great degree of flexibility and control, though this can be a bit of a blessing and a curse, as it also takes a lot of tweaking to get a high-quality finish, especially over a tight timeframe.
The features are much more geared toward a CAD flavour of experimentation, meaning easy transformation between vector files, and the ability to do things like merge and overlay shapes very easily. They also have really great quality intiutive type design, way nicer and more thoughtful than Brother’s offerings, allowing much smaller readable text that didn’t have the grottiness of small text produced with PE Design.
 the stitchBuddy interface (free version is read only)
Overall I feel like with a bit more tweaking and practice we could’ve definitely got more out of PEMbroider, and I’m looking forward to experimenting with it more, but the inconsistency of the finish and somewhat dodgy optimisation (these were a lot harder to trim) meant that, despite having a desire to make an all-pembroider work, I defaulted to PE design. That said, I think these things could be resolved with practice, and for anything programmatic or pixellated it was far and away the best option: there were many elements we could not have done without PEMbroider, listed below.
As PE Design is only for windows, and PEMbroider doesn’t have an interface to open files, I also downloaded the free version of StitchBuddy for mac to view and check files, which proved extremely helpful (before this i would go windows -> dropbox -> mac -> USB -> machine -> oh no is that the right file -> back to windows… now i only go back to mac).
faces
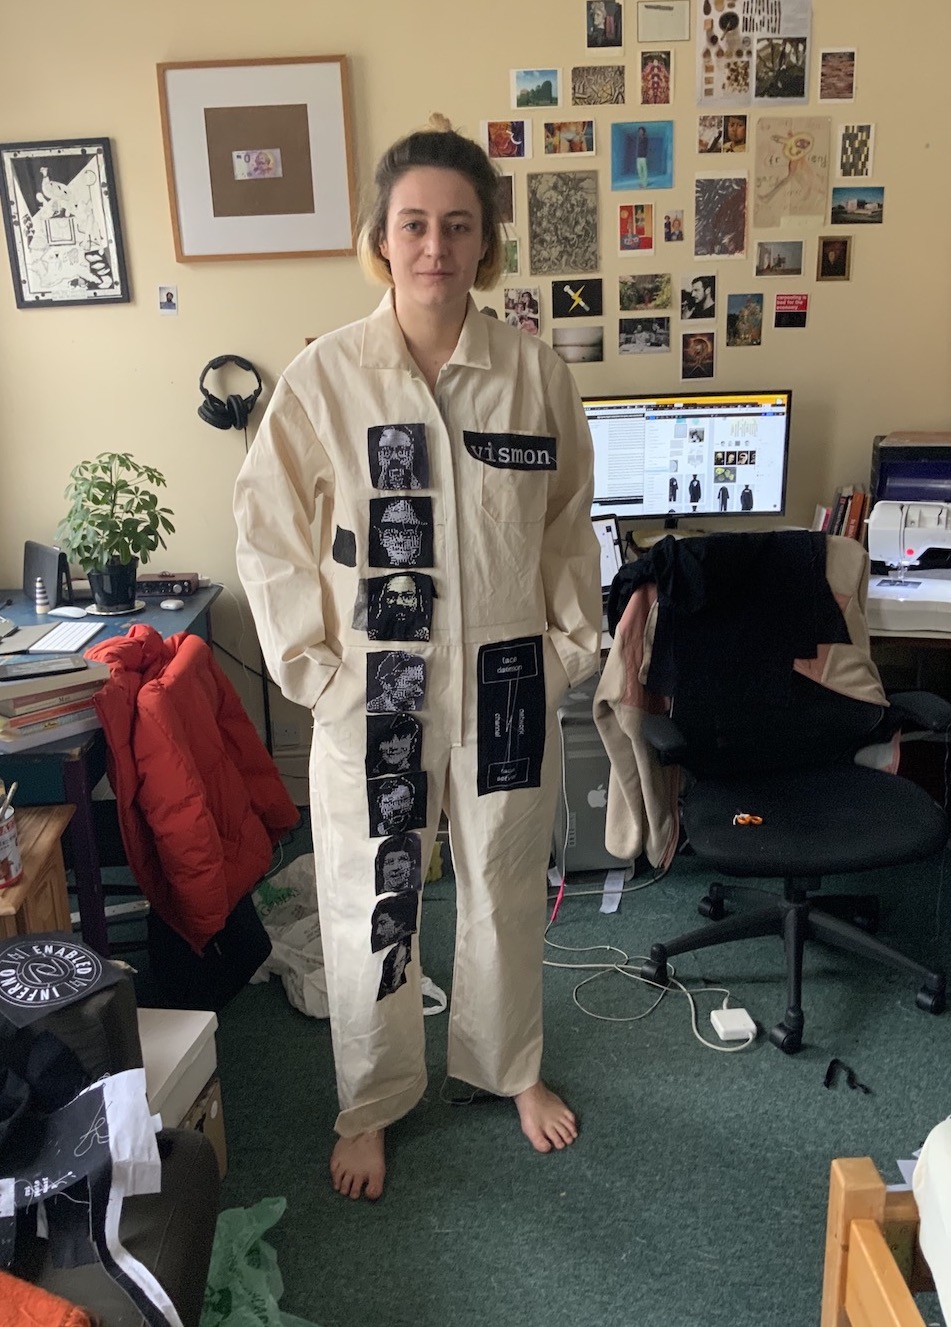
The first opportunity to really use PEMbroider came from making the pixellated faces from the vismon system, illustrated by Luca Cardelli. PE design doesn’t deal well with grids, understands shapes in terms of outlines+fills, and has a tendency to round off corners. Because you have a lot of control over how files are read in, I scaled each file up to 500px, while keeping the original pixel texture instead of resampling.
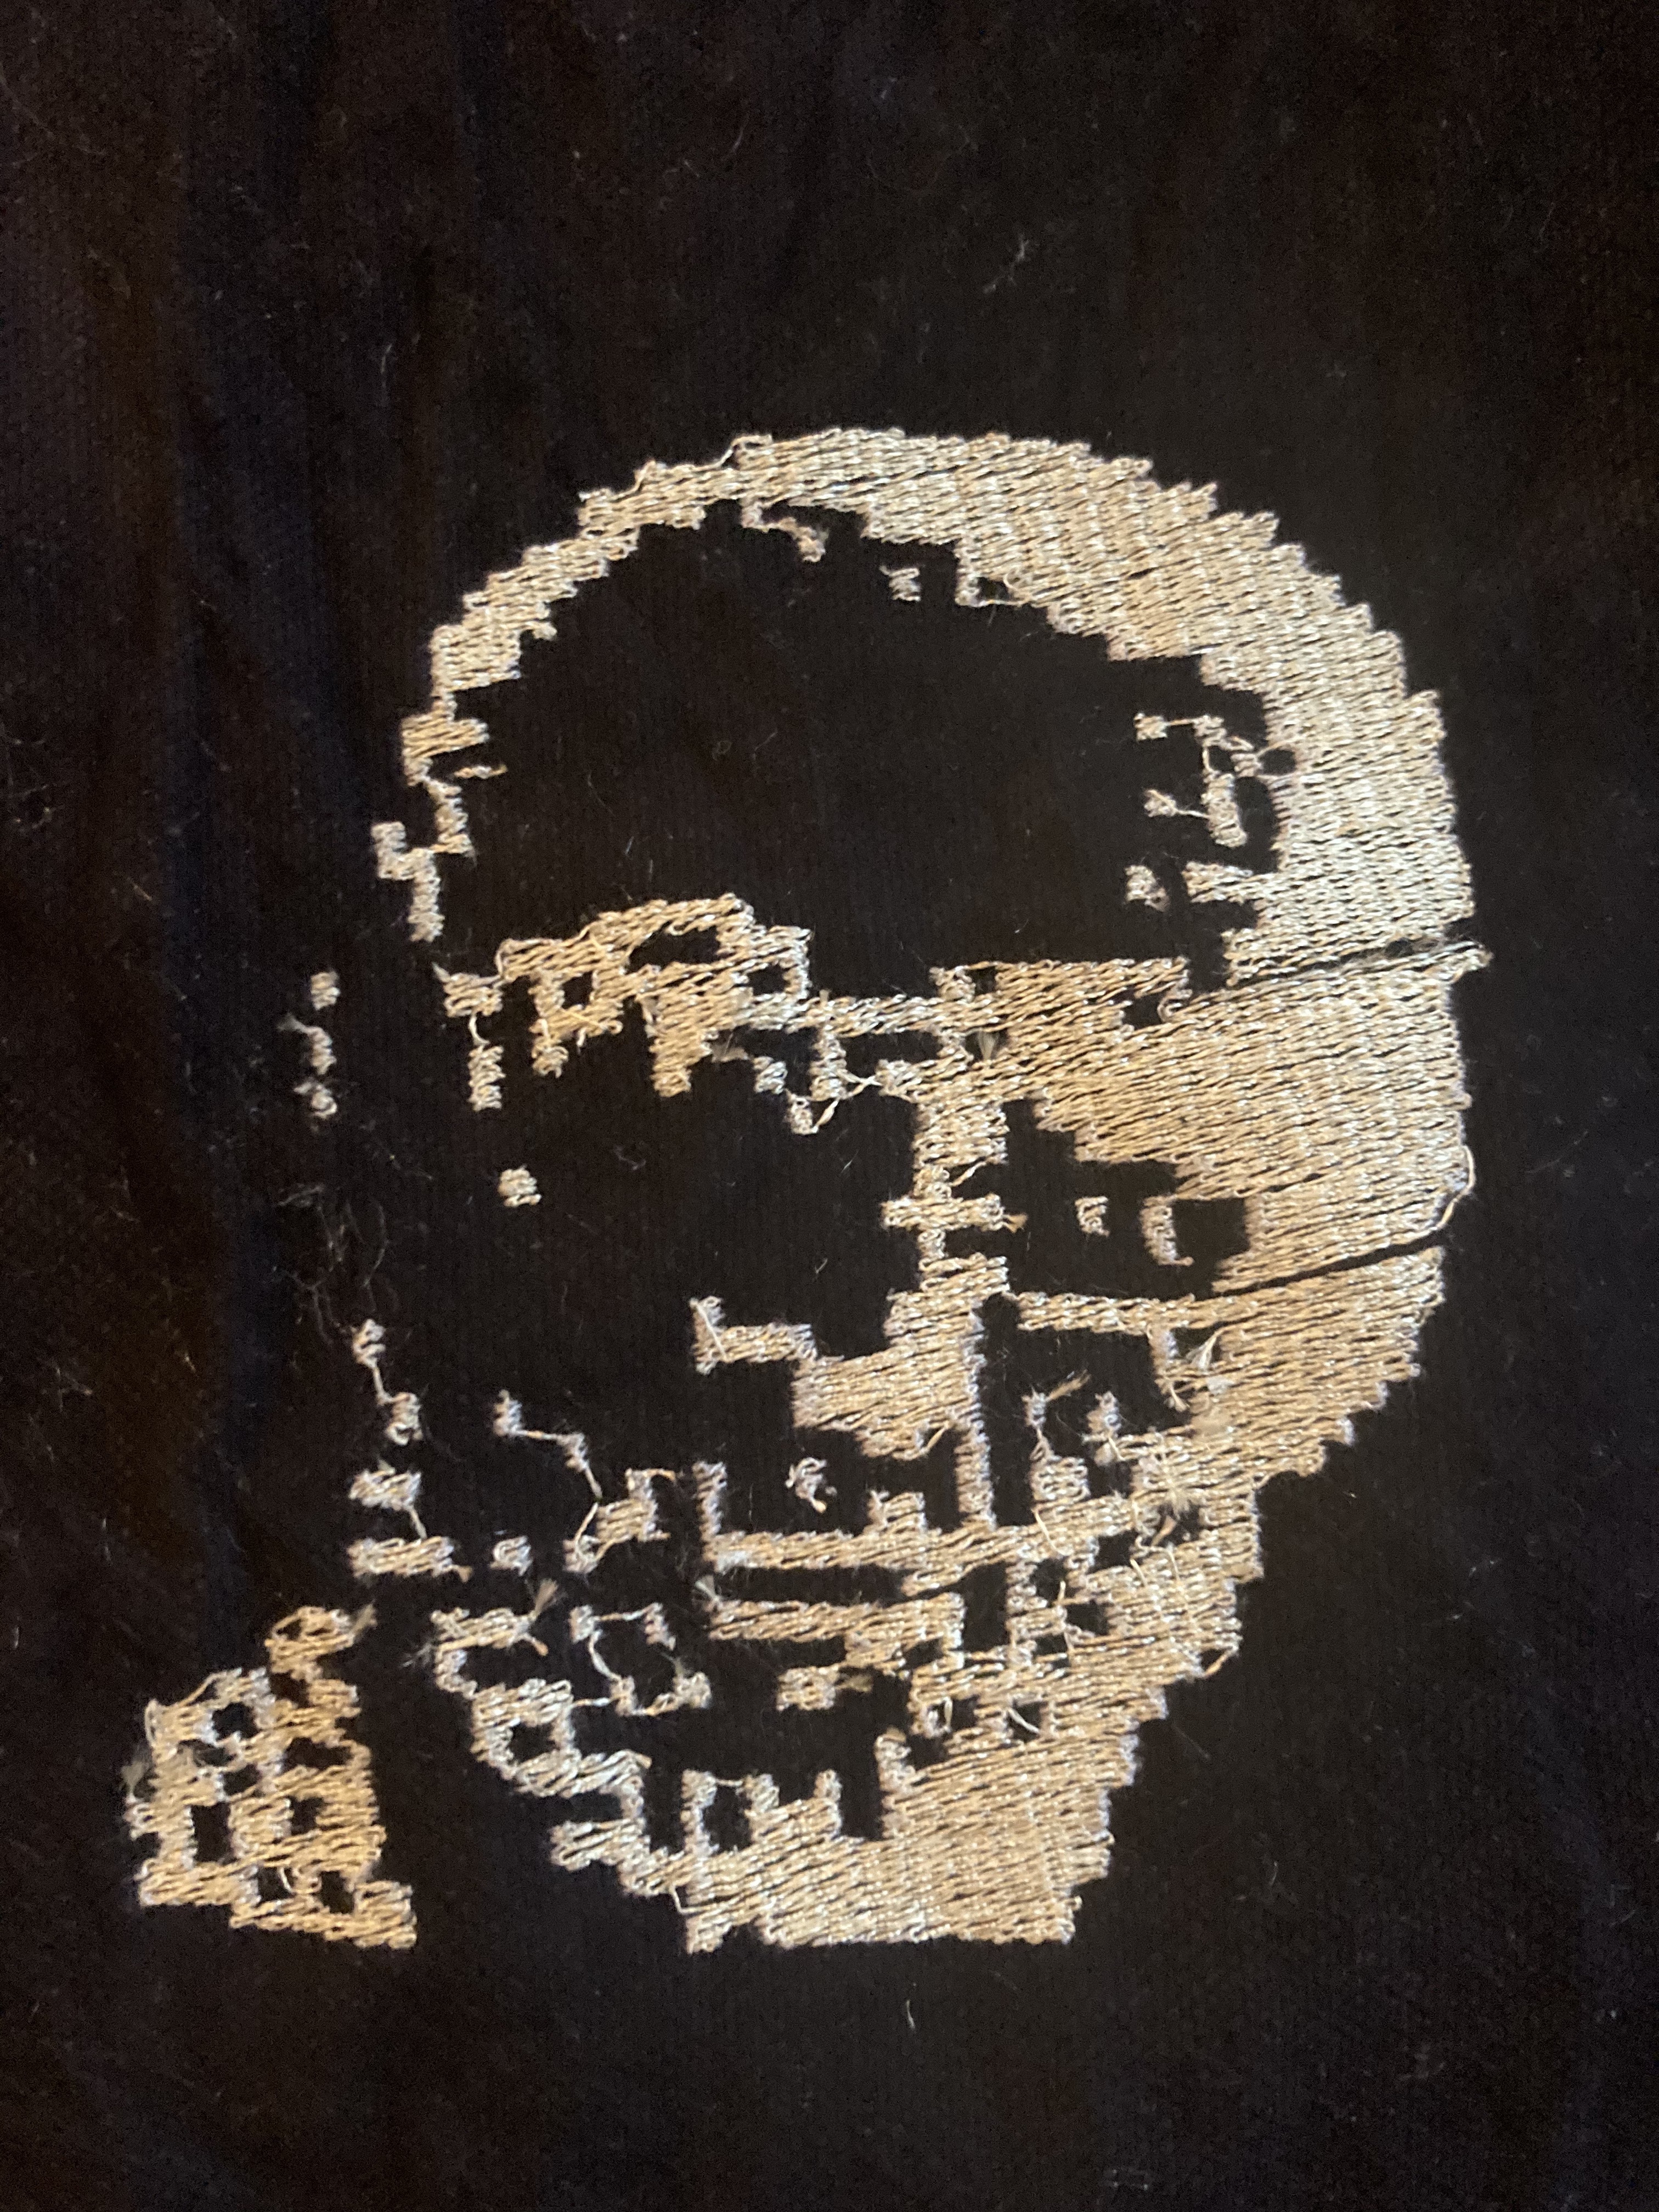
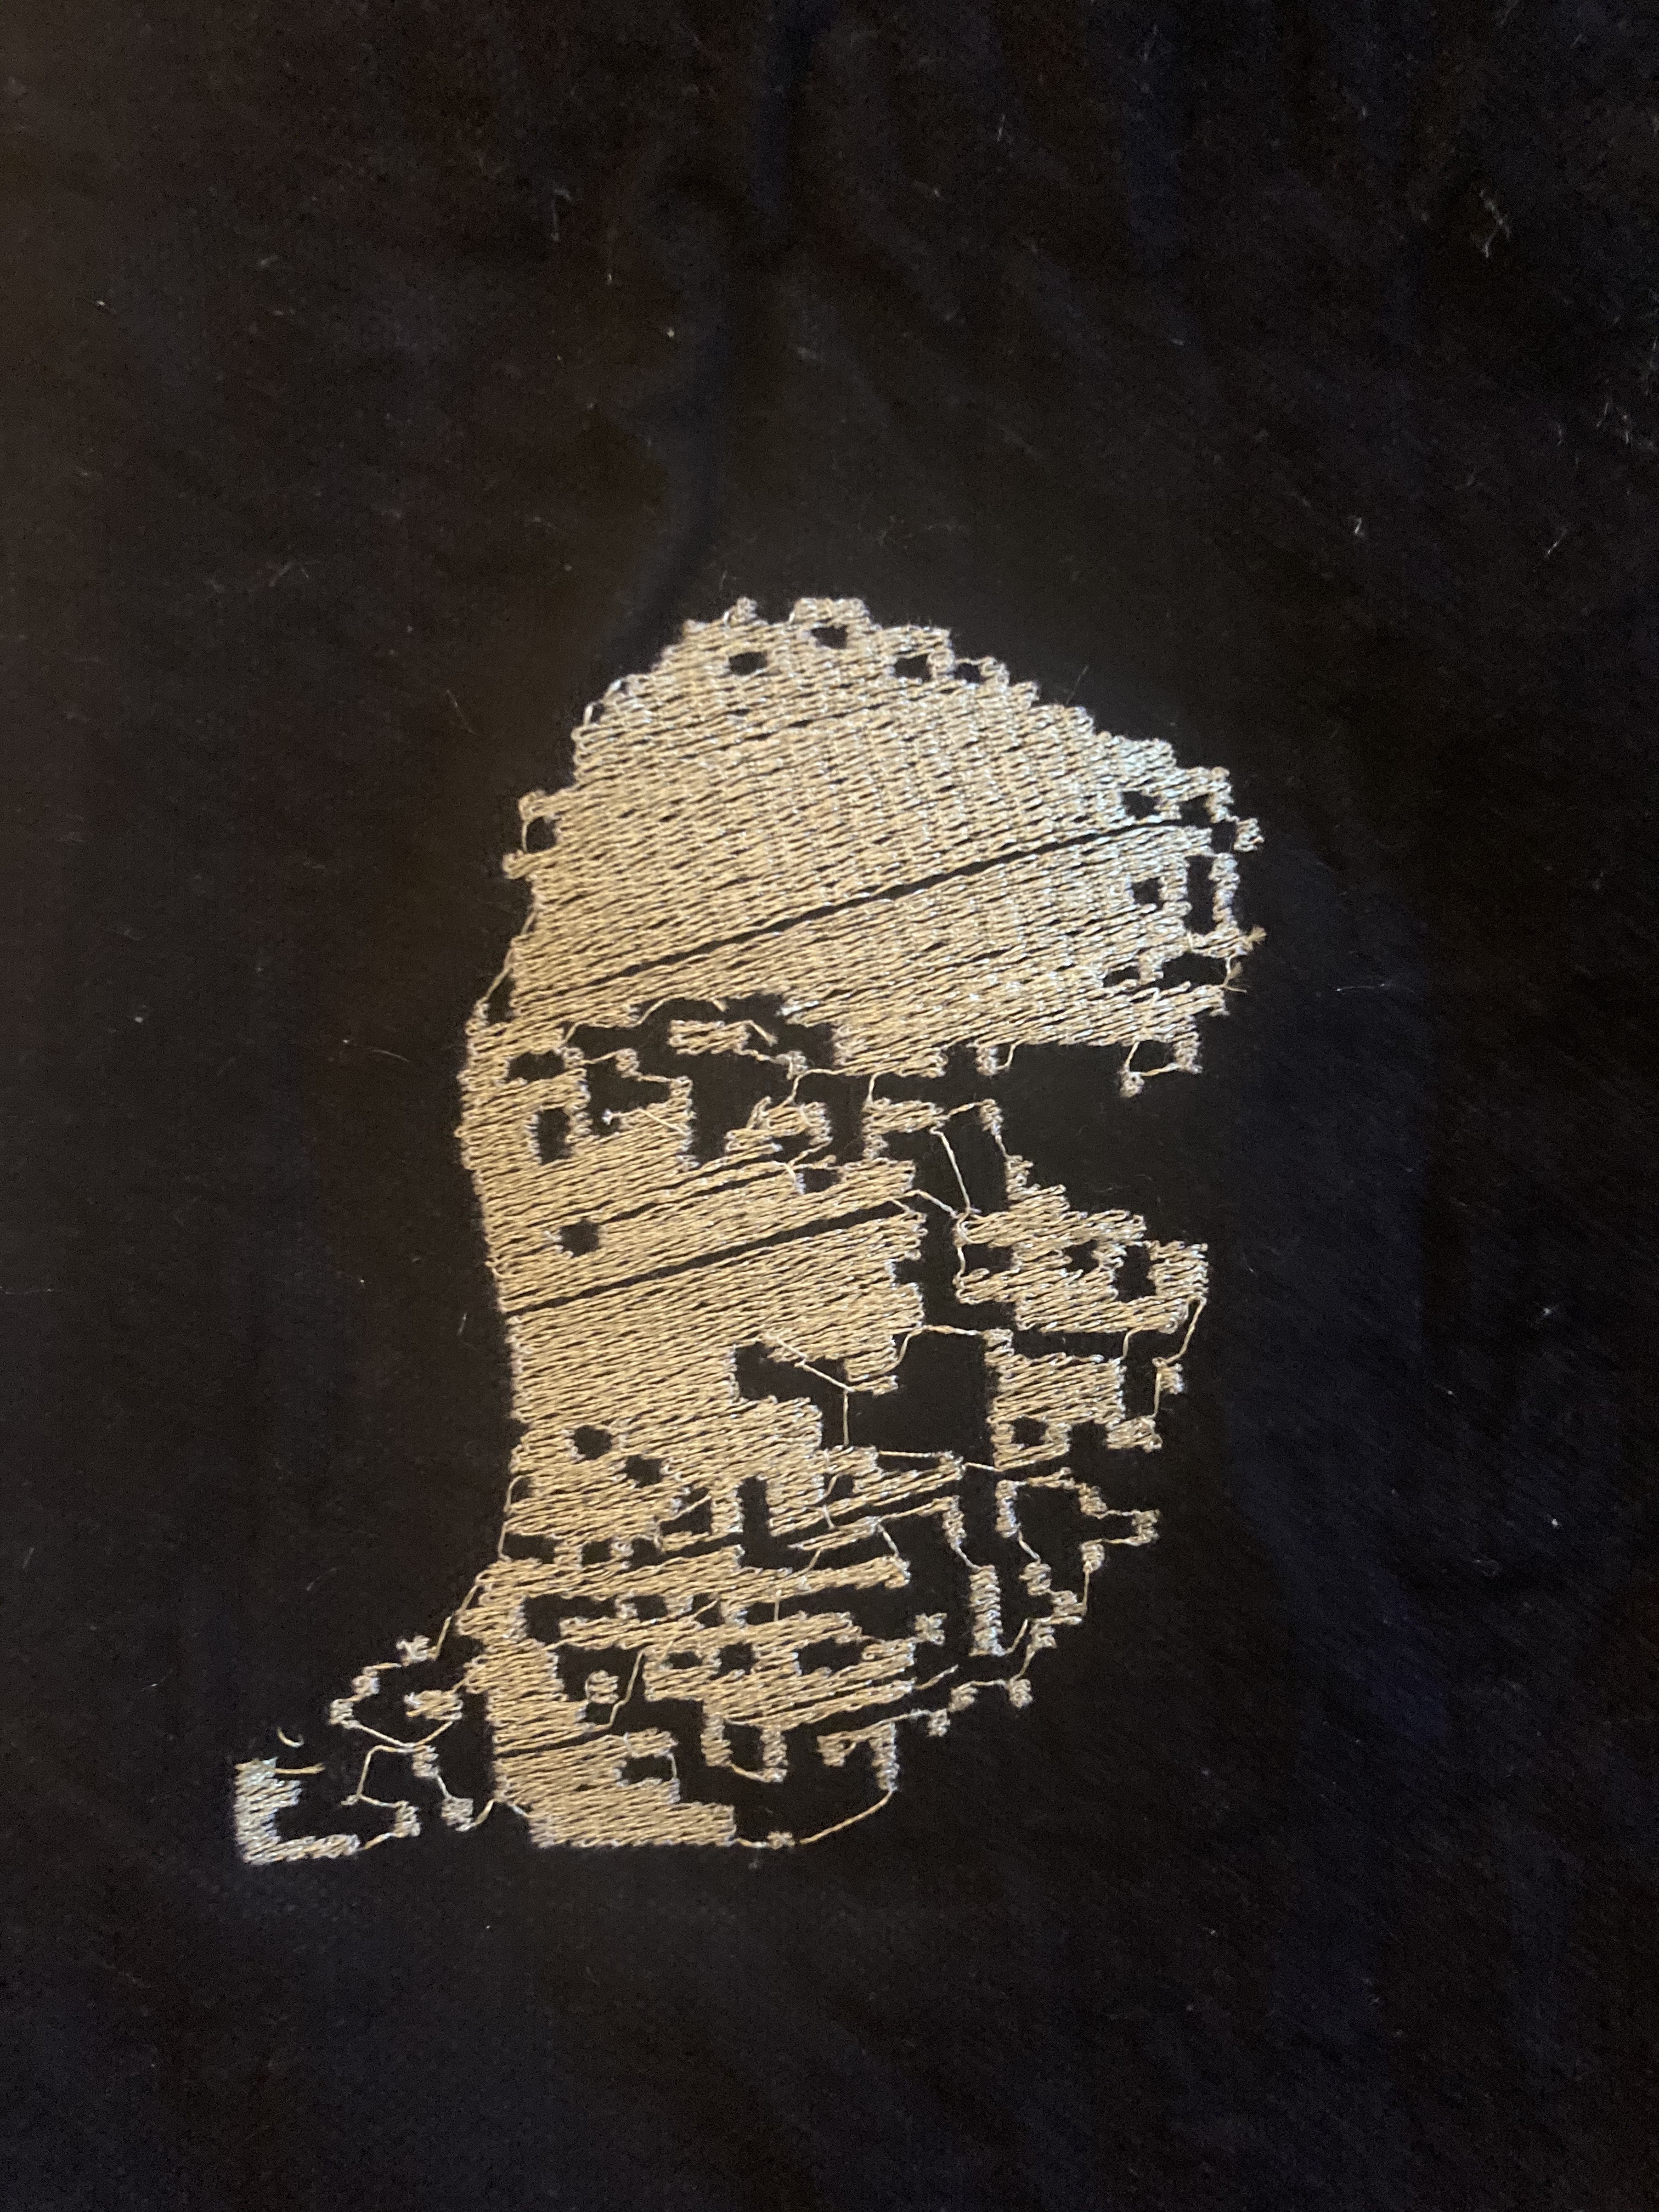
The person to the left and centre’s image was labelled aap, who I think is Angelo Papenhoff, who now runs a site dedicated to maintaining PDP computers, though I’m not 100%. On the left is the first test; to the centre is the same image, but inverted, which looks much better as the colour cues are the right way round. To the right is Ken Thompson, both inverted, and with the hatching direction set to 0 degrees, which creates the effect of a computer scanning.
 round 1
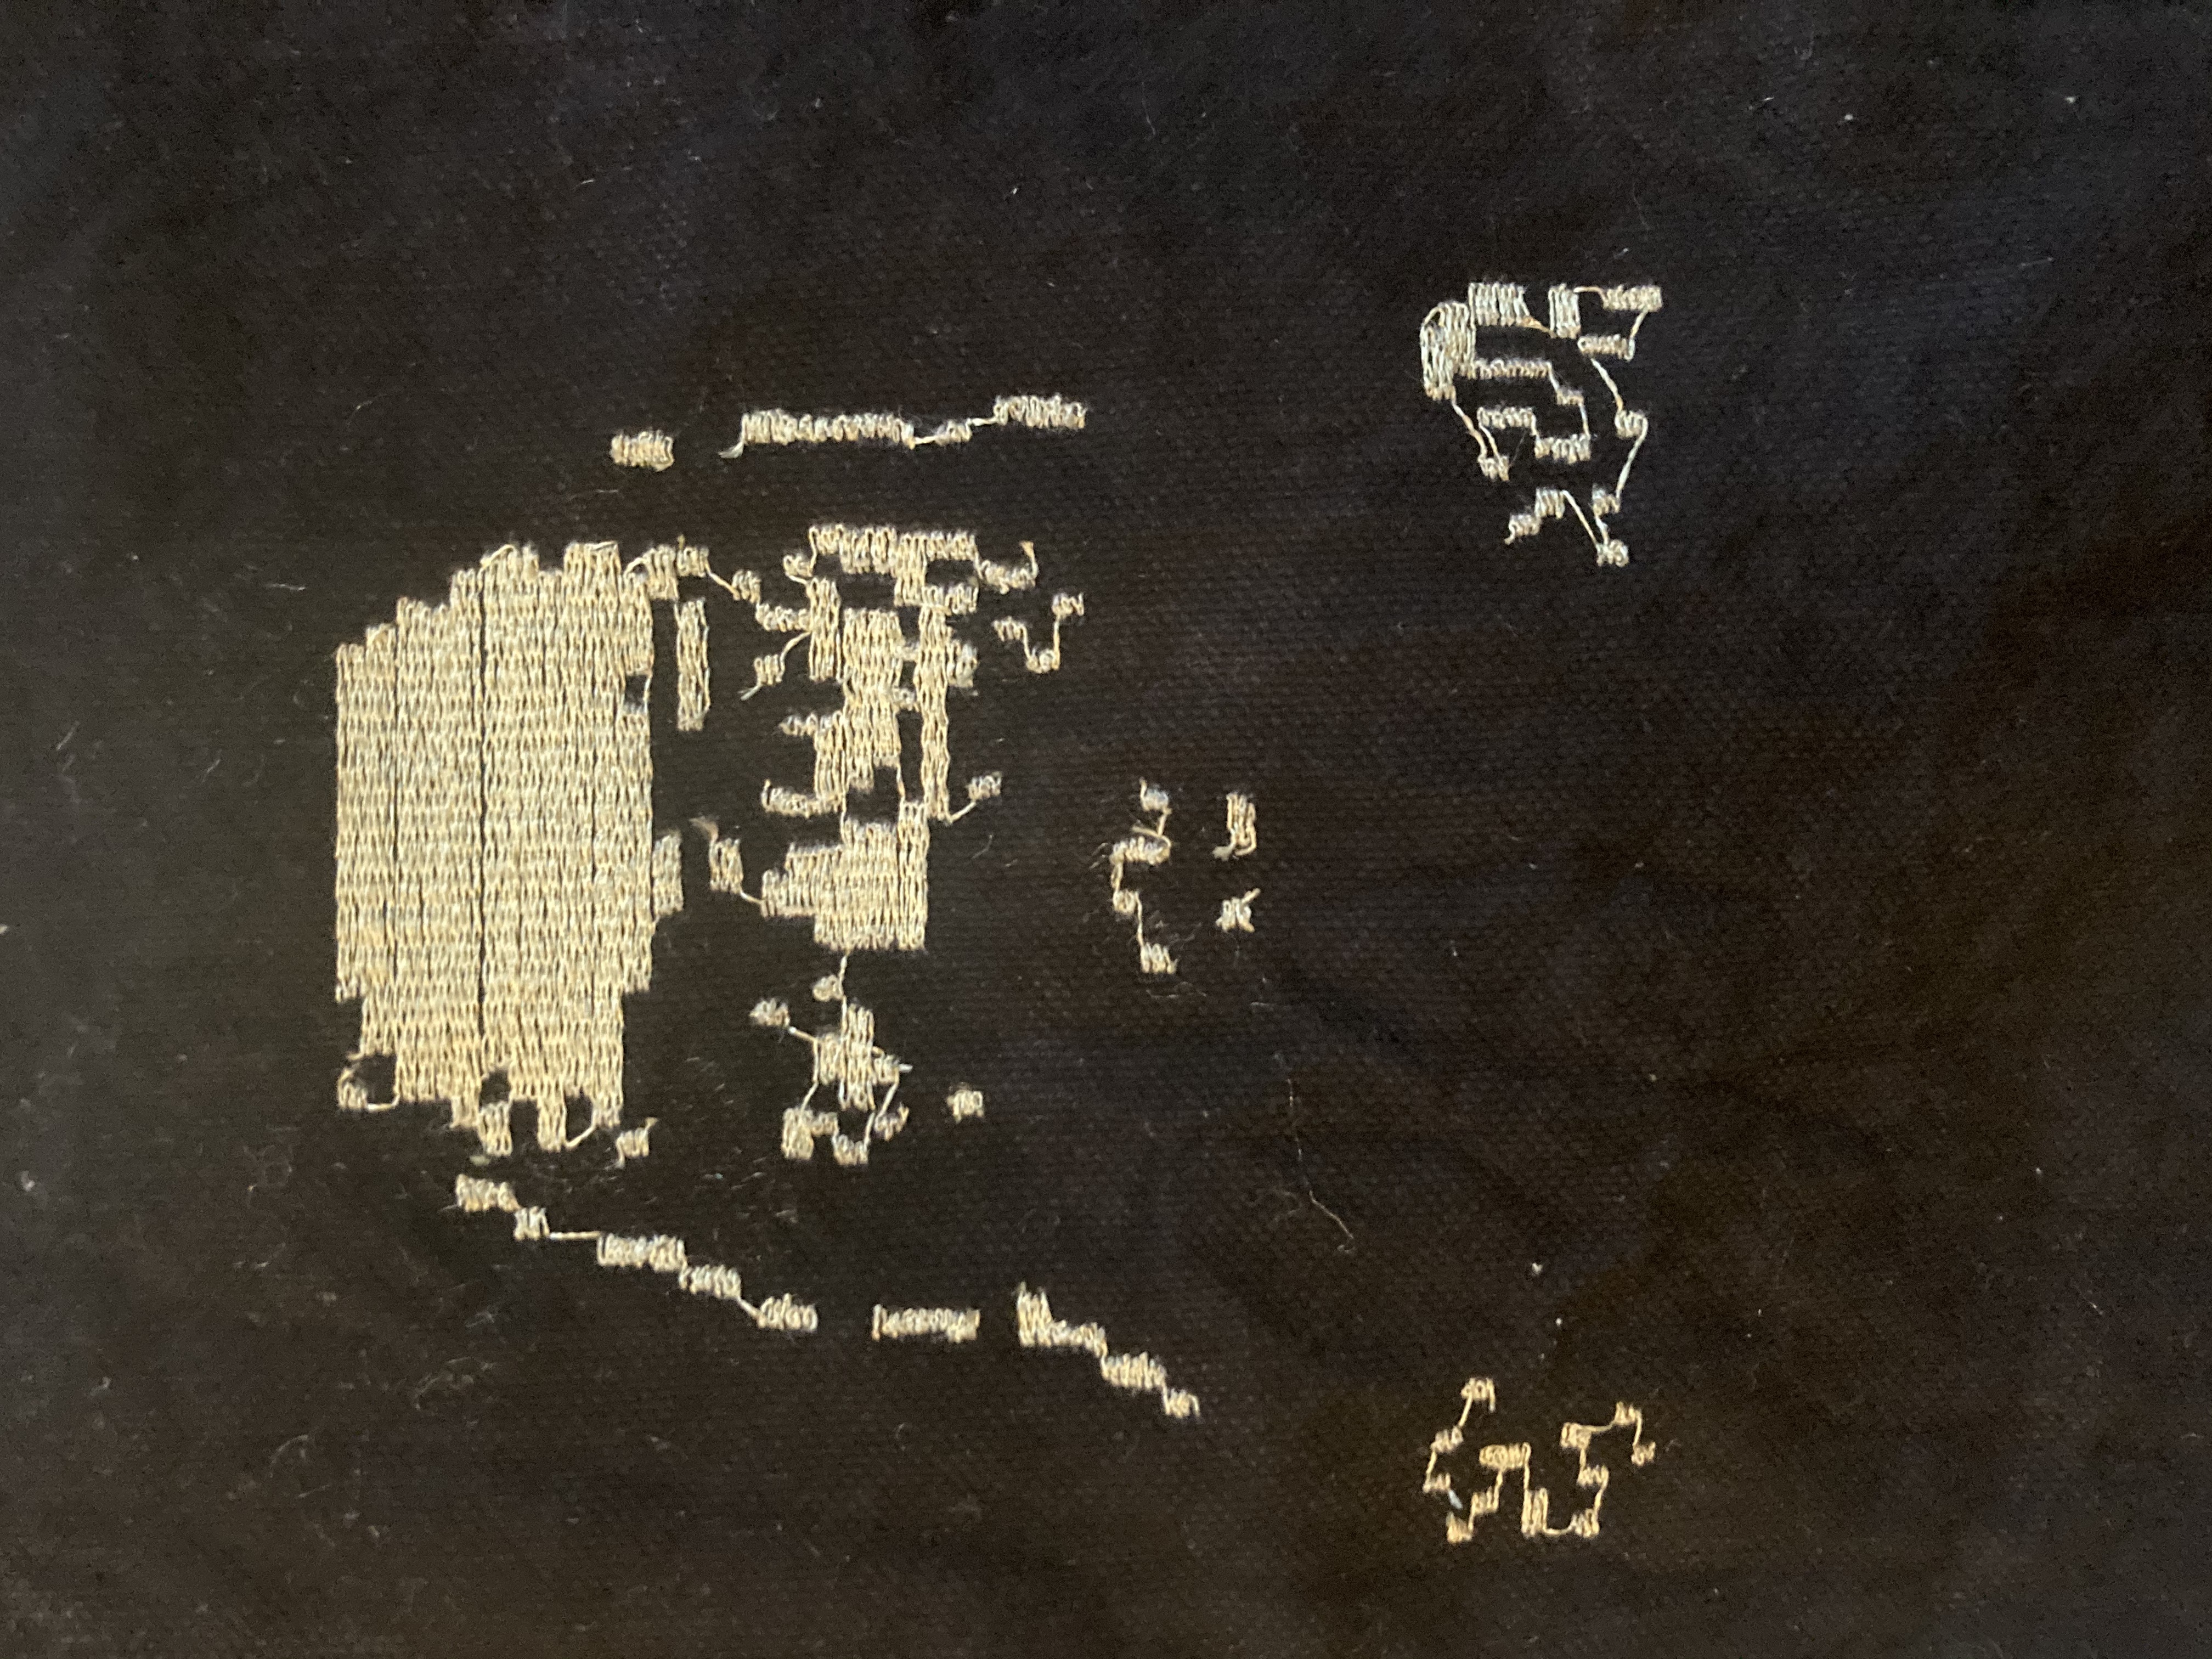
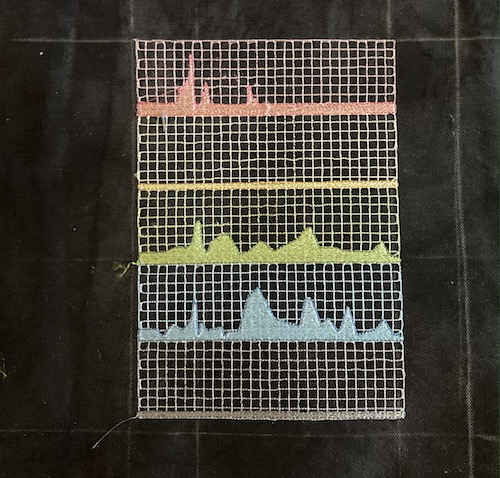
the plan9 status tracker
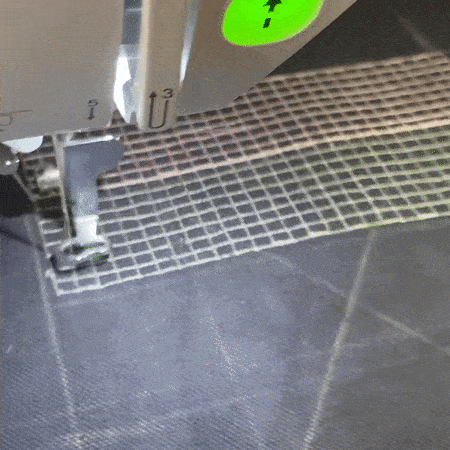
This was probably the trickiest of the designs, as it required both a regular grid, and a high-quality even and glossy fill which I’d not been able to produce reliably using PEMbroider.
 round 2
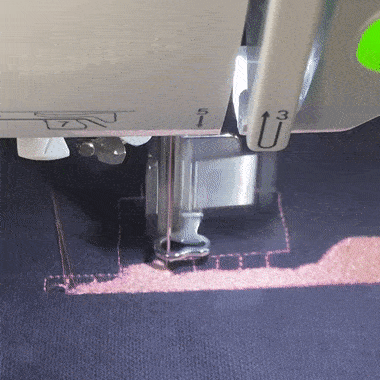
first attempt: At first, I tried doing this straight in PE Design 6: producing a fairly good-quality grid after a huge amount of dragging different points around in the software. The result embroidered OK, but the toolpath was pretty strange (see right). The way the toolpath was laid out in the software also meant it was impossible to shift the status graph around without distorting the whole grid. After 10 minutes fruitlessly dragging points around I realised there must be a better way.
second attempt: I made the grids in PEMbroider, then dropped them into the .PES file editor of PE design 6, which I hadn’t realised until recently allows you to layer multiple designs on top of each other. it doesn’t have the nice ‘merging’ features of PEMbroider, and you can’t edit the patterns directly without editing the originals, but nonetheless, it allowed a hybrid grid/fill system to be made. I drew out the fills, then processed them with PE Design 6, making a remarkably complicated meta-file that only just fit the largest hoop. But~ it came out well in the end.
actually embroidering the suits
![]() progress tracker for suit 4
progress tracker for suit 4
It took a really long time to work up the courage to go from the sample patches, to sewing directly onto the suits, as we didn’t have a lot of room for error. In hindsight, having a couple of extra metres of dyed fabric would have saved a lot of stress, though in the end there were no pieces that needed to be re-cut. We divided the work according to the system that gary would mark up and organse the placements of the patches, and that I would embroider them, kind of assuming that the embroidery would take about 2x as long as the other part. In the end it was pretty much 50:50, with marking, chalking and measuring turning out to be extremely laborious.
In order to keep track of the status of each separate piece, we made a spreadsheet to track each design from finalising the design, to separating the tacked fabric, to marking up and measuring, and then finally the embroidery. Our main concerns were either mixing up different pieces from different suits, or embroidering the wrong side of something/upside-down etc, so we decided to finish each suit fully before moving onto the next. This also had the advantage of having to confront the hardest designs of each suit separately, where they could easily have been pushed along.
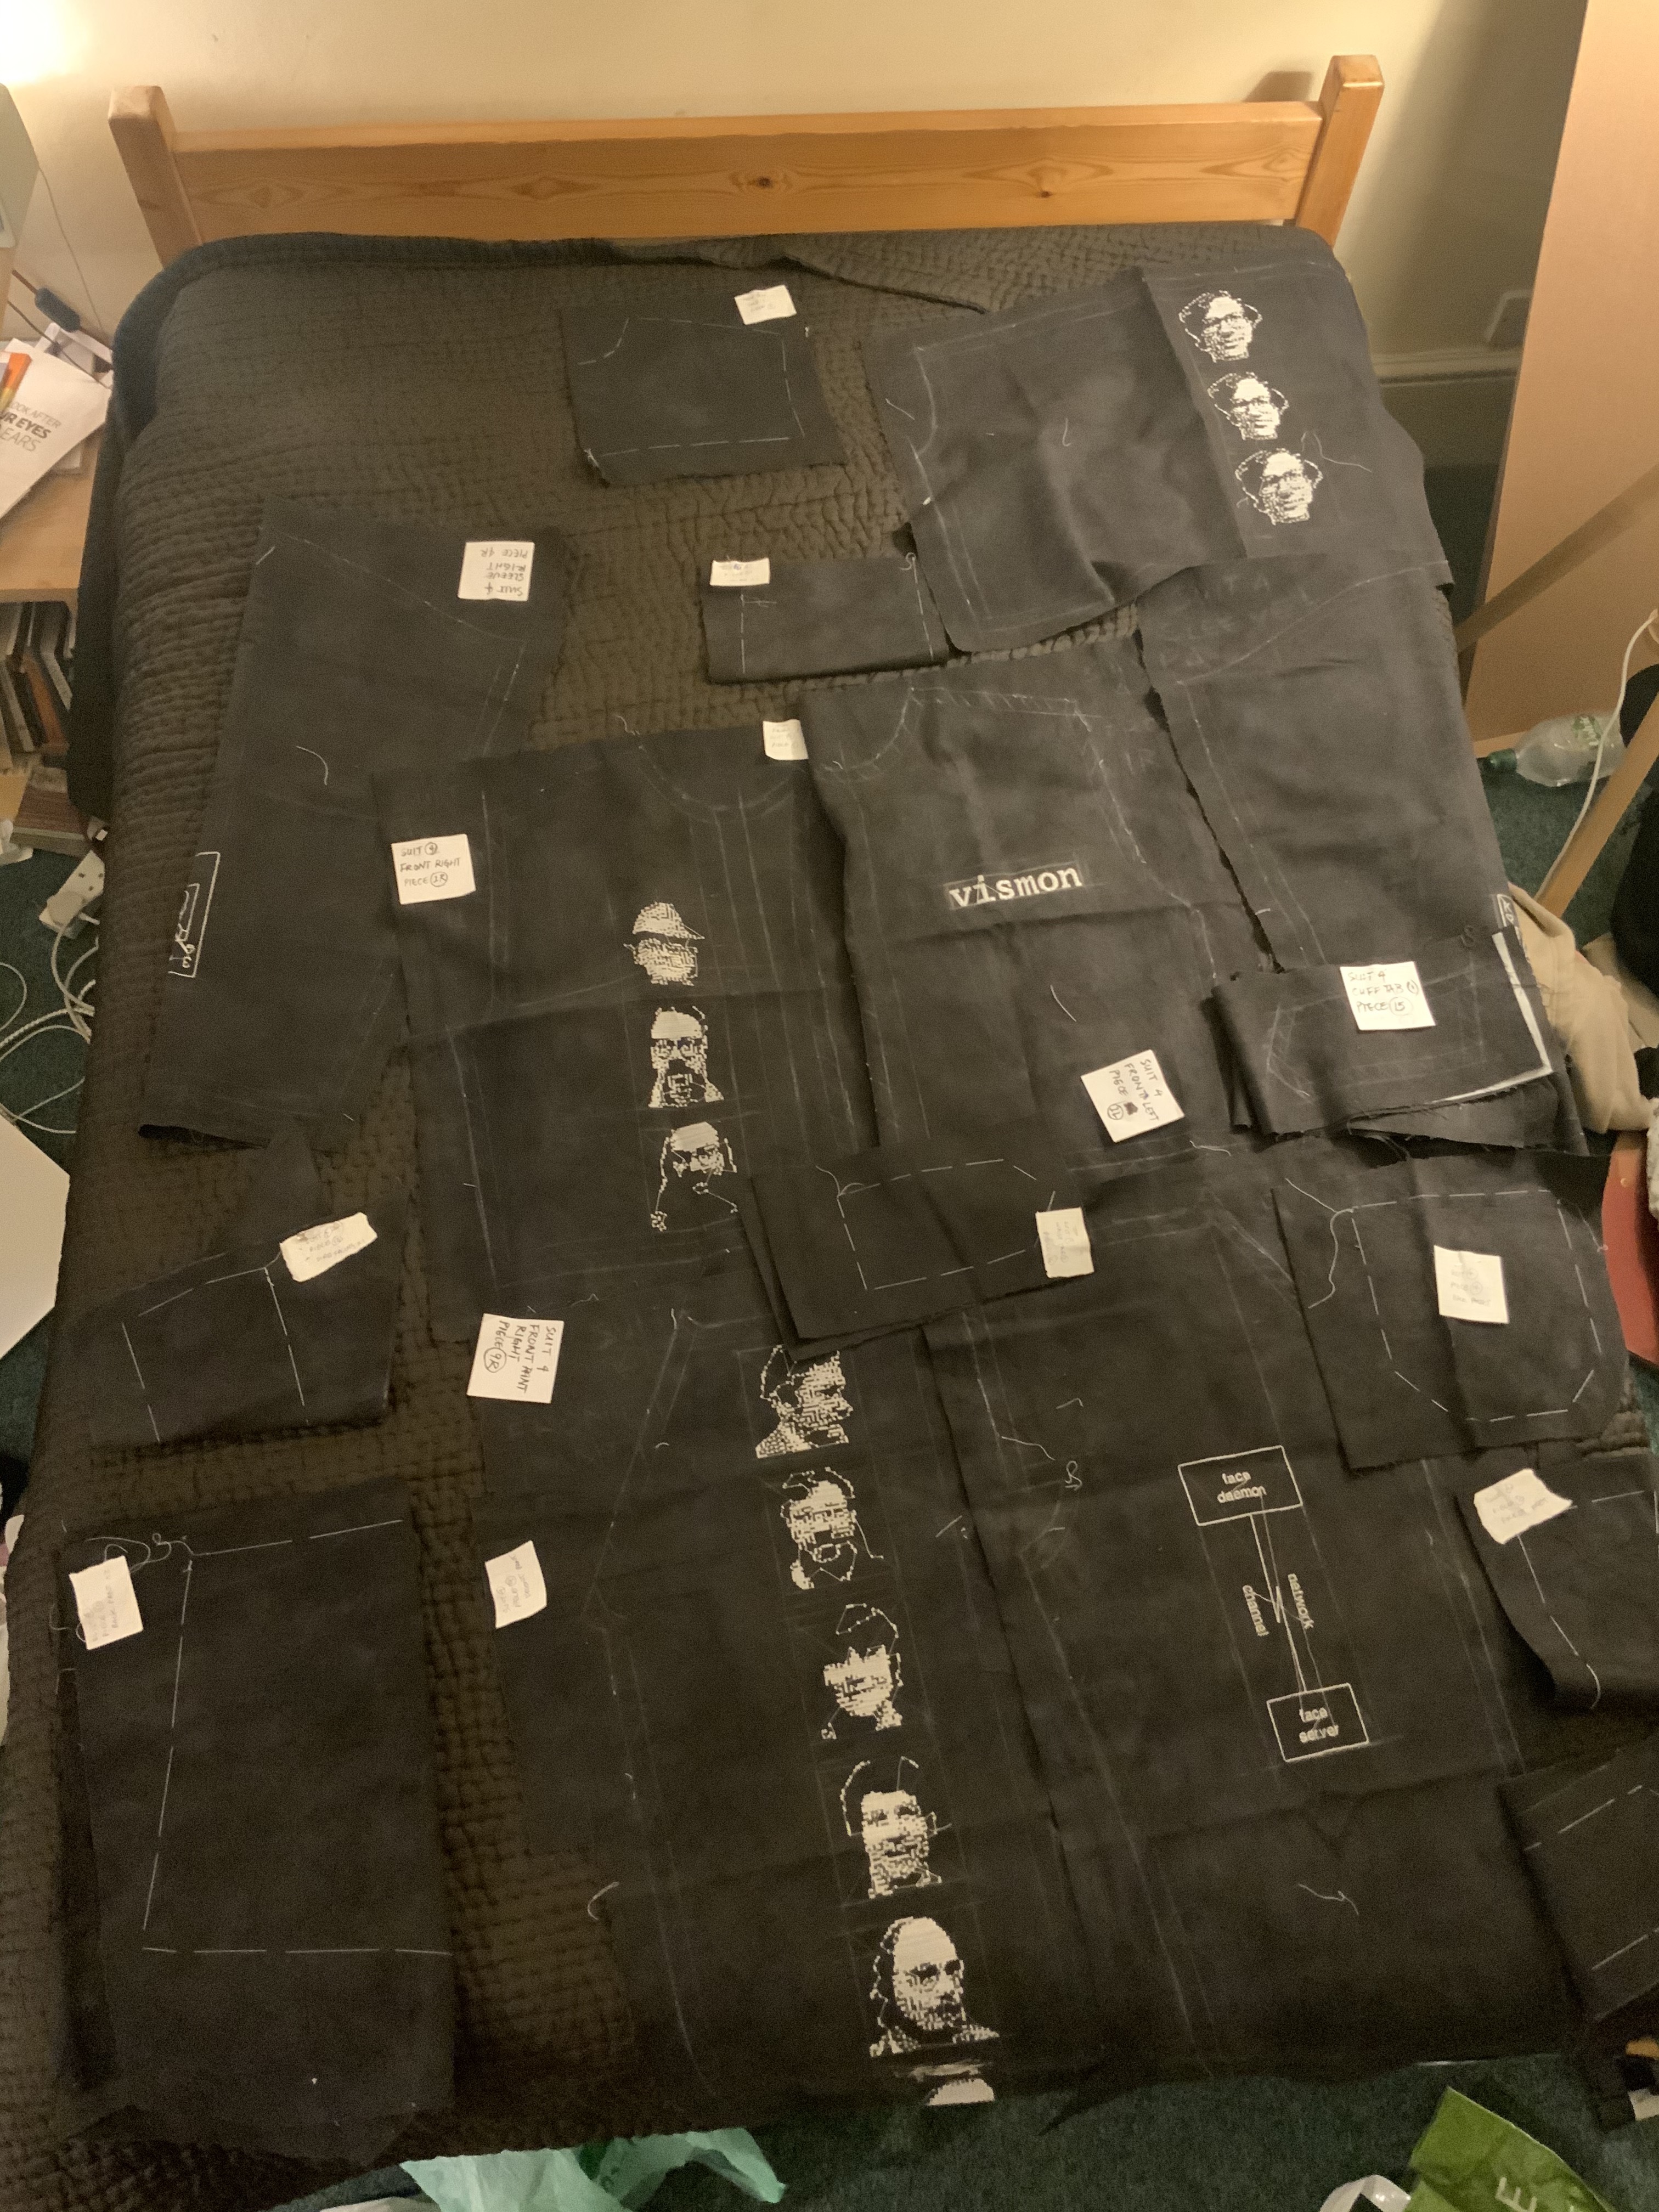 suit 4 layout
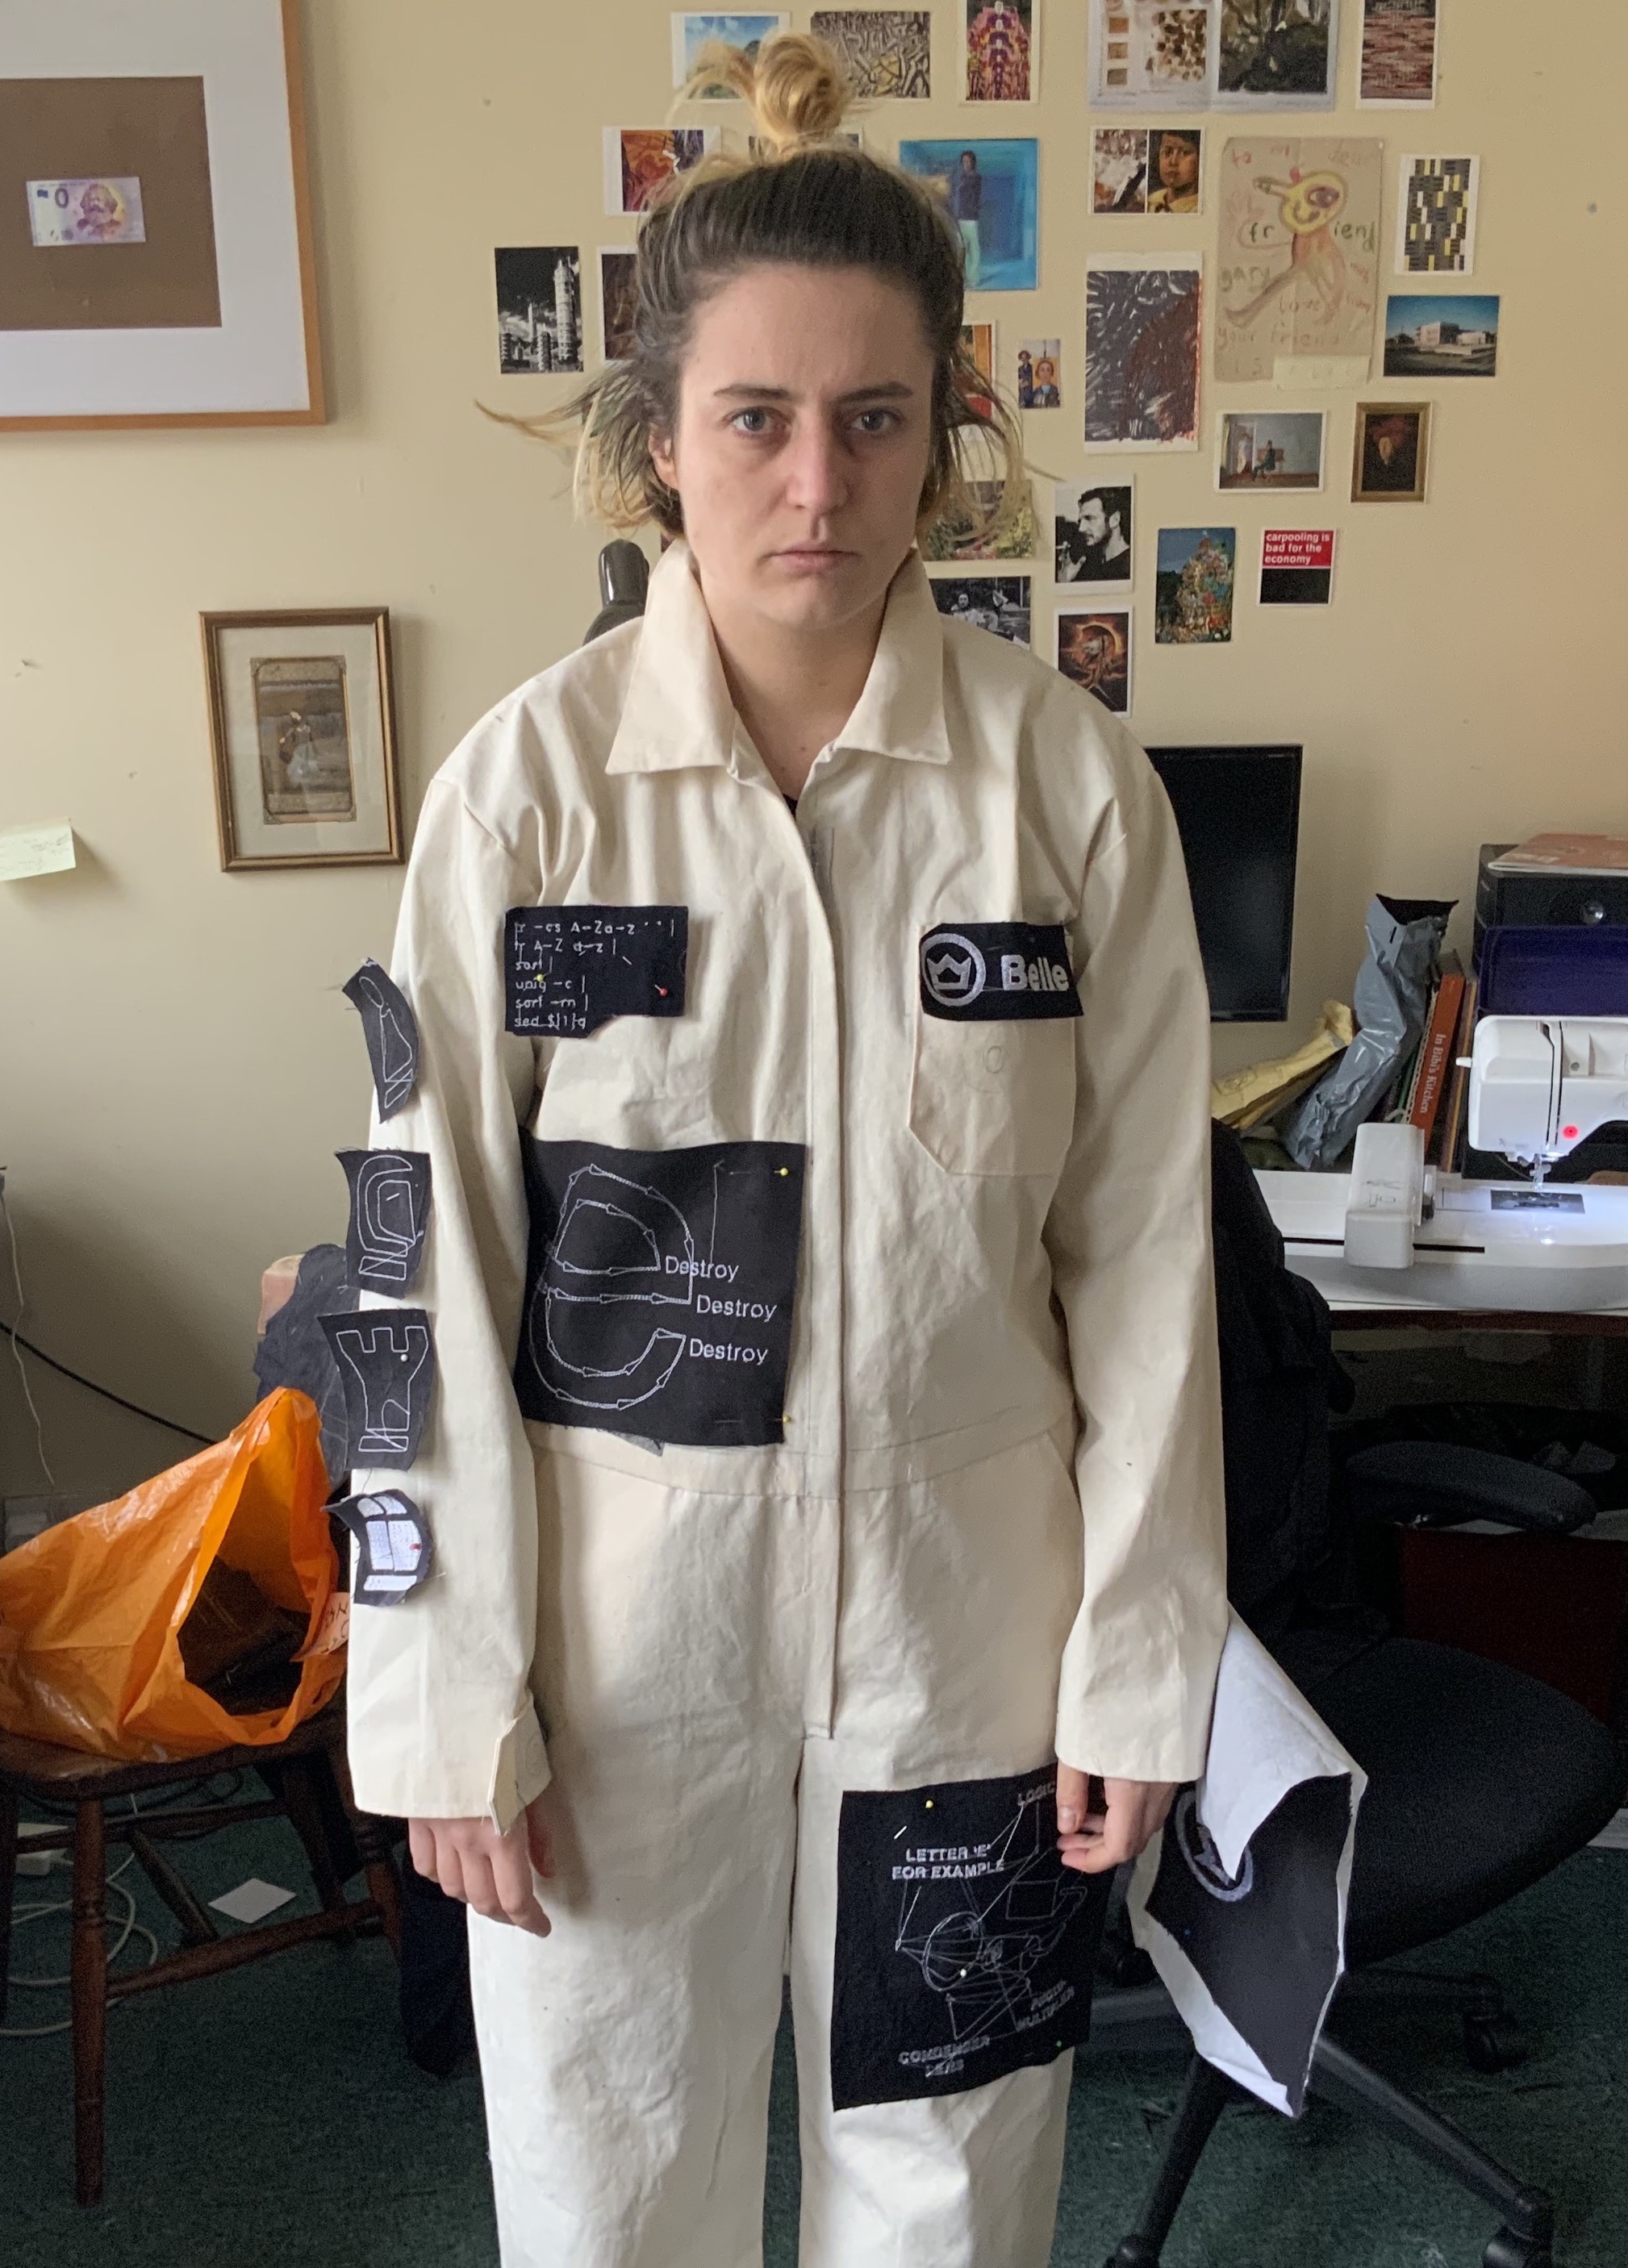
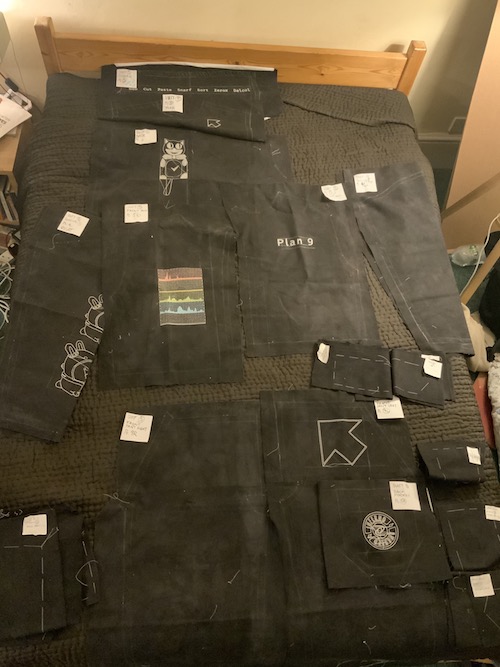 suit 5 layout
When we thought we’d finished each suit, gary would lay the entire thing out piece by piece and photograph it to check that we hadn’t lost or missed anything.
designing a FO label
This part was the only part of the project that felt like genuinely free experimentation, in part because we actually only did these once we’d posted all the pieces to cornwall to fabricate the suits, as we’d totally forgotten about the potential for labels.
I made a very easy outline of the FO logo in PE Design, using the satin stitch to fill the shape. Initially I only embroidered the plain white fill, but then decided to start experimenting with different lines, offsets and colours. In order not to constantly be going back and forth between my computer and the machine, I used the same file each time but switched out the thread and changed the position of the machine each time.
![]() foreign objects test logos in the hoop
foreign objects test logos in the hoop
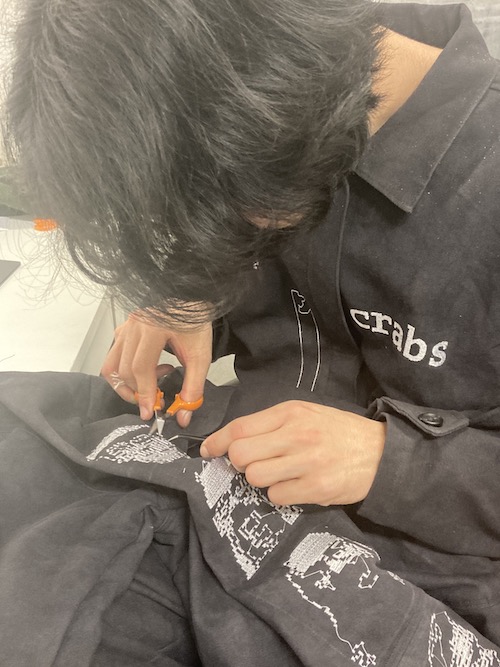
trimming
We did this part after getting the complete suits back from Eliza. Trimming can really be the scourge of embroidery, but in this case, with a couple of exceptions, the process was only about a day’s worth of shared work, and light enough to chat etc
I got a painfully expensive pair of Fiskar’s embroidery scissors to do the snipping and, I am glad to say, they are very good at snipping and probably worth it. Because of the price we only had one pair, though.
buttonholing
 nice buttonholes
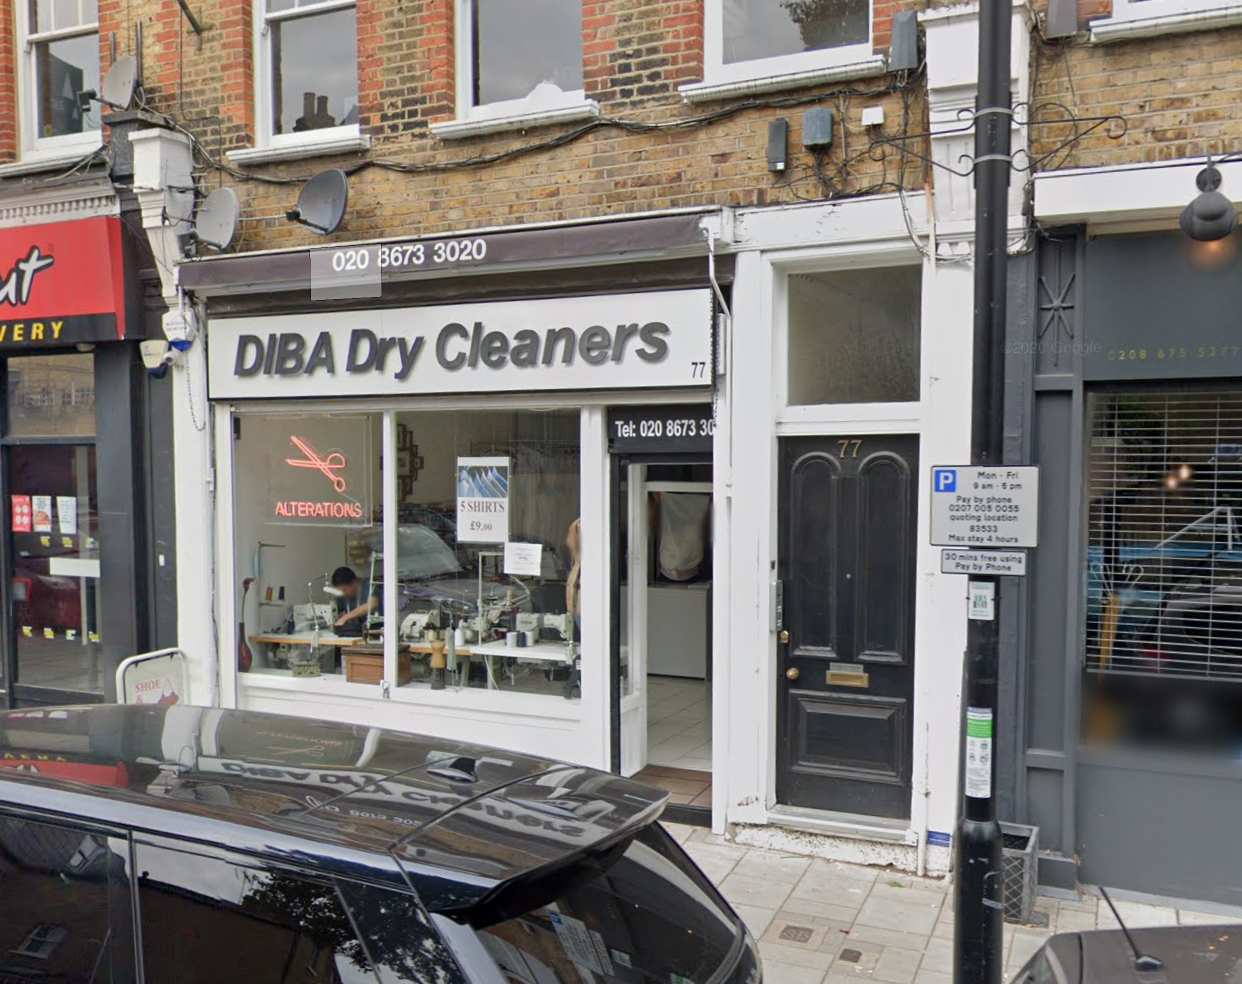
One thing I didn’t know is that unless you’ve got a proper buttonholing machine at home, a lot of people take their garments to get buttonholed elsewhere. there’s a guy in soho who only does this, but was also only accepting orders by post, which seemed a bit of a waste of time given how close we were. We got ours done by Diba Dry Cleaners and tailors on Abbeville road, who were super quick and really great.
The very last thing we did (after taking a bunch of documentation pictures) was to post the suits to Genie Kausto in New York, where they took them to Bell Labs and took a bunch of pictures on site, including a film. We had a good time making them a reference dossier of images and poses to strike. It felt like a really great outcome for the project, though also sad not to have been there in person.