
knitting experiments
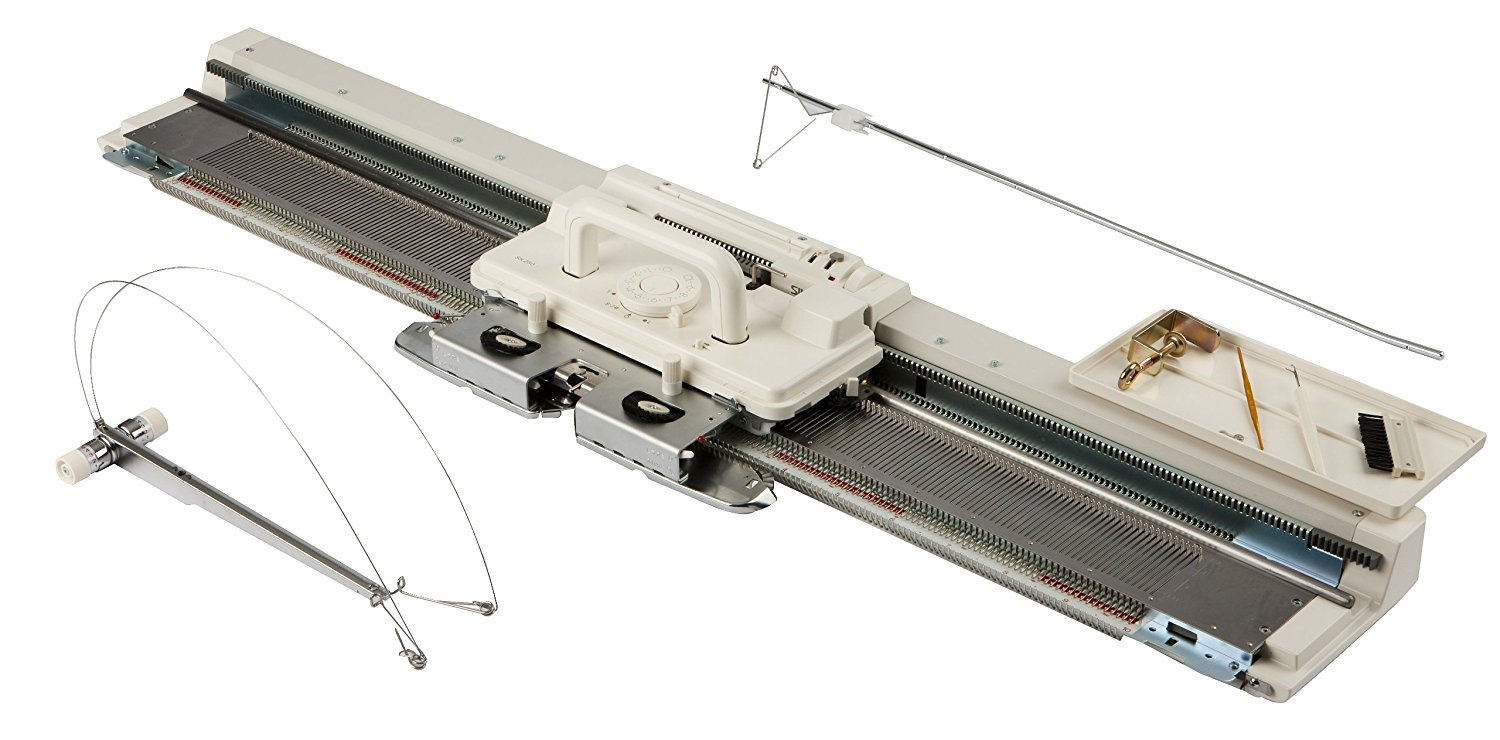
Since I started working at the Creative Computing Institute in January of this year, I’ve been on-and-off teaching myself how to use the Silver Reed SK840 digital knitting machine that we have there.It can be used either as a purely manual machine, or partially computer-controlled, using a box called a ‘Silverlink’ that mimics the behaviour of a punchcard, and allows for complex patterning.
The thing that really appeals to me about knitting is the idea of modifying the bulk properties of a material, using tangible, meso-scale processes. It’s an idea I’ve thought a lot about, especially since seeing my friend Jifei talk about this during his PhD defence, this idea of visible changes that can modify the behaviour of materials around us. I also like the idea of processes that combine human/manual manipulation with machinery that automates some but not all of a complex process.
It’s also a sweet machine.
 200 needles, baby
As I learn more about machine knitting, I’ve been collecting links in an are.na channel, which runs alongside a channel I’ve had for years called ‘Textile Computer’, which also contains some relevant links, though focussed on textiles and computation more broadly. I’m also in the process of writing a series of tutorials on this machine for the CCI wiki, which should be a bit more formal once they’re done.
sensors and e-textiles
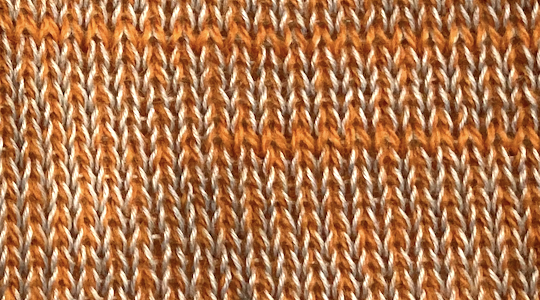 closeup of conductive yarn / lambswool sample
One of the first things I did with the machine (after learning how to create a basic swatch, cast on, etc) was to test out knitting with conductive yarns. There’s a couple of nice guides on how to do this; my favourite is written by KOBAKANT on their fantastic How to Get What You Want site.
Typically, conductive yarn is used differently to conductive thread: it has much higher resistance, which means that it’s not used to directly connect components unless they are very close together. However, because the conductive properties of fabrics knitted with conductive yarns change according to the state of the material, they make great sensors.
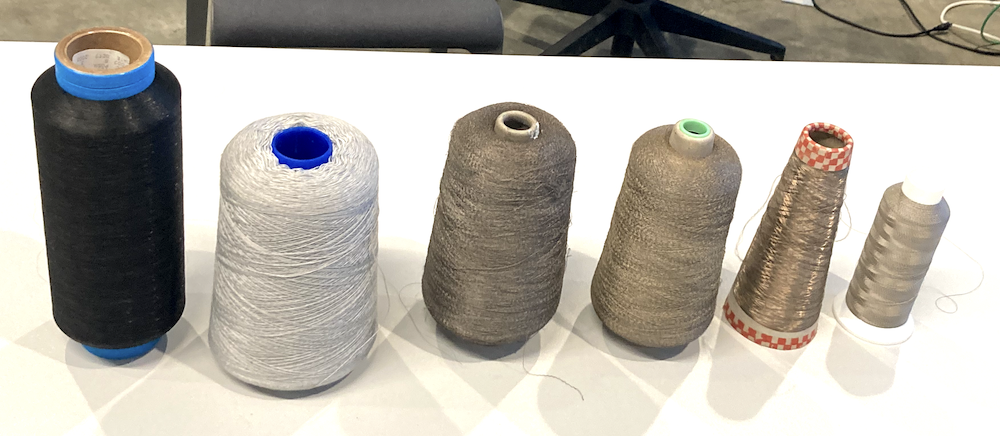 CCI conductive yarns
When a knitted sample is relaxed, it has a high resistance as the fibres in the yarn do not make contact with one another, meaning that current can pass only along a few strands. When the sample is stretched, however, the fibres are pulled into closer contact, reducing the resistance and allowing the flow of an electric current. This means that the inclusion of a conductive yarn allows you to sense movement in the material, creating a stretch sensor.
As most of the conductive yarns we had were too thin to knit by themselves without tangling, I wrapped them together with a lambswool carrier yarn, which had the other nice effect of giving the fabric a good weight. With one exception (a very stiff, dry, metal fibre), they were all OK to knit with, and produced really interesting results.
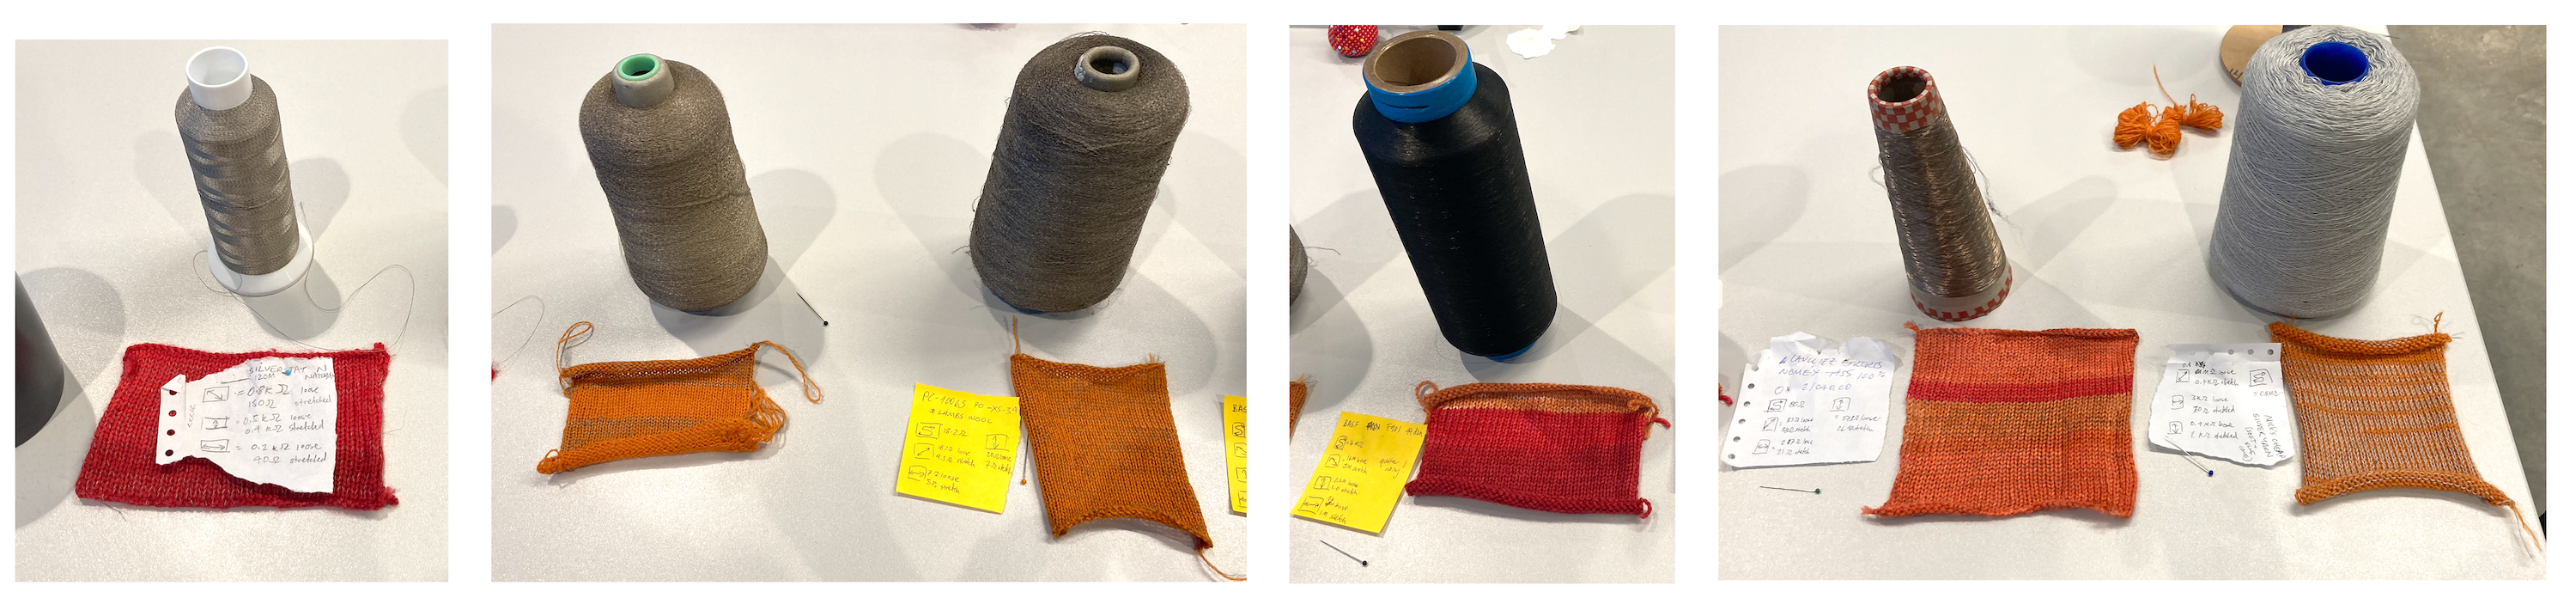 6 swatches made with different conductive yarns
I was really surprised with the range and consistency of the results; using different yarns I was able to make reliable variable resistors in the Ω, kΩ and MΩ range.
Below is a gif of Eva testing out the variable resistance, attached to the analog input to an Arduino and a simple potential divider. As she stretches the fabric, the resistance decreases; the LED brightness shows the change in sensed voltage.
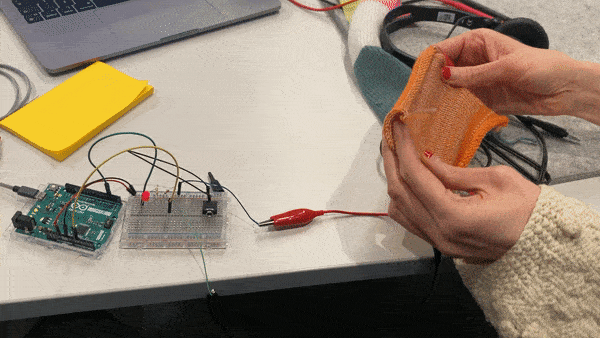
testing the stretch sensor
As well as stretch sensors, they make great integrated capacitive touch sensors when included in fabric. I worked with some students to knit some touch-sensitive pockets, and I reckon with the advent of the intarsia carriage (see below) it’ll get much easier to integrate discrete sensor patches into the textile.
Using Designaknit
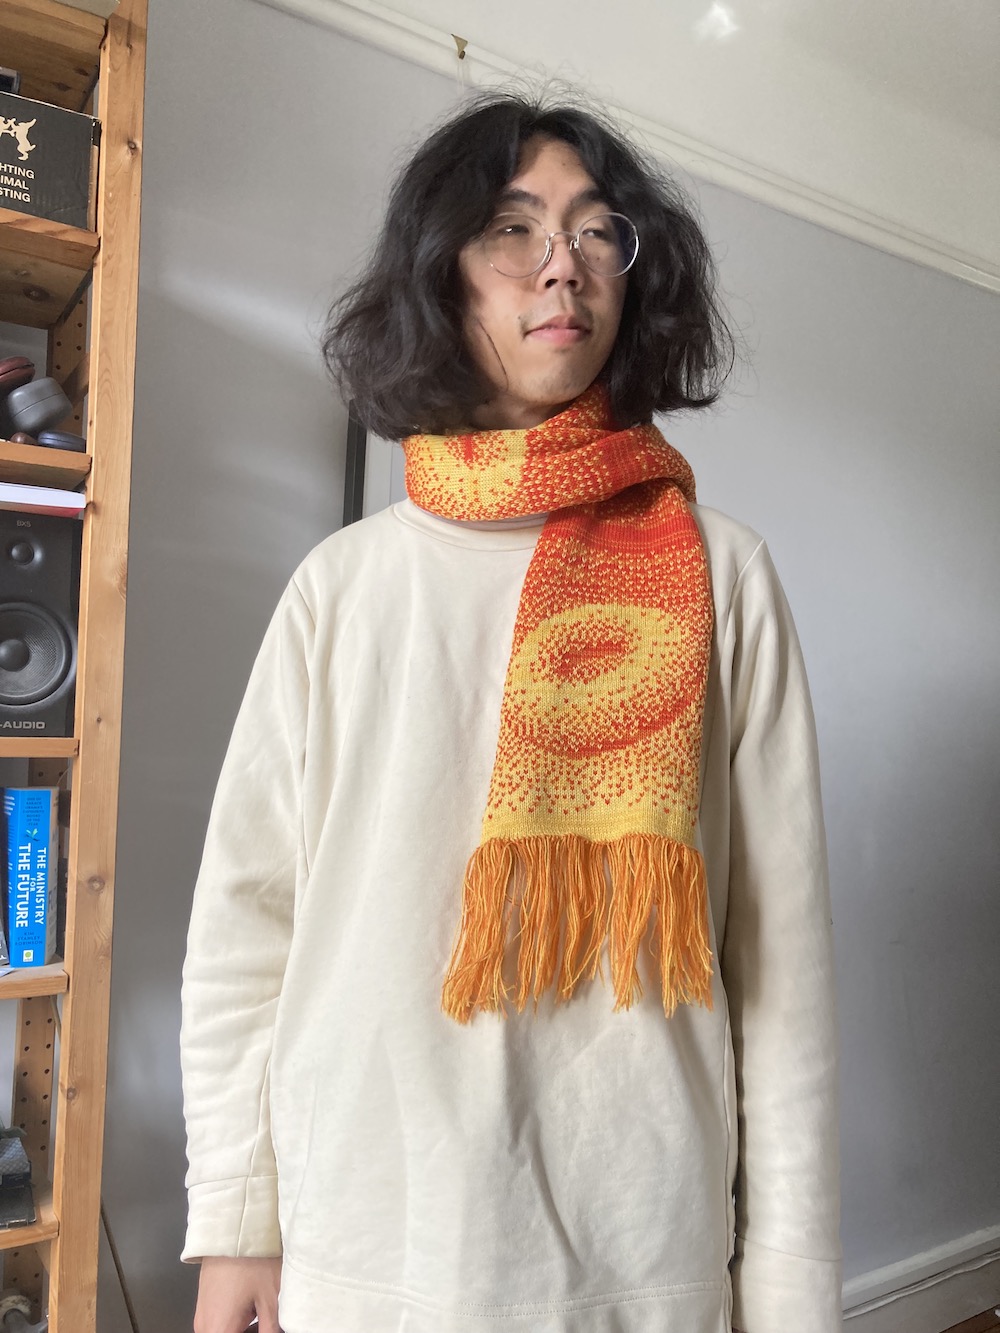 fairisle scarf I knitted for gary’s birthday (the fringe is done by hand)
After I’d played around for a bit with the machine and become comfortable with basic manipulation, I wanted to experiment with computer control. Initially I found it quite overwhelming – it’s very versatile software, that comes from a world very unfamiliar to me. I used this series of videos to learn the basics, and have since also been using a copy of part of the manual I found in PDF form.
fairisle
Fairisle was the first digital technique I learned, and it’s pretty low-effort to produce some really beautiful, impressive things that it would be very hard to knit by hand. It works by switching between knitting 2 yarns, leaving one to trail along the back of the fabric while the other is stitched. It has the limitation that you don’t want these ‘runners’ to get too long (or they will get caught on things), so the best things involve a lot of noise/repetition to avoid large areas of a single colour.
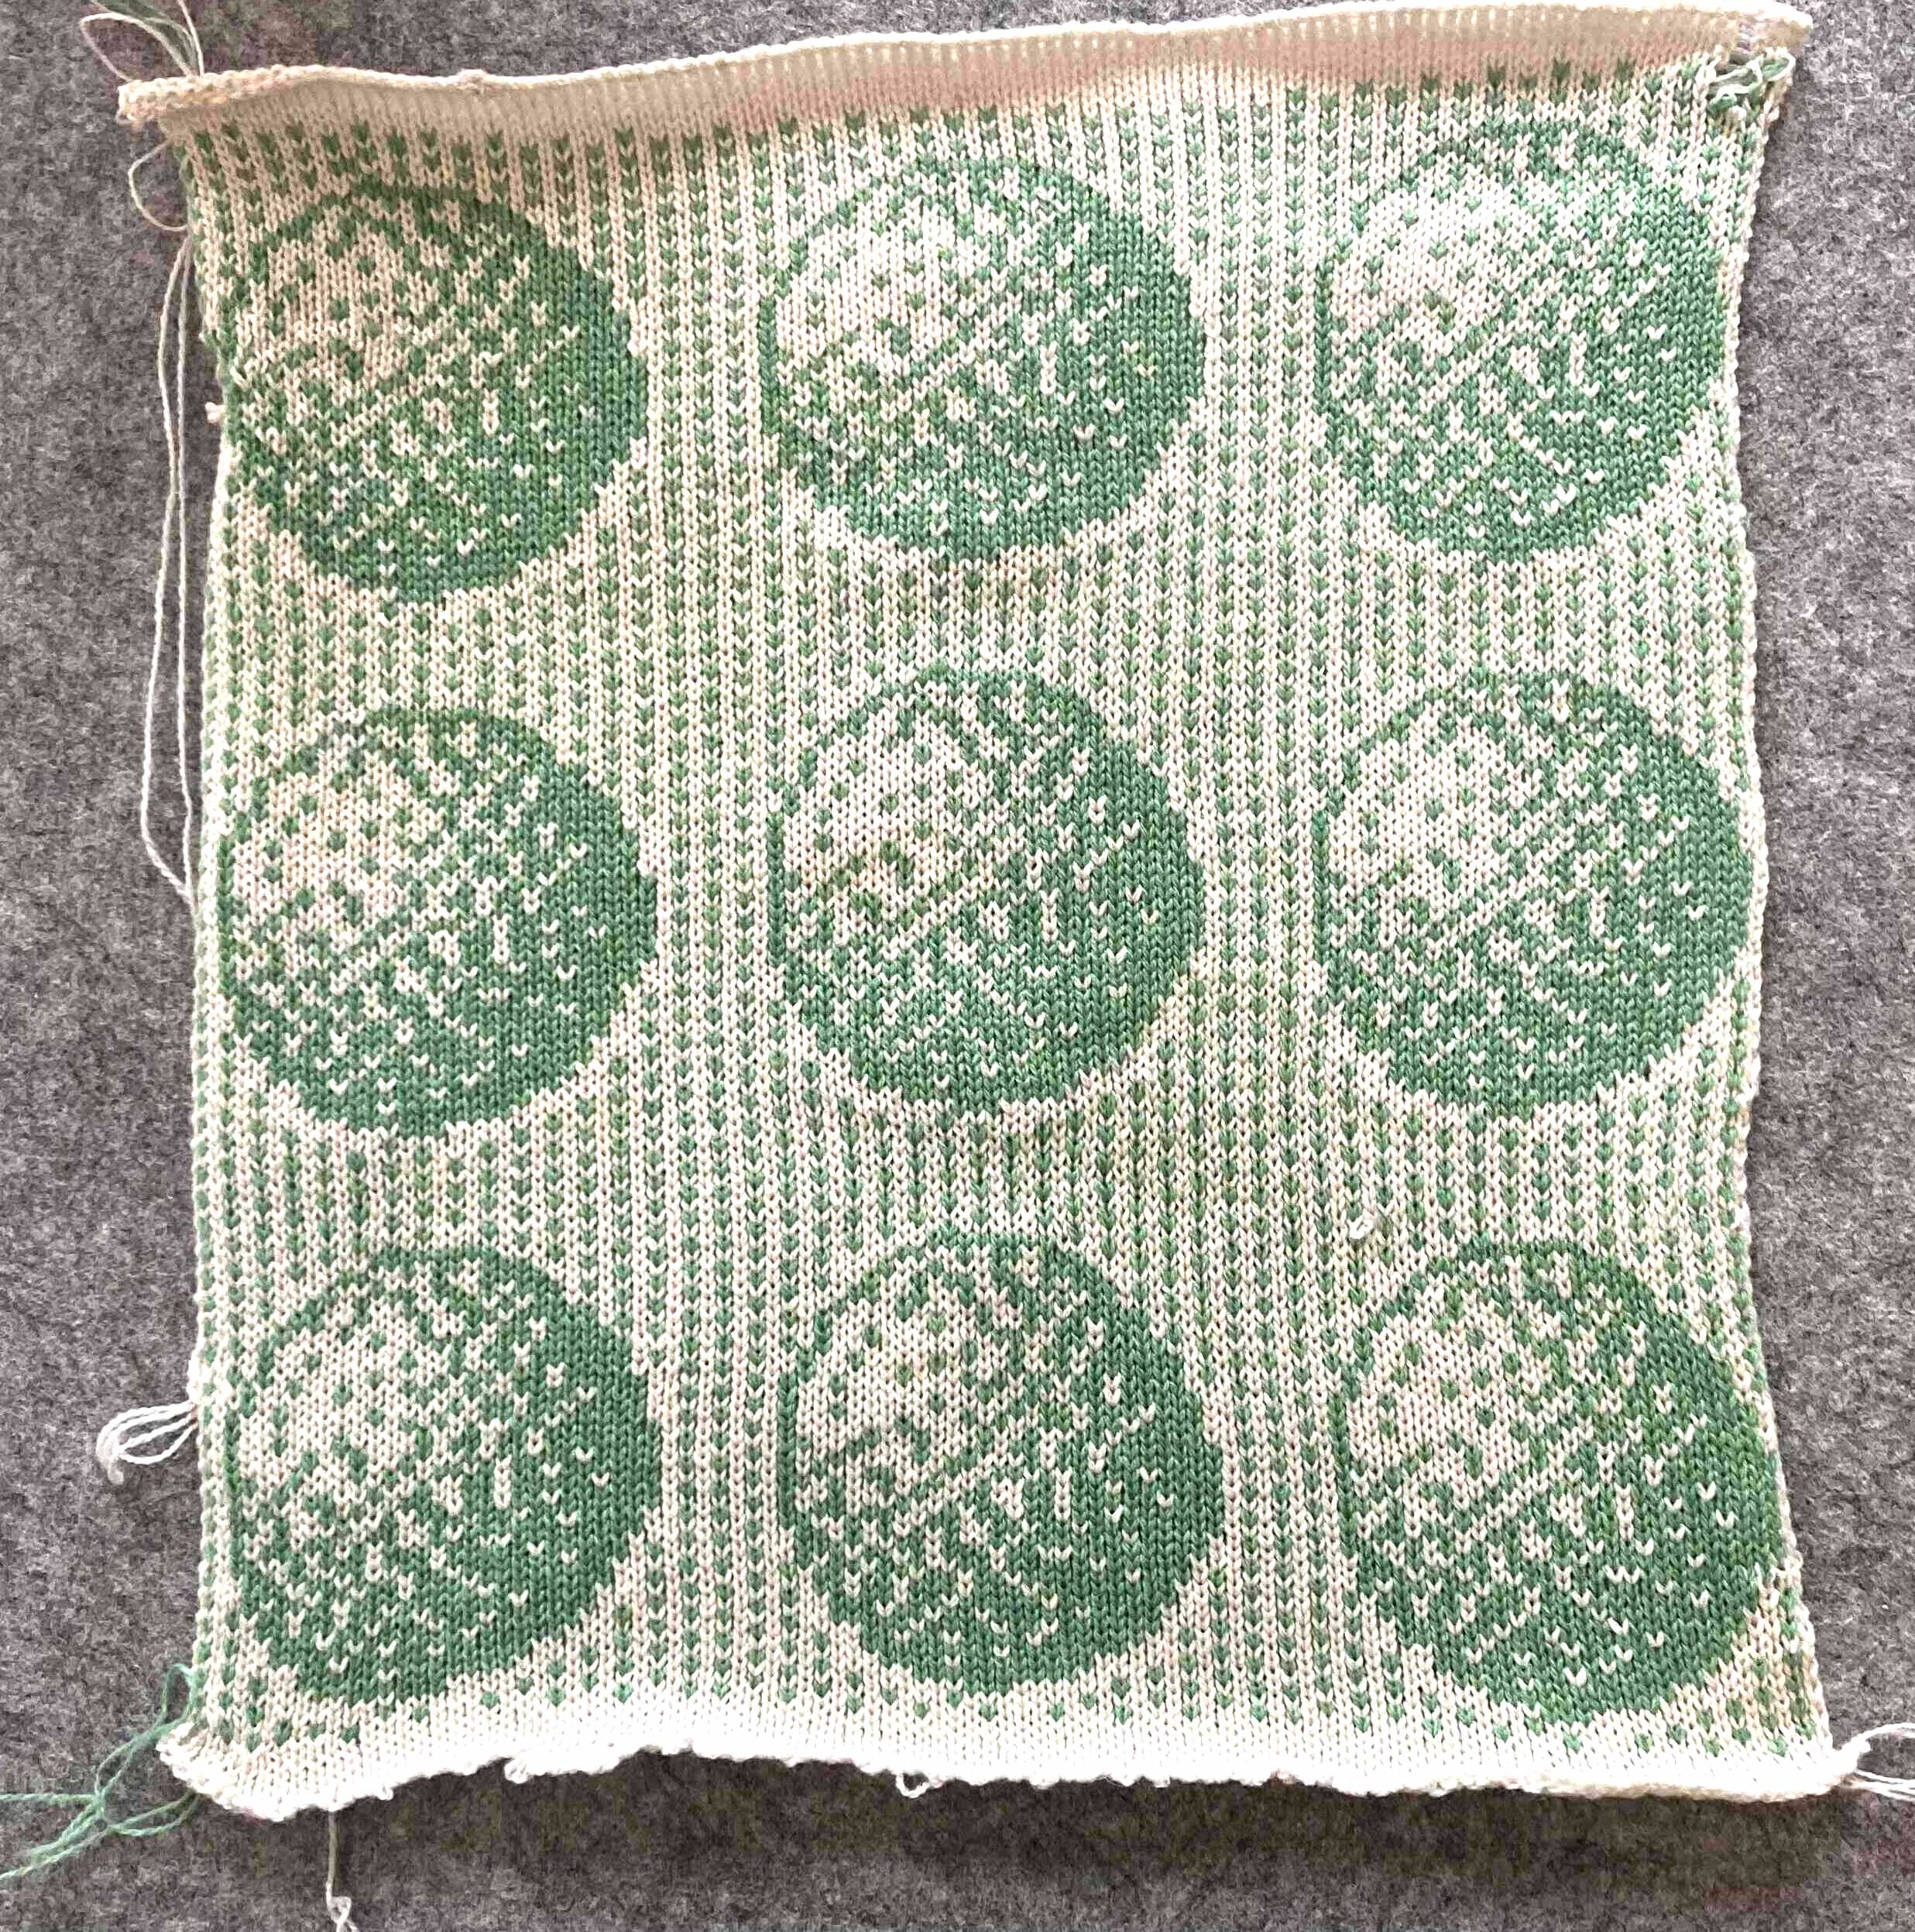 test swatch for fairisle orbs (I’m not so keen on the regularity of the ‘birds-eye’ – dithered – pattern)
The first big project I did on the machine was to knit a scarf for gary’s birthday. I used a Processing script to generate a pixellated torus shape, and then used Designaknit’s import photo tool to turn it into stitches (the pixellation turned out to be unnecessary as the software actually does it for you, sometimes with annoying results).
tuck mosaic
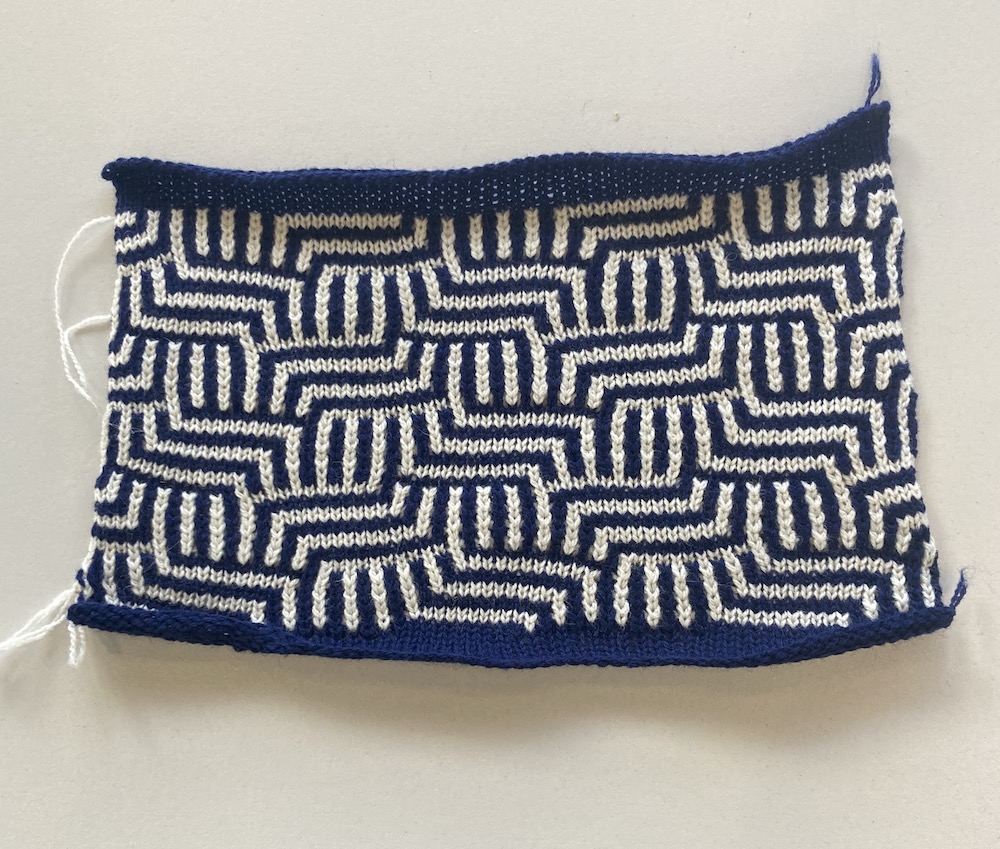 tuck mosaic swatch
This is a pretty cool technique where you use the structure of the stitches to manipulate patterns. The 2 colours here are knitted in horizontal stripes, but with a regular pattern of stitches ‘tucked’ into the stitch above, manipulating the structure to resemble vertical lines. The result looks very beautiful, but it’s time-consuming to change the colour every 2 rows.
What’s interesting about tuck patterns is that they look nothing like the patterns that produce them. There’s a great and incredibly detailed blog post on Alessandrina (very helpful knitting blog) which explains in great detail.
Manual Shaping
mock rib and sleeves
Although Designaknit is a big help when it comes to drafting patterns, you still need to increase and decrease stitches manually. For my first attempt at this, I tried out making a sleeve for a child’s jumper. At the same time, I had a go at adding a ribbed edge. It also makes placing patterns on shaped pieces very straightforward, which is lovely.
Typically if you’re doing this properly, you use what’s called a ‘ribber’ – 2 beds of needles placed facing one another so you can transfer stitches between them. My impression is that this opens up a lot of shaping possibilities, but it also seems like you can get away with faking stuff on a single bed machine (which seems less complex).
I watched this video for guidance, which was pretty good (it’s in ?Norwegian? but there are subtitles), and produced a nice ribbed edge that didn’t feel too loose. One thing I learned from the collar video is that you can force a fold by knitting 2 rows on higher tension halfway through, which I’ve tried since and seems to work well.
making a collar
 collar for a tiny tiny jumper
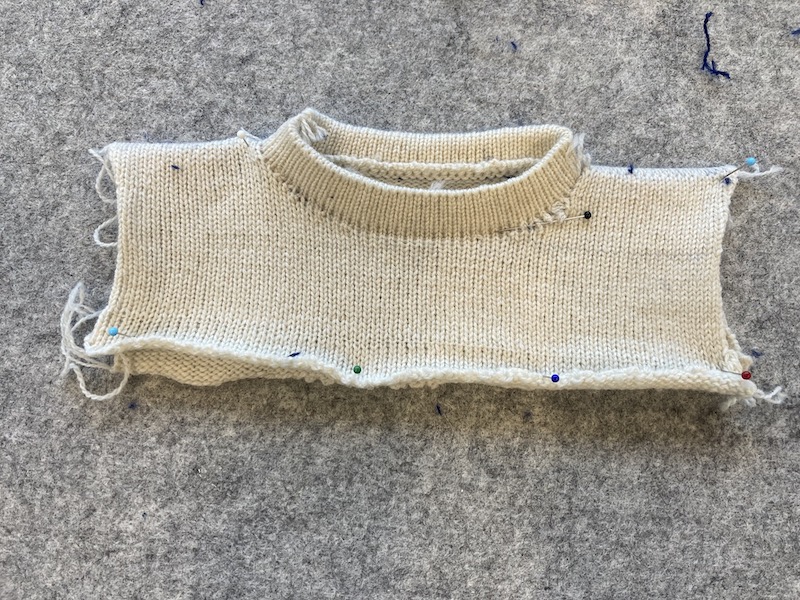
A key feature of machine knitting turns out to be good old-fashioned manual dexterity, something I’ve been slowly acclimatising to, though it’s been quite a steep learning curve. One very quiet afternoon over easter, I decided to learn how to make a fully-fashioned neckline, on a baby-sized sweater. It was pretty challenging, but also a very satisfying process.
First you knit the neck shape, then knit a couple of rows of waste yarn on top. To do either side of the neck you need to do one at a time, with the other needles in a hold position. Once that’s done, you hook all the ‘neck’ needles back on, and then start to knit the collar. I learned how to do this from this video, which shows you how to add a ribbed neckline using a single bed machine.
the intarsia carriage
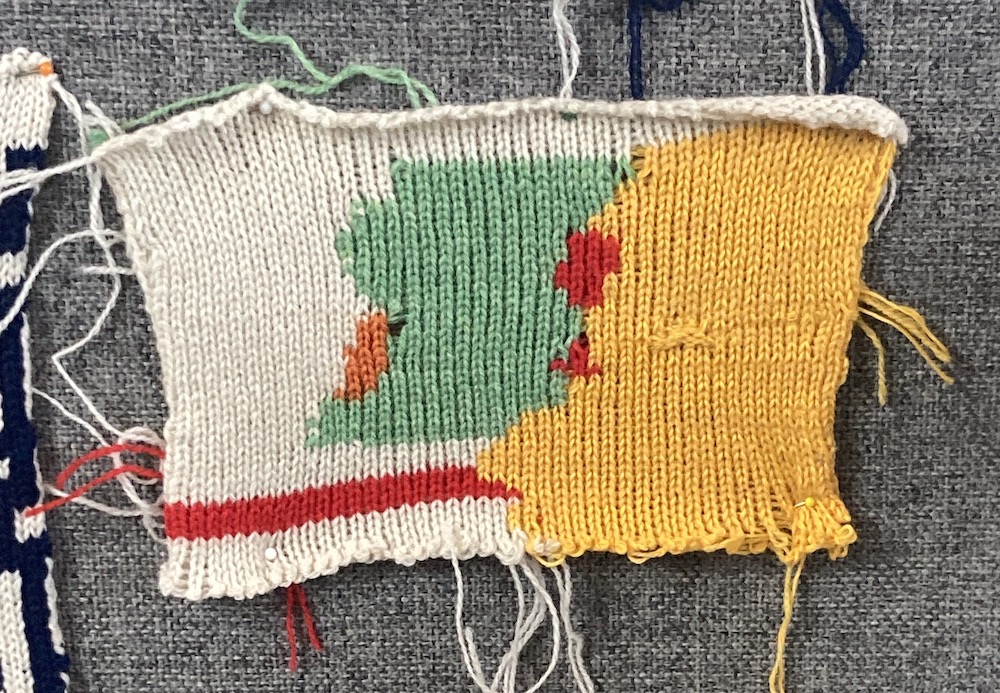 first attempt with the intarsia carriage
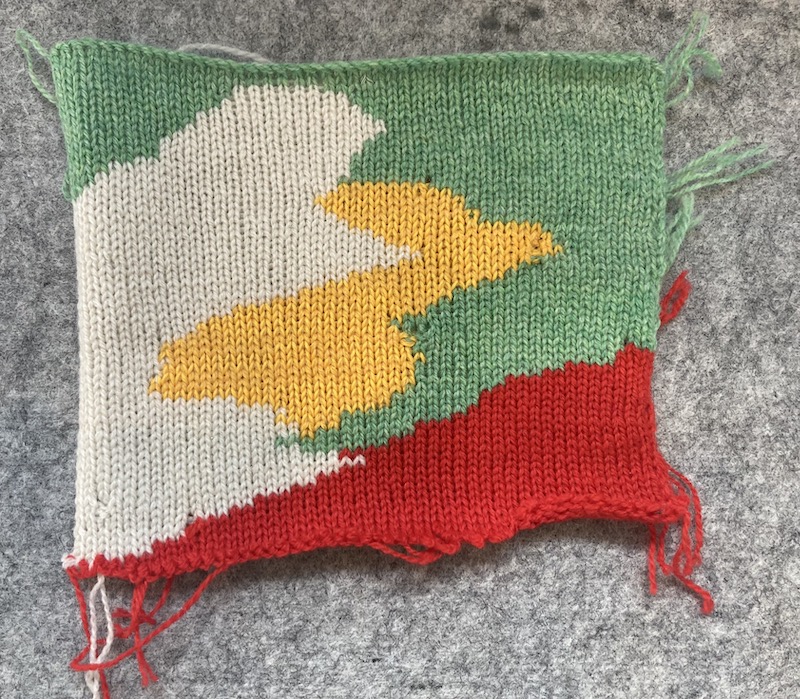 second intarsia swatch – still a few errors, but improving
A new addition to the machine is a small carriage which allows patches of colour to be knit together using a technique called intarsia, with no runners at the back. I personally really like the aesthetic of this kind of knitting, though it’s a much more manual process than the other colour-changing techniques and as such takes a long time.
My first experiments with it definitely felt like a step back in terms of dexterity, but I really like the effect it produced, especially in my second swatch.
automatic colour changer
In a somewhat profligate move, we also got hold of an automatic colour-changer for the machine, which can be used to change the colour of the main yarn rapidly once every 2 rows or less. The real benefit of this is in doing patterns like a tuck mosaic, which otherwise require a huge amount of effort to keep changing the 2 yarns constantly, but also makes knitting anything involving stripes a real breeze.
It involves adding a beautifully-made set of mechanised hooks to one end of the needle bed, that can be pressed in and out to ready a yarn to be used. When ready to change the yarn, the carriage clicks into the hooks, with one hook grabbing the old yarn from the feeder, and another hook pushing the new one into place. It’s a really remarkable bit of machine design when it works (though it also takes a bit of getting used to).
I had a go at using this to change one of the colours while knitting fairisle – I found that it was more liable to tangle than either straight knitting with a colour changer, or fairisle without one, but once that was under control the effect was pretty attractive, even from just messing around. Excited to do more with it.
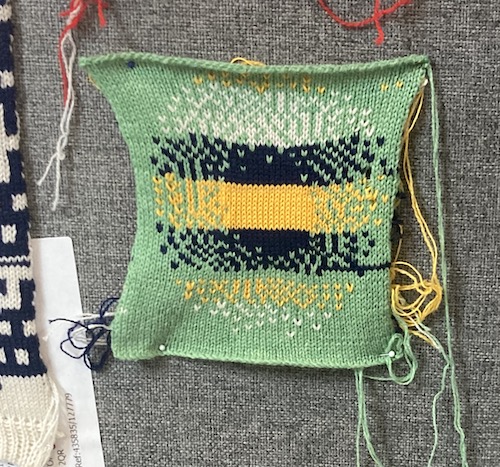 fairisle swatch knitting using the automatic colour changer to change one of the yarns
Next project
I’ve become very interested in manipulating the file format used by Designaknit to more readily knit generative designs without first having to go through the image -> stitch translation process offered by the software.
CMU textiles lab have an open-source industrial machine file format called knitout, which seems really cool but currently can’t be translated into the proprietary .dak file format, which is what gets sent via USB.
There is a project here to reverse-engineer DAK files (which can currently read their contents but not write to them), as well as a very thorough overview of attempts and challenges involved (as well as a bit of packet sniffing) on Nadia Campo Woytuk’s Softwear blog. During August I’m planning to look deeper into some of these!