
kniterate notes 4
This is the fourth in a series of blog posts about the Material Programming Project. We are developing malleable knitting software for the Kniterate, a semi-industrial knitting machine. The first post, on the Knitout project, is available here, a longer post about the Kniterate machine is here, and a guide to the different file formats is here.
This week I learned 2-bed knitting on the domestic machine, and made some progress on the Knitout-> Kniterate code visualiser. We also managed to get a bunch of tests to run on the Kniterate, most of which worked fairly well. We also visited an exhibition of some work by visiting students from NAFA (Nanyang Academy of Fine Art Singapore), which featured a really great and inspiring bit of Kniterate work.
making friends with the ribber
This past weekend, Rosie and I went to Knitworks to do a workshop on the Brother ribber. Neither of us had worked with one before, and it was really useful for getting a material understanding of what’s happening on a 2-bed machine.
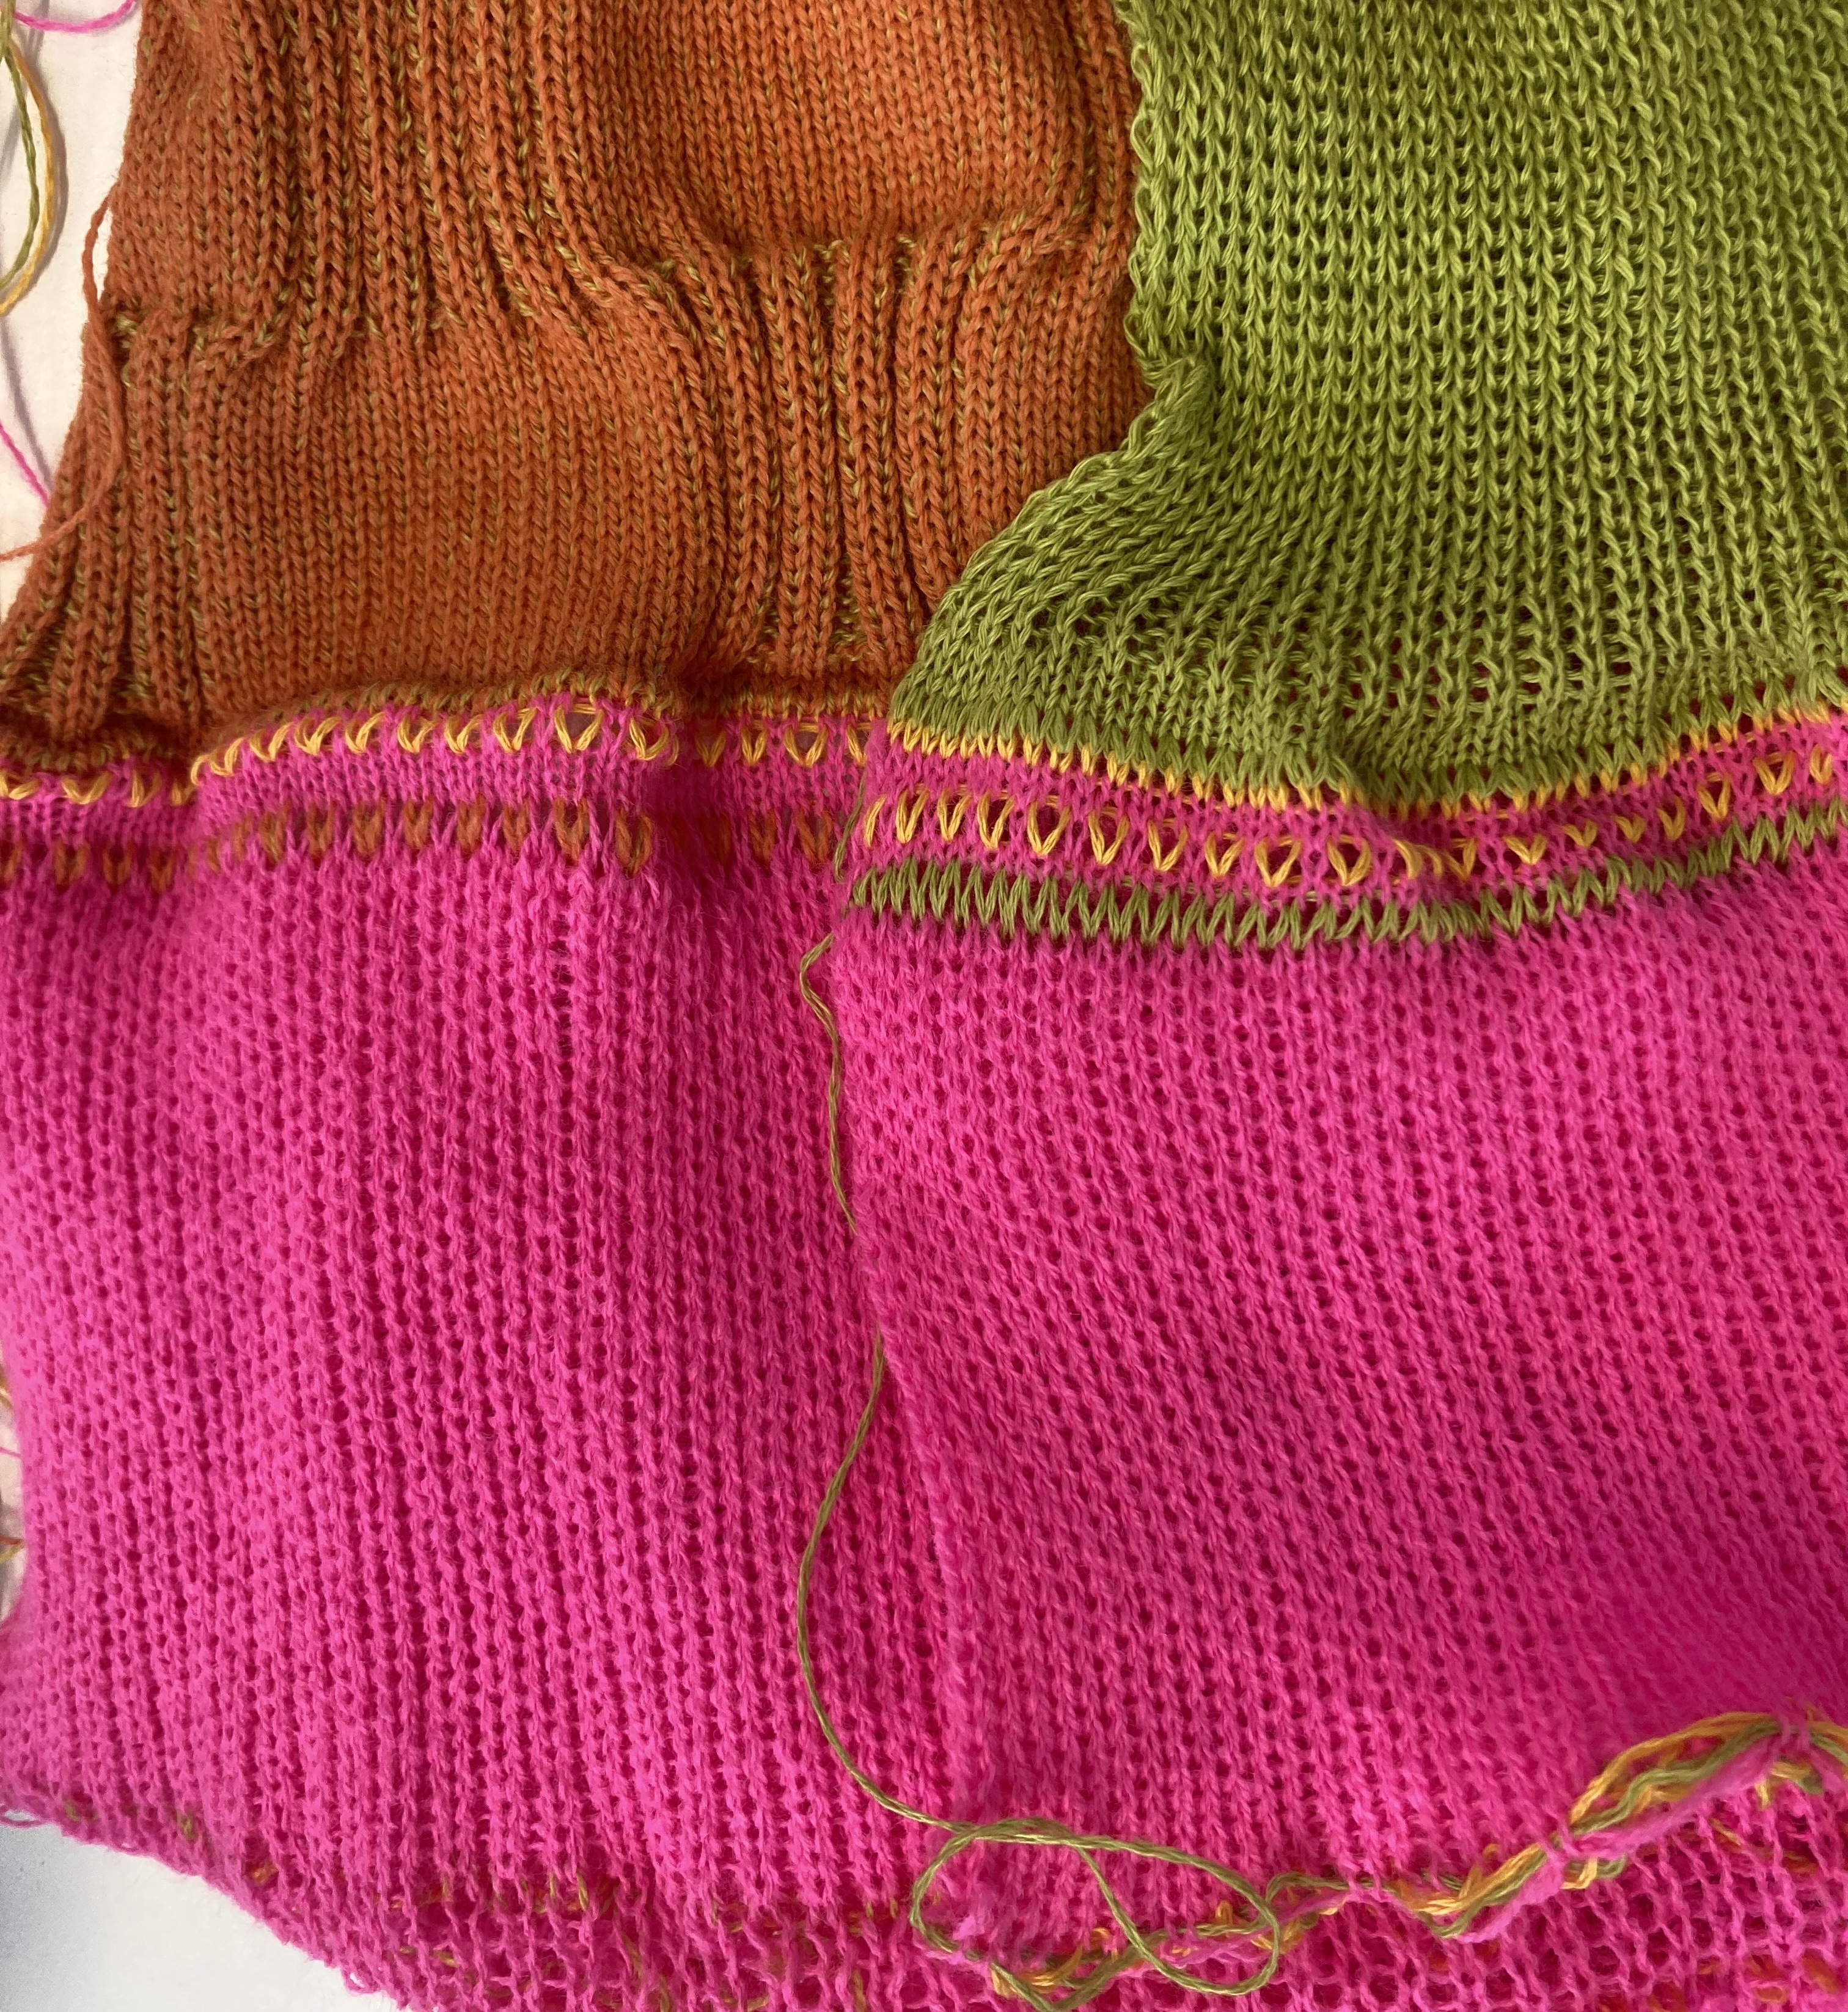
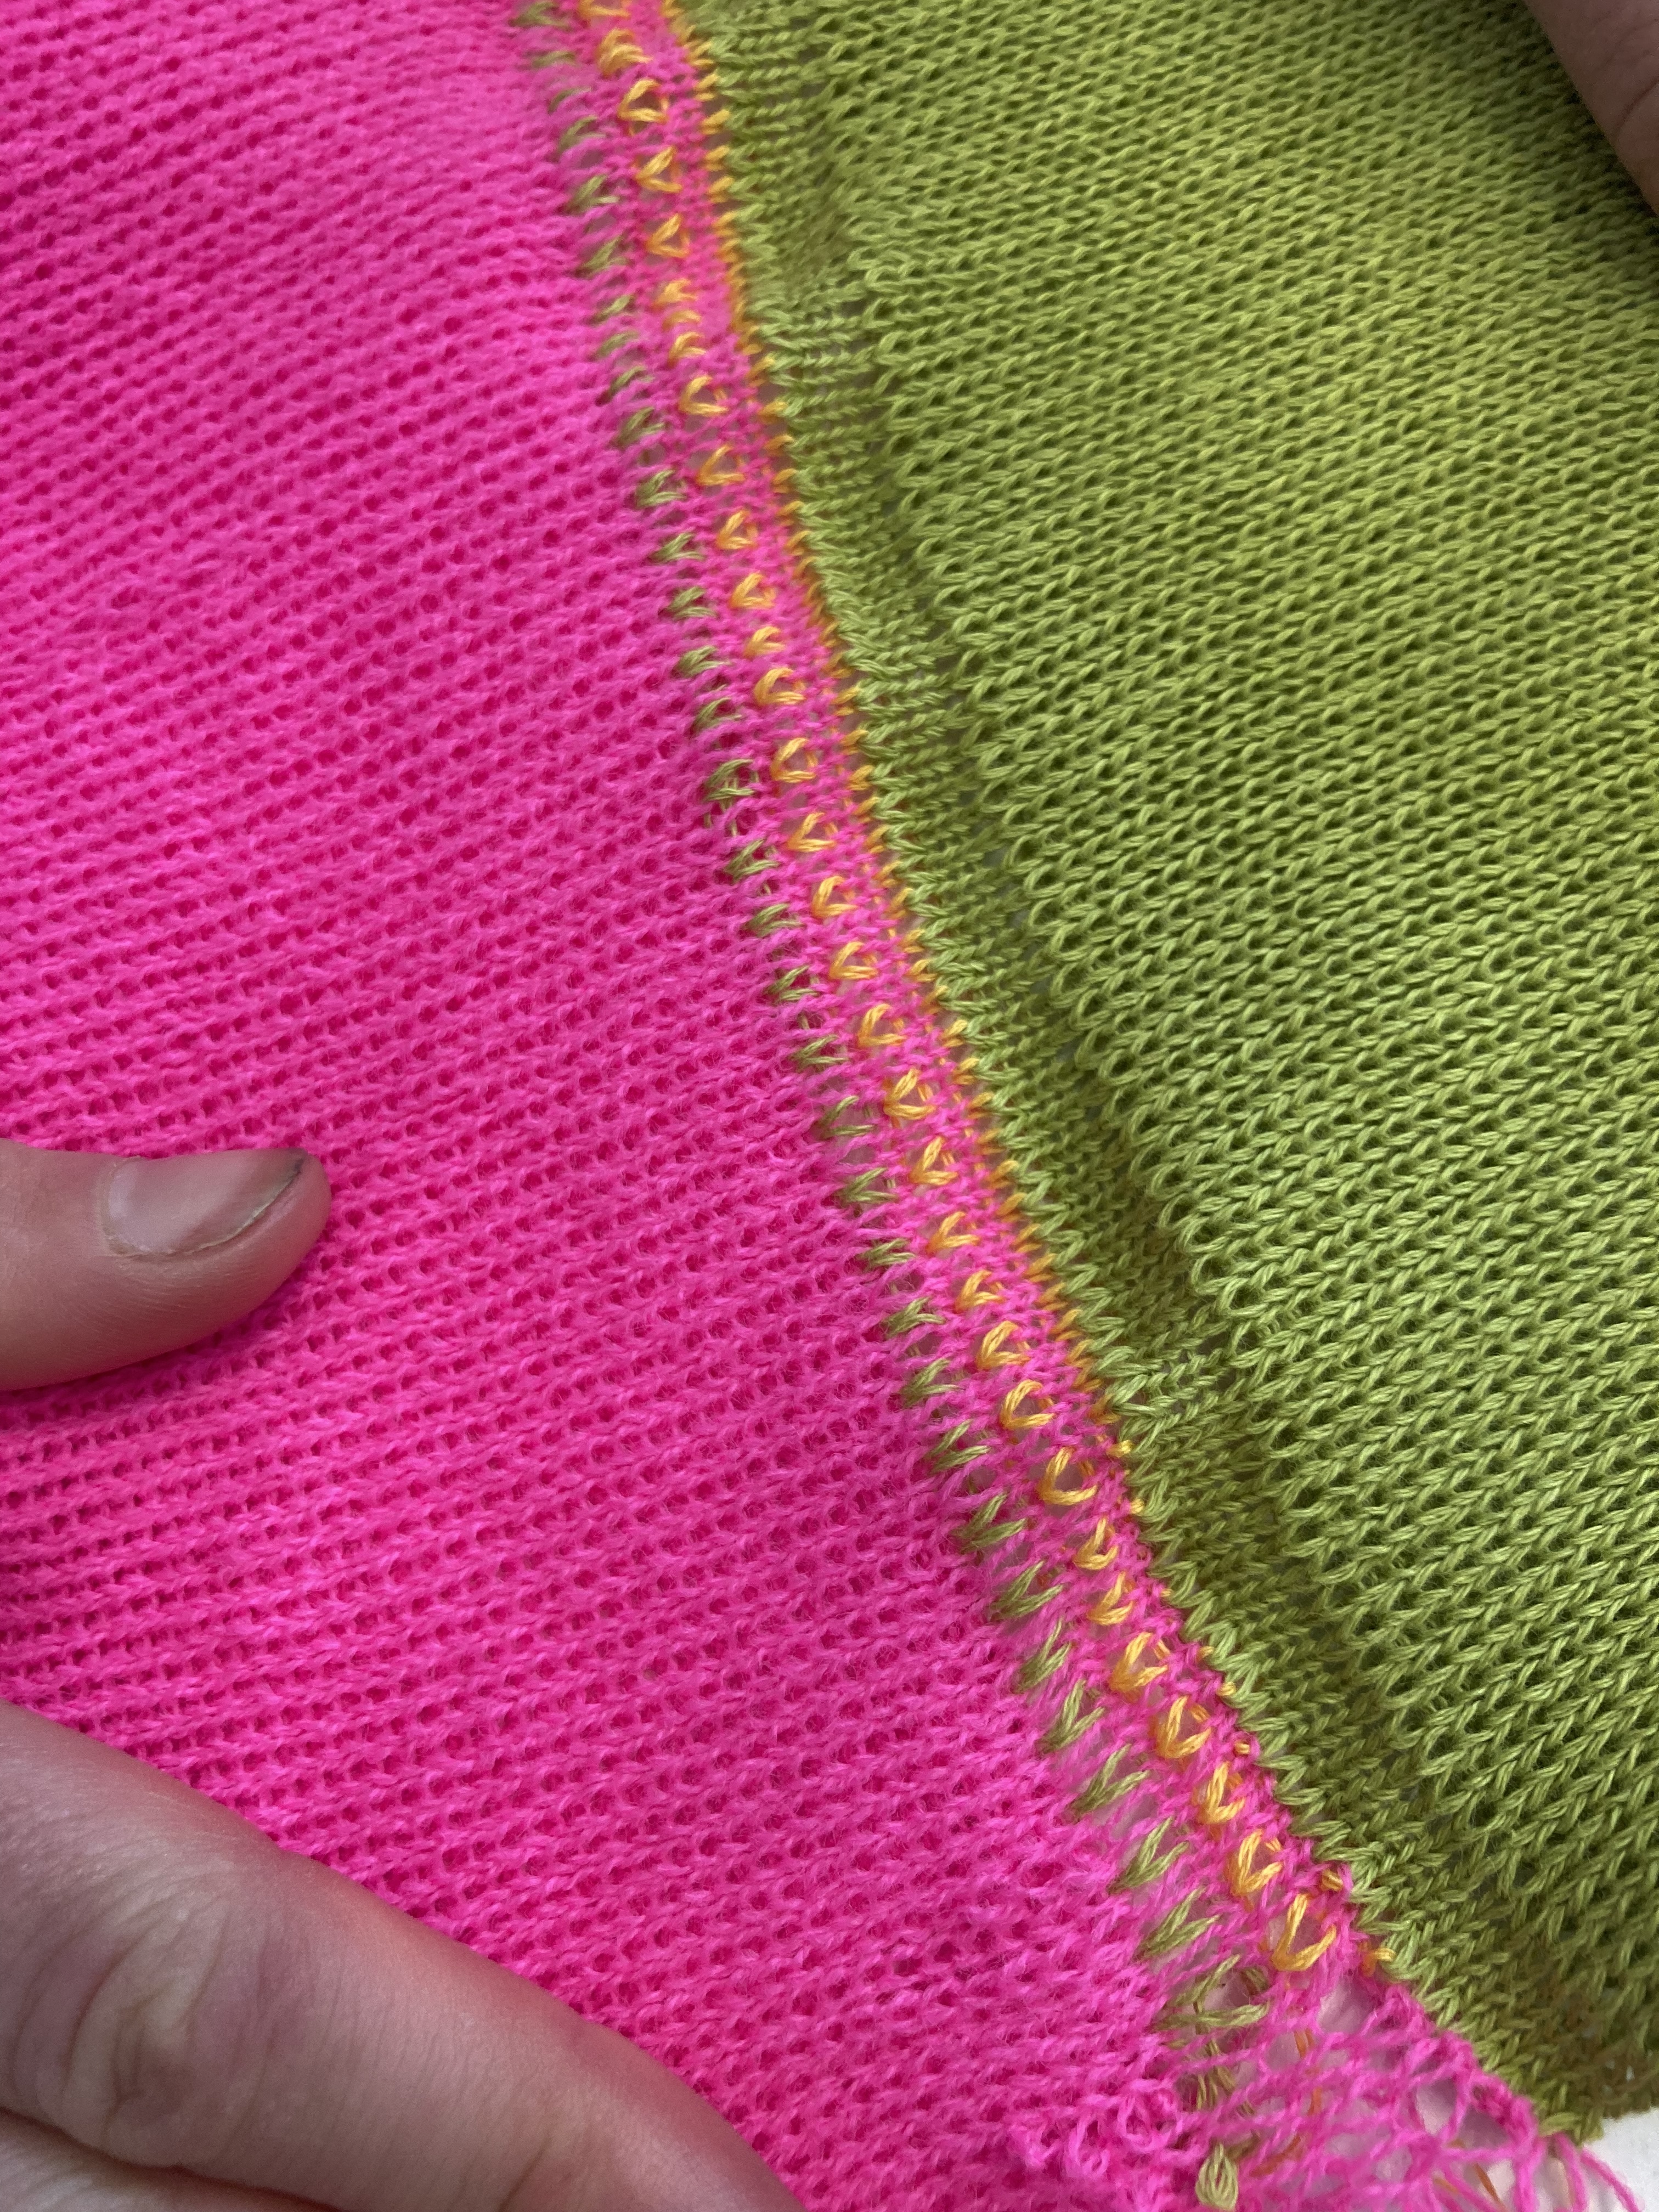
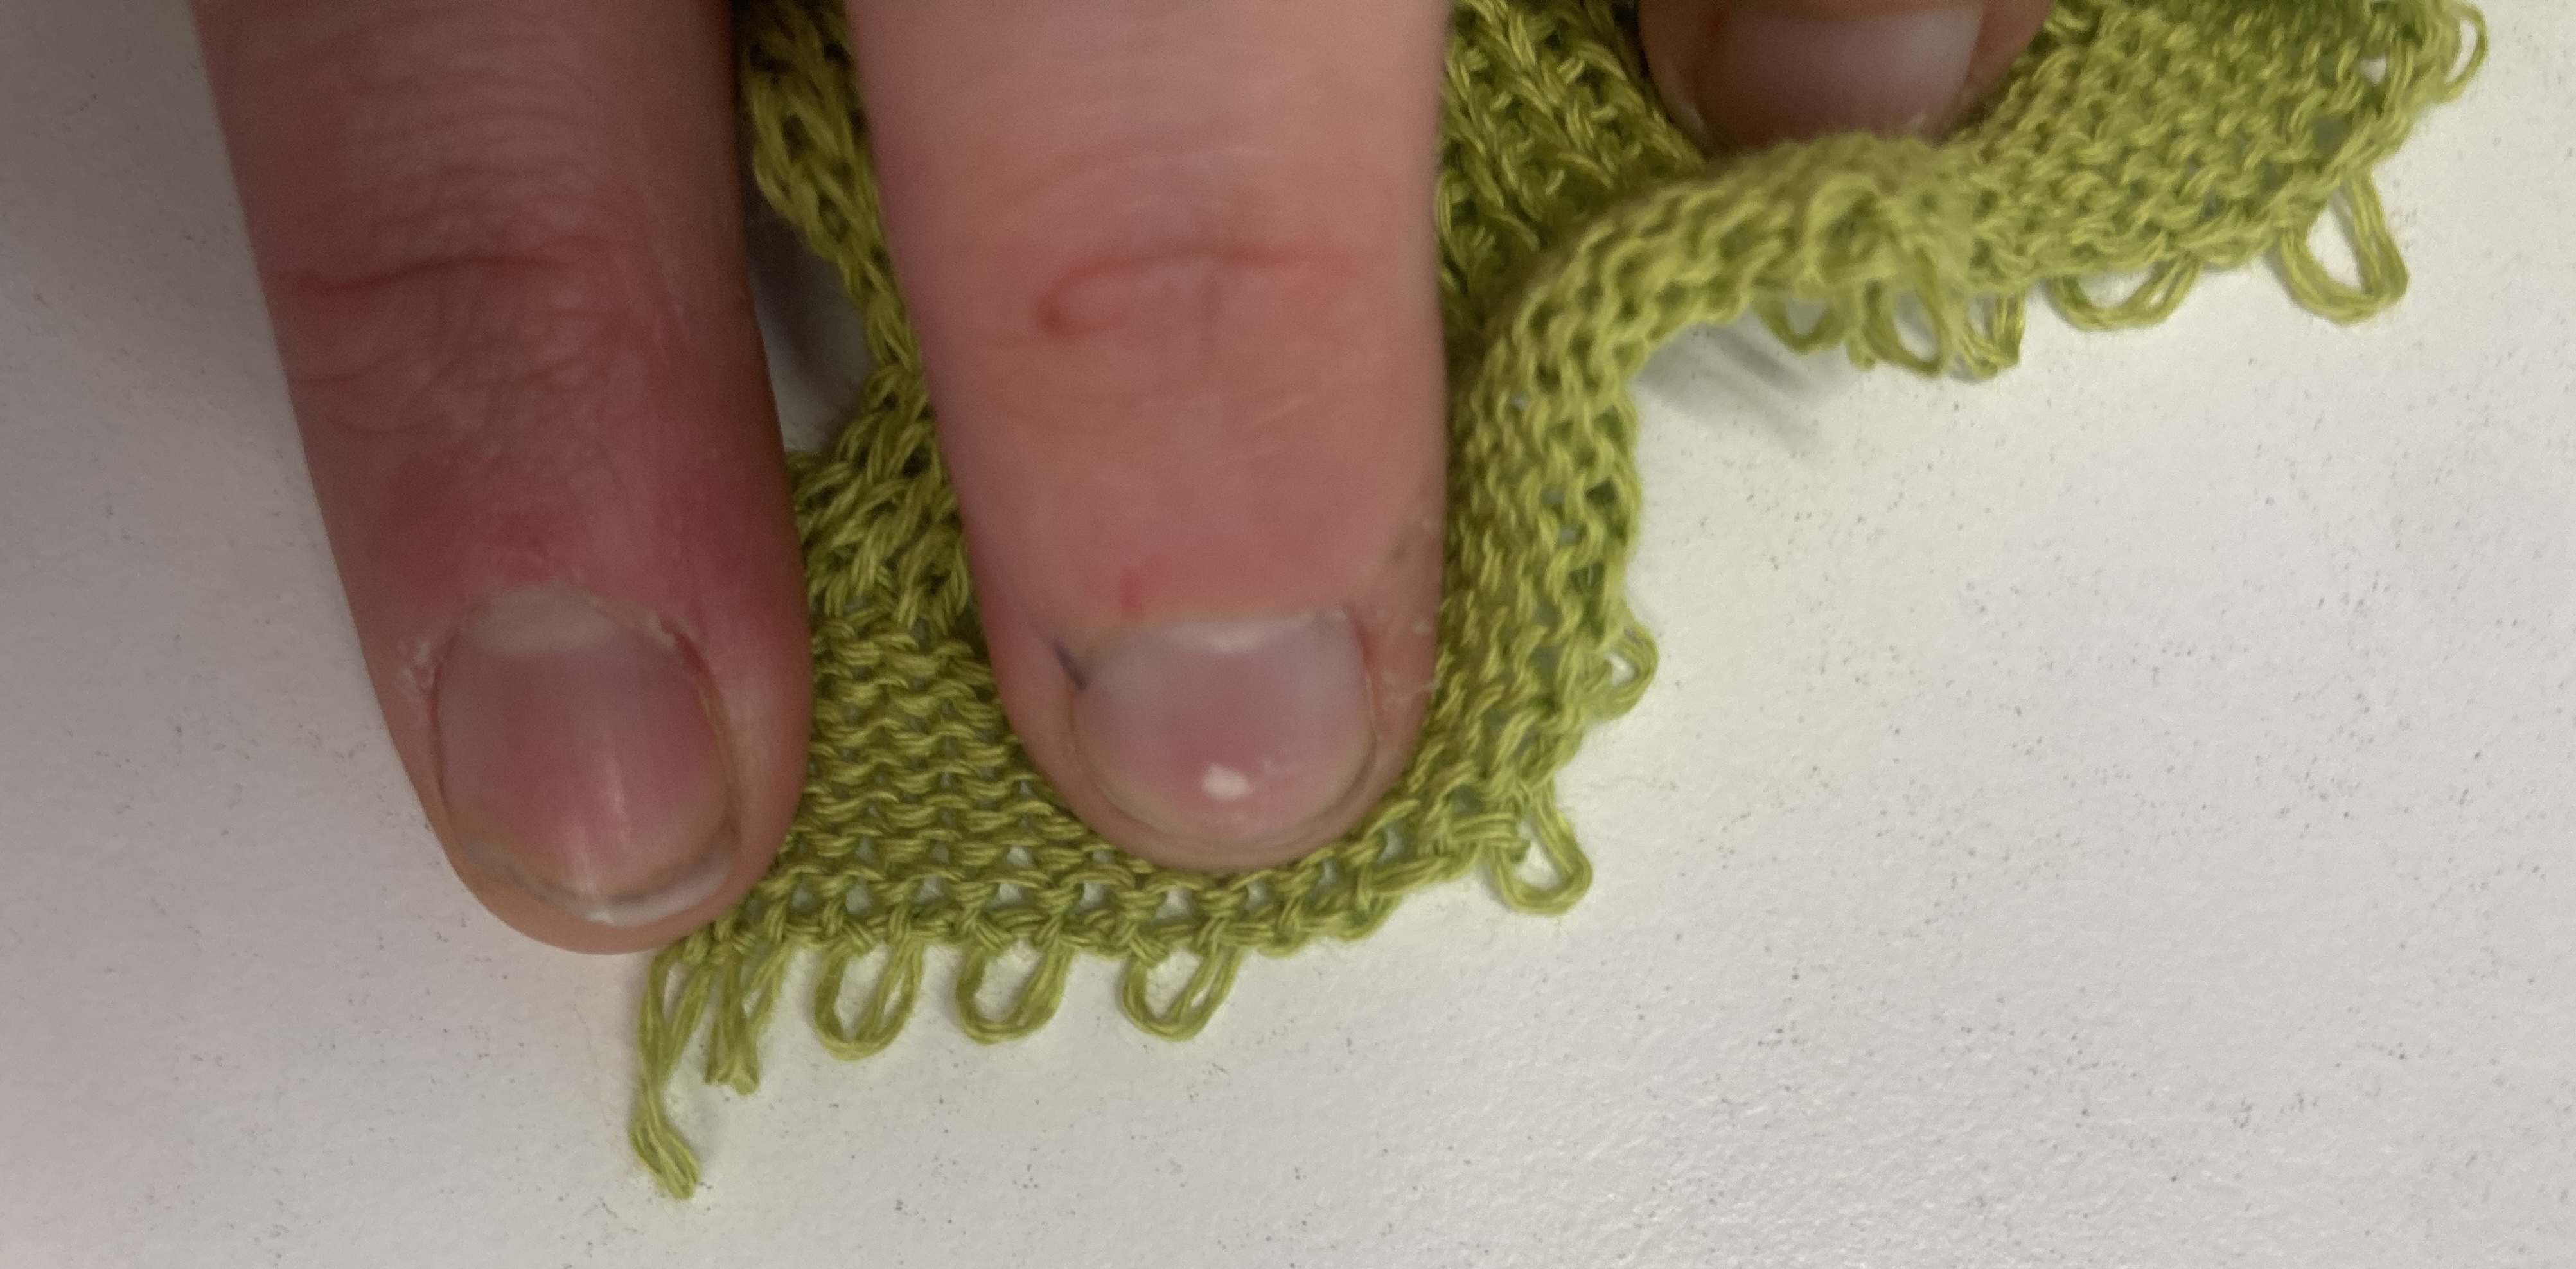
 a plated 5x5 rib sample made on the Knitworks ribber. The ribbing pattern is made by transferring stitches between the front and back beds
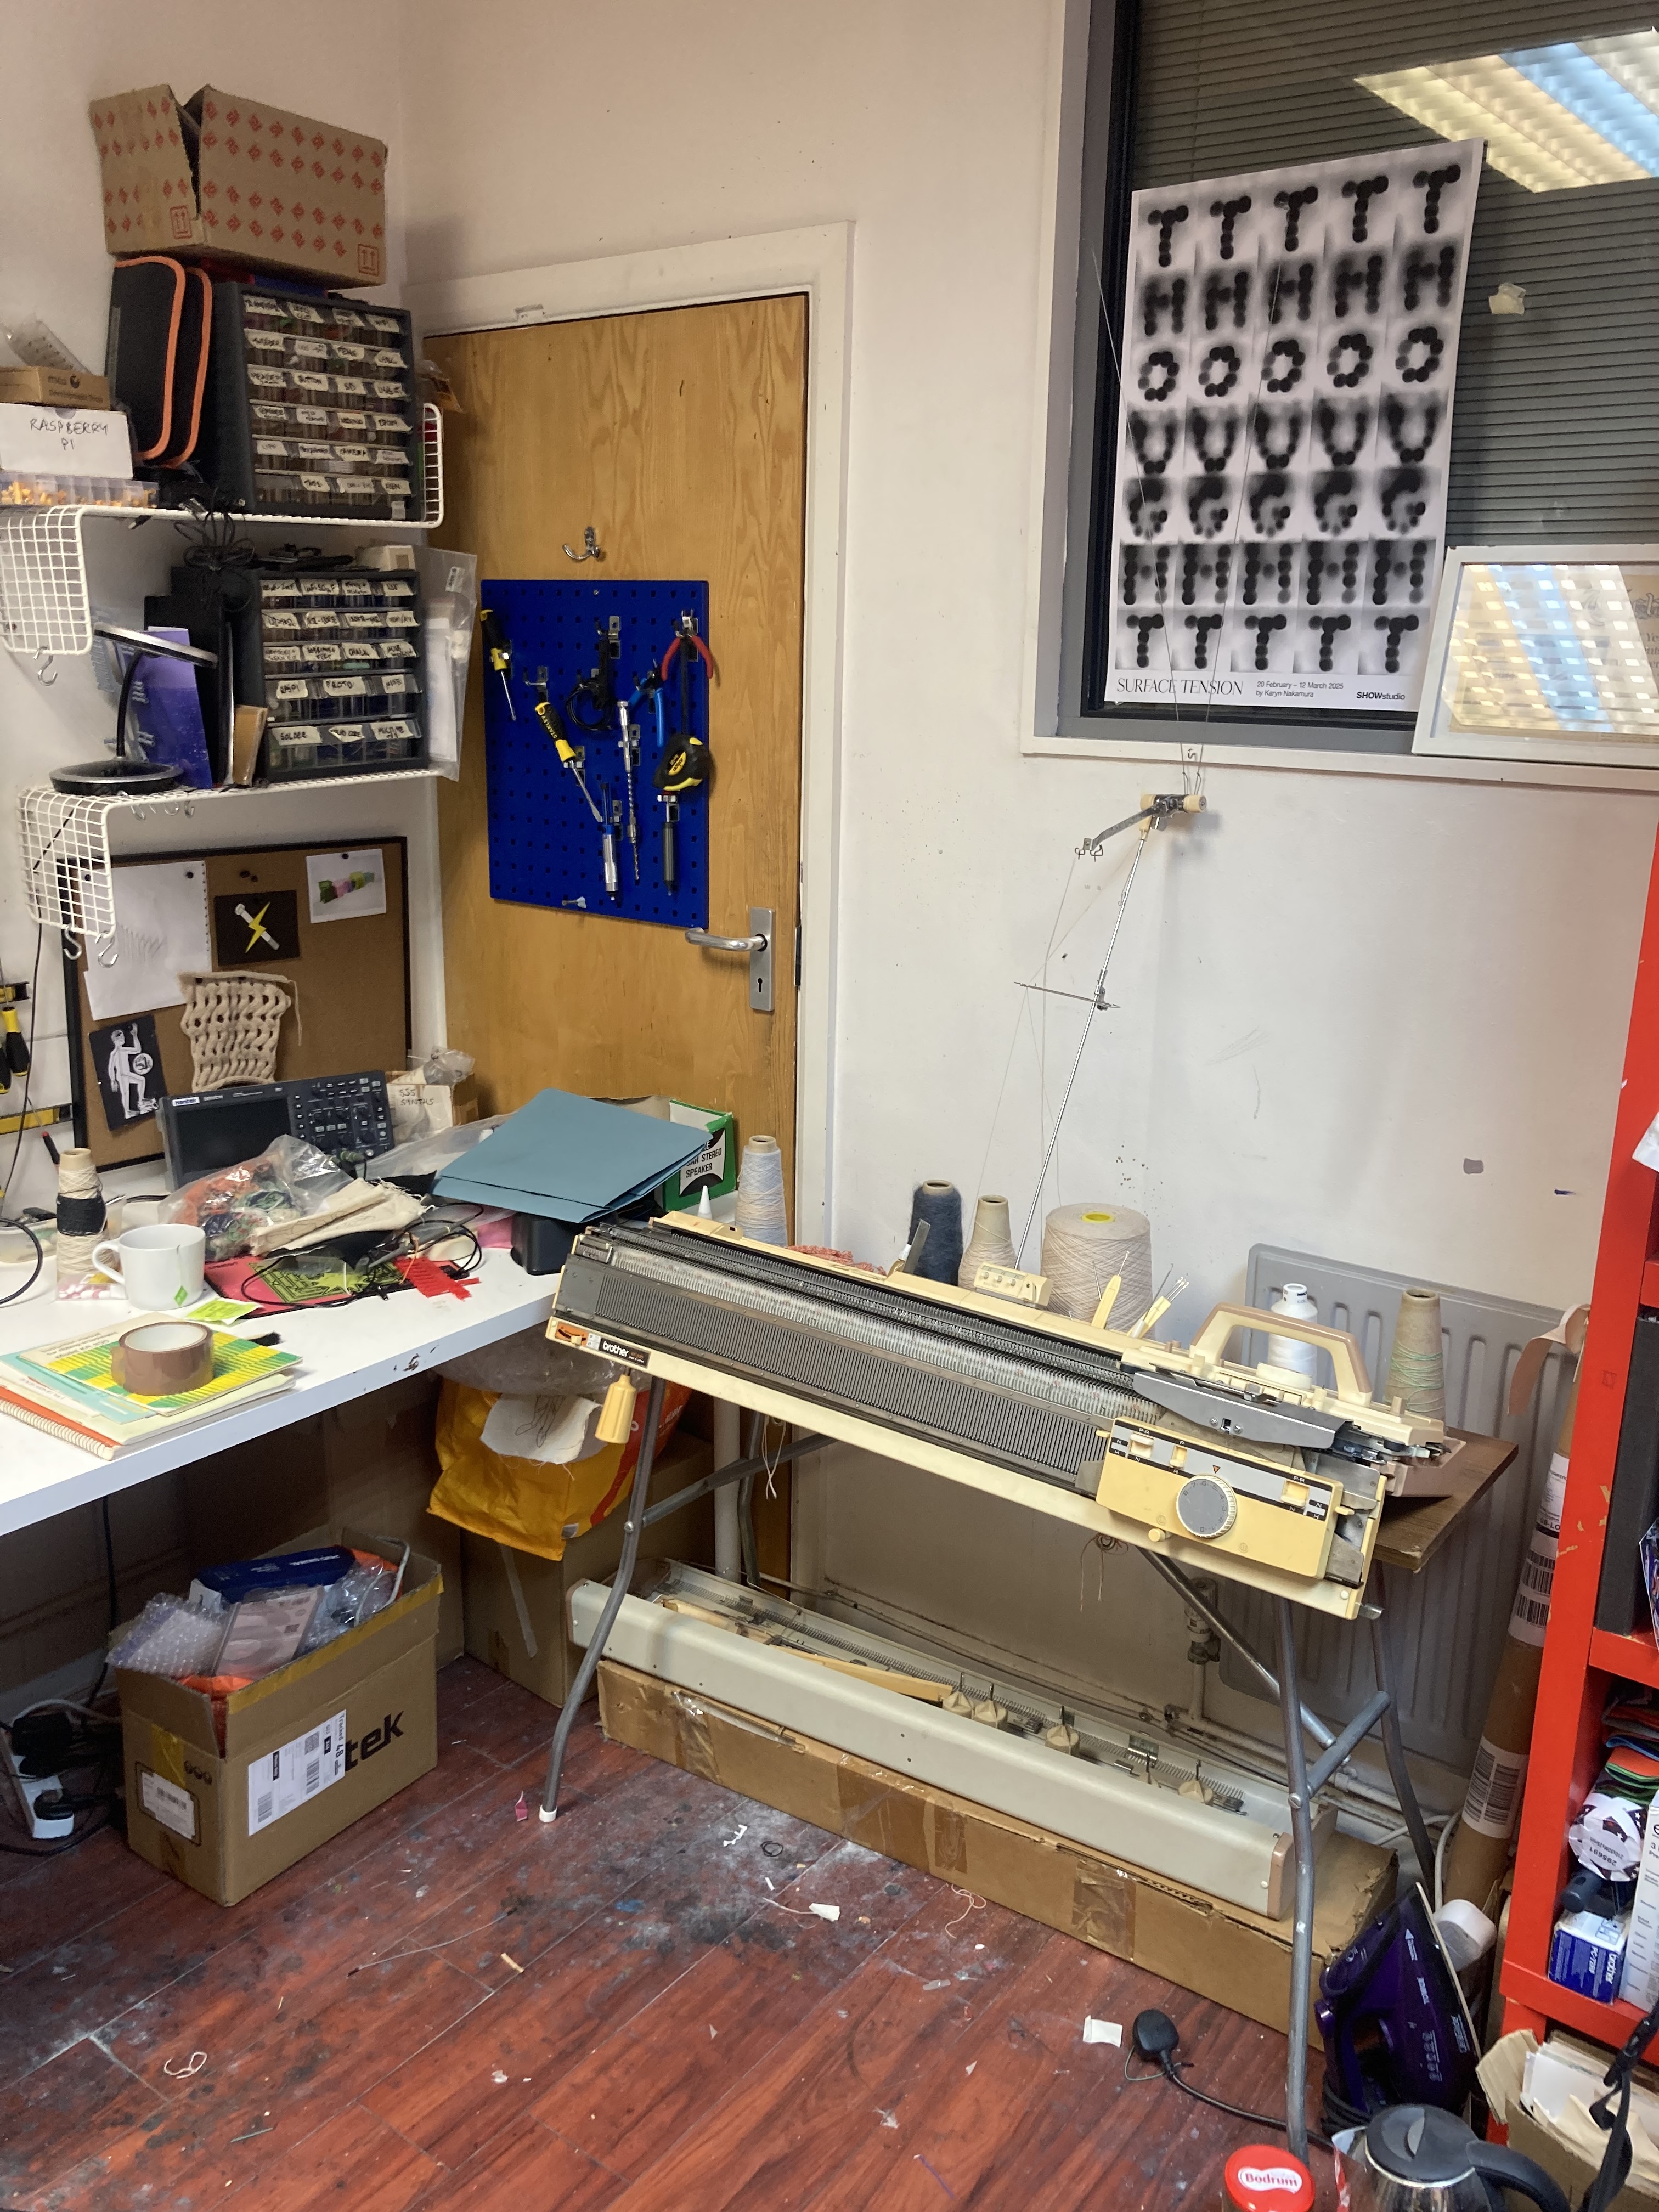 Setting the ribber up in my studio
We practiced a cast-on, different ribs, and experimented with plating and racking on the front bed (which might be a nice thing to re-create on the Kniterate). After the session, I went to my studio to set up the ribber that had come with my Brother machine, but that I’d not used before! It was pretty straightforward to set up: the hardest part was figuring out how to attach the brackets to the ribber as they’d been taken off. These are sprung, to allow the bed to latch up and down.
kniterate testing
testing the waste section
The first thing we did at Chelsea was to test the waste section sample we’d generated last week. All I needed to do was add a set of rows of front bed knitting. I decided to do this by using the waste generation file as intended – I made a rectangle on the front bed, and then appended the waste section using a script.
This turned out to be easier said than done: the lines I’d added to the cast-on section messed up the carrier directions because I was bringing them in twice: once in the tucked section and once again in the kniterate-style introduction that I’d added. This meant that the carriers ended up on the ‘wrong’ side of the bed for the original code. In the end I ended up adding a few extra rows to hack this together so we had something to test with, but I’ll need to sort this out properly later on.
 comparing between a waste section from the kniterate editor (left) and the knitout code (right). Note the tucked draw thread and cast-on yarn at the bottom of the knitout-based sample
The tests went well: B was quite pleased with the double introduction as it means the yarns are brought in early on, getting around an issue with yarn height on their kniterate, and saves her from manually bringing the carriers in. It was really cool seeing our code turn from code into actual, knitted material – and in seeing the correspondences between the knitout and kniterate-editor based cast-on.
We encountered another issue, which is that bringing carriers ‘out’ from the right hand side means that they trail over the whole knit to move to the Home position. For now we just move the ‘out’ statement to the end (as they’re not as important in kniterate anyway),B said that bringing carriers ‘in’ and ‘out’ was more of a Shima thing – when they’re not being knit they just sit there, they don’t do that much. but the other way around this would be to always ensure the drawthread ends up on the RHS (thinking about it, this is non-ideal as it fixes the cast-on direction of the input file… so we won’t do that).
Once we’d got this working, we made a couple of test samples – one with a 1x1 rib, one with a fisherman’s rib (same as the waste section). Both of these knitted well, though they could have been a little tighter.

casting off
The next thing to test was casting off (after B spent about 20 minutes manually casting off the first sample). Initially, I used the rectangle-bindoff code from (in the US, ‘casting off’ = ‘binding off’) from the knitout examples repo, adapting it to the more recent version of the knitout-frontend javascript code as follows:
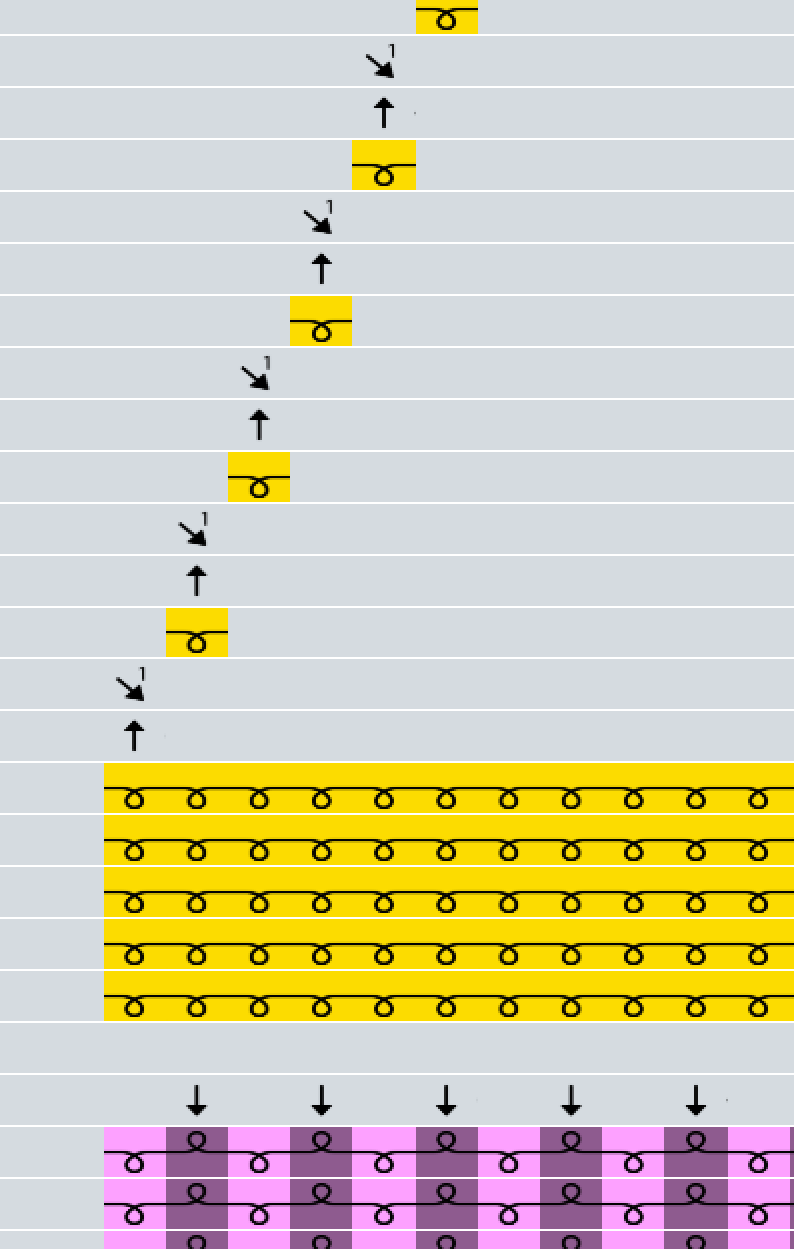
 what the first bindoff section looks like in the knitout visualiser. Note the ‘held’ stitches every other stitch on the back bed!
k.xfer("f" + n, "b" + n);
k.rack(1.0);
k.xfer("b" + n, "f" + (n+1));
k.rack(0.25);
if ((n-min) % 2 === 1) {
	k.tuck("+", "b" + n, Carrier); // every other stitch held by back bed
}
k.knit("+", "f" + (n+1), Carrier);
if (n+2 <= max) {
	k.miss("+", "f" + (n+2), Carrier);
}
k.rack(0.0);
Translating to words, the order of operations here is:
- transfer a stitch from the front bed to the back bed (the previous row will all have been knitted on the front bed, leaving the back bed free)
- rack 1 needle position over, bringing the stitch that was transferred to face the next needle along (which will still have a stitch)
- transfer that first stitch from the back bed to the front bed (on top of an existing stitch)
- every odd-numbered stitch, perform a tuck stitch on the back bed (this will take a loop of yarn from the carrier and hold it in place on the back bed). This is effectively holding the carrier yarn in place.
- knit the stitch that’s held on the front bed
- for all except the last 3 stitches, drop the knitted stitch off the front bed
- rack back to 0, and continue
This does something a bit different to the typical knitout bindoff, which doesn’t do this step of holding every other stitch on the back bed. B remarked that this method was ‘very shima-y’ (probably because it’s taken from the regular knitout examples), and the end result was somewhat distorted.
 the bindoff test sample knit using the original code -- note how the shima-style holds leave some loose stitches on the edge
The next step was to update the code to match kniterate editor, removing the every-other-needle transfers to the back bed. We ran out of time to test this, but the hope is this should work similarly to the version in the kniterate editor:
k.xfer("f" + n, "b" + n);  // front to rear transfer
k.rack(1.0); // rack 1
k.xfer("b" + n, "f" + (n+1));
k.rack(0.25);
k.knit("+", "f" + (n+1), Carrier);
k.rack(0.0);
This does a simpler operation than the first one described above, missing the tuck steps, but also leaving the ‘miss’ steps till the very end, holding the knit stitches in place on the needles (instead of holding them in place using the tucked stitches on the back bed).
- transfer a stitch from the front bed to the back bed
- rack 1 needle position over
- transfer that first stitch from the back bed to the front bed
- knit the stitch that’s held on the front bed
- rack back to 0, and continue
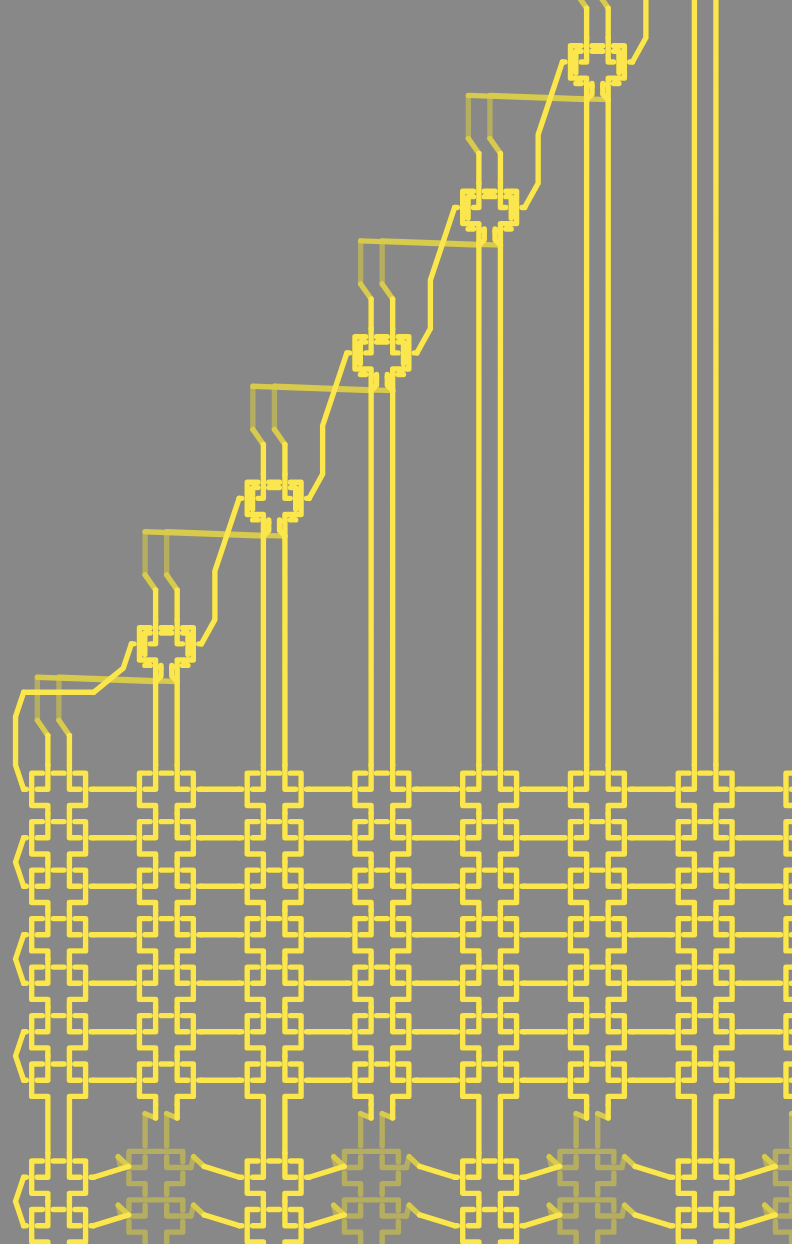
The kniterate editor bindoff, compared to the equivalent in knitout. Note that compared to the image above, no tucked stitches are held at the back.
In validating this approach, I also looked to see if there were any kniterate-specific knitout examples. I wasn’t able to find a JS-based bindoff in Gabrielle’s code, but there is a Python equivalent in her knit3D repository, where ‘x’ represents the number of the needle:
k.xfer(f'b{x}', f'f{x}')
k.rack(1)
k.xfer(f'f{x}', f'b{x-1}')
k.rack(0)
[...]
k.knit('-', f'b{x-1}', c)
The … part is this, which handles roller positions. It’s unclear whether this is necessary for a straight bindoff – potentially this is necessary as when dealing with 3D shapes, it might need to be extra careful with the positioning of the sample on the bed.
if x != xferNeedle+count-1:
  if not asDecMethod and (xferNeedle+count) - x == 30:
    k.rollerAdvance(0)
  elif x < xferNeedle+count-4
  and (asDecMethod or (xferNeedle+count) - x < 30):
    k.addRollerAdvance(-50)
    k.drop(f'b{x+1}')
if not asDecMethod and (xferNeedle+count) - x >= 30:
  k.addRollerAdvance(50)
kniterate issues
We encountered a recurrent issue where the Kniterate moves the yarn carrier before the carriage starts to move, resulting on stitches being dropped on the right hand side of the bed. B mentioned that this was also an issue that also occurred in kniterate-editor generated files, but was seeming to occur more often in ours.
She said that this only ever happened with carriers on the right-hand-side of the code, and also happened most frequently just after the main yarn was cast on (e.g. after the row of both beds knitting at the start of a sample).
I started to look into this by making close comparisons of the .kcode files generated by the kniterate editor and knitout-to-kcode conversion script respectively. This yielded some differences, but will need a lot more time with the converter (and ideally to see how the Kniterate editor does it) to get to the bottom of if, how and why there’s a bug there.
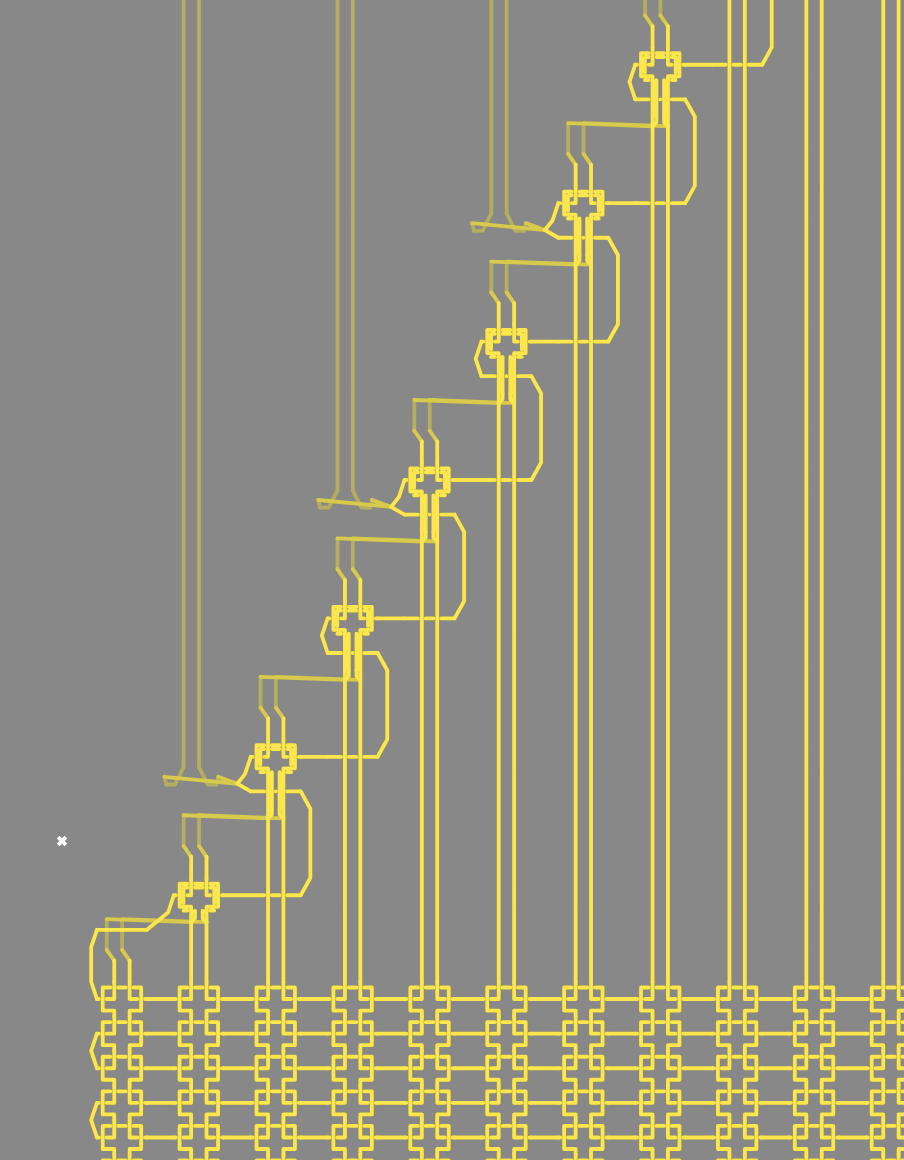
In trying to understand this, I also made an annotated guide to a .kcode ‘row’:
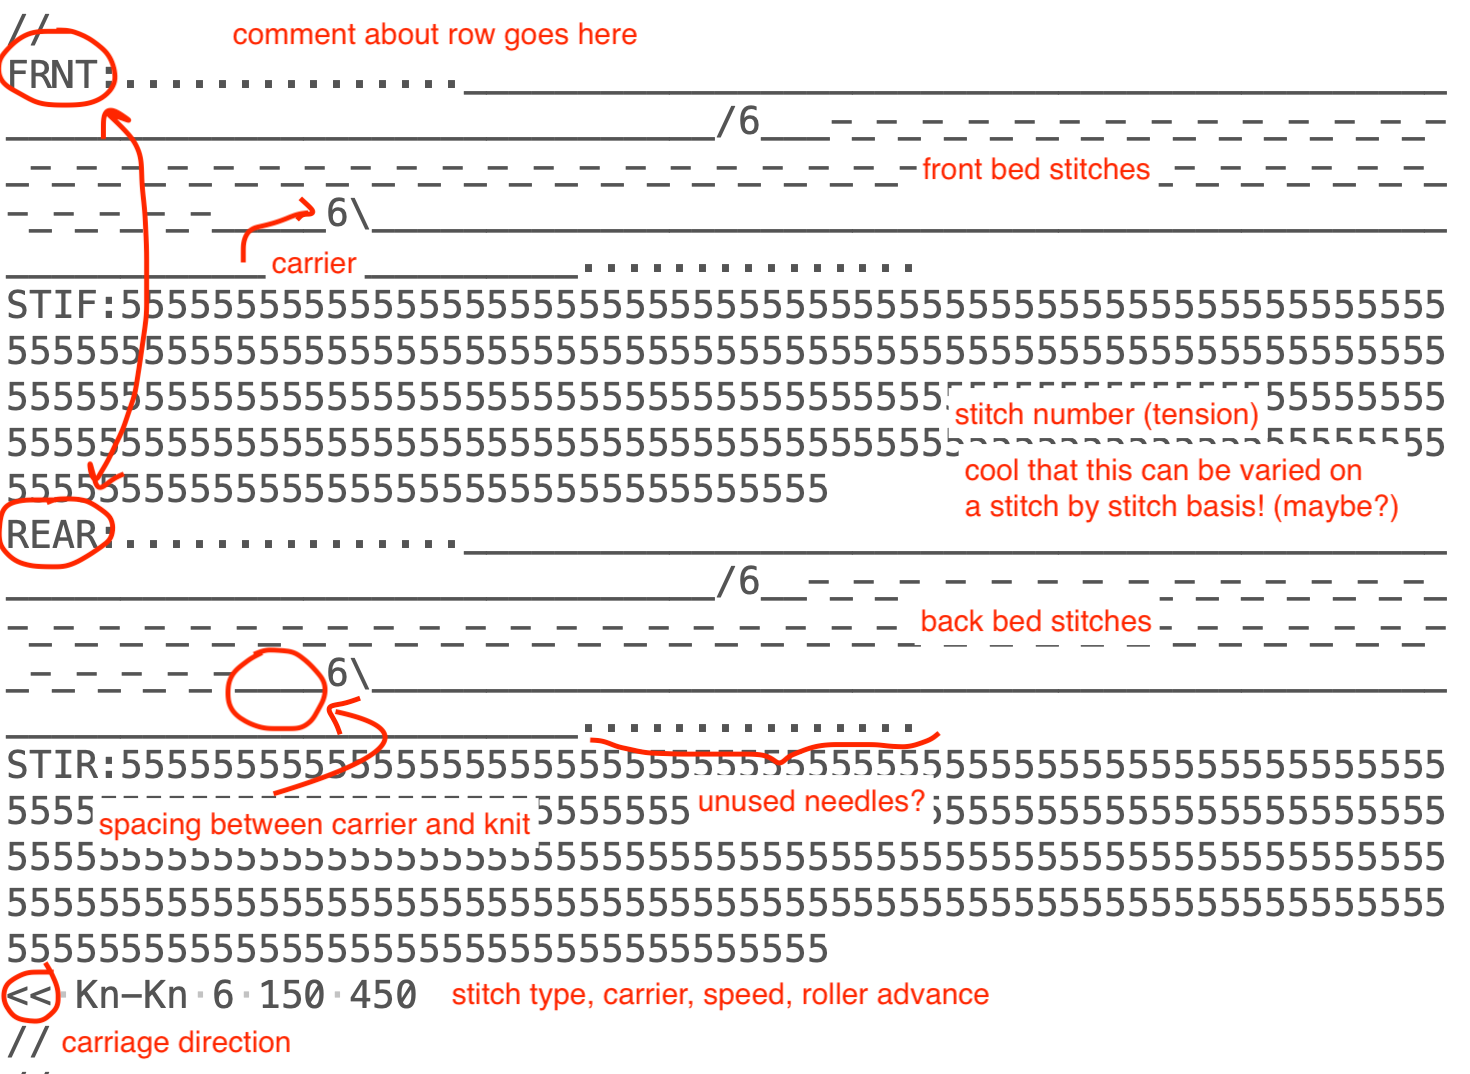 the 'row' consists of information about the front bed (carrier position and stitches, then stitch tensions), followd by the back bed, followed by a general metadata section (stitch type, carrier, speed etc)
knitout -> kniterate editor
To make the JS knitout library usable to our students, I’m updating the visualiser to include a bunch more kniterate-specific functions, including kcode export and automatic waste section generation.
updating the interface
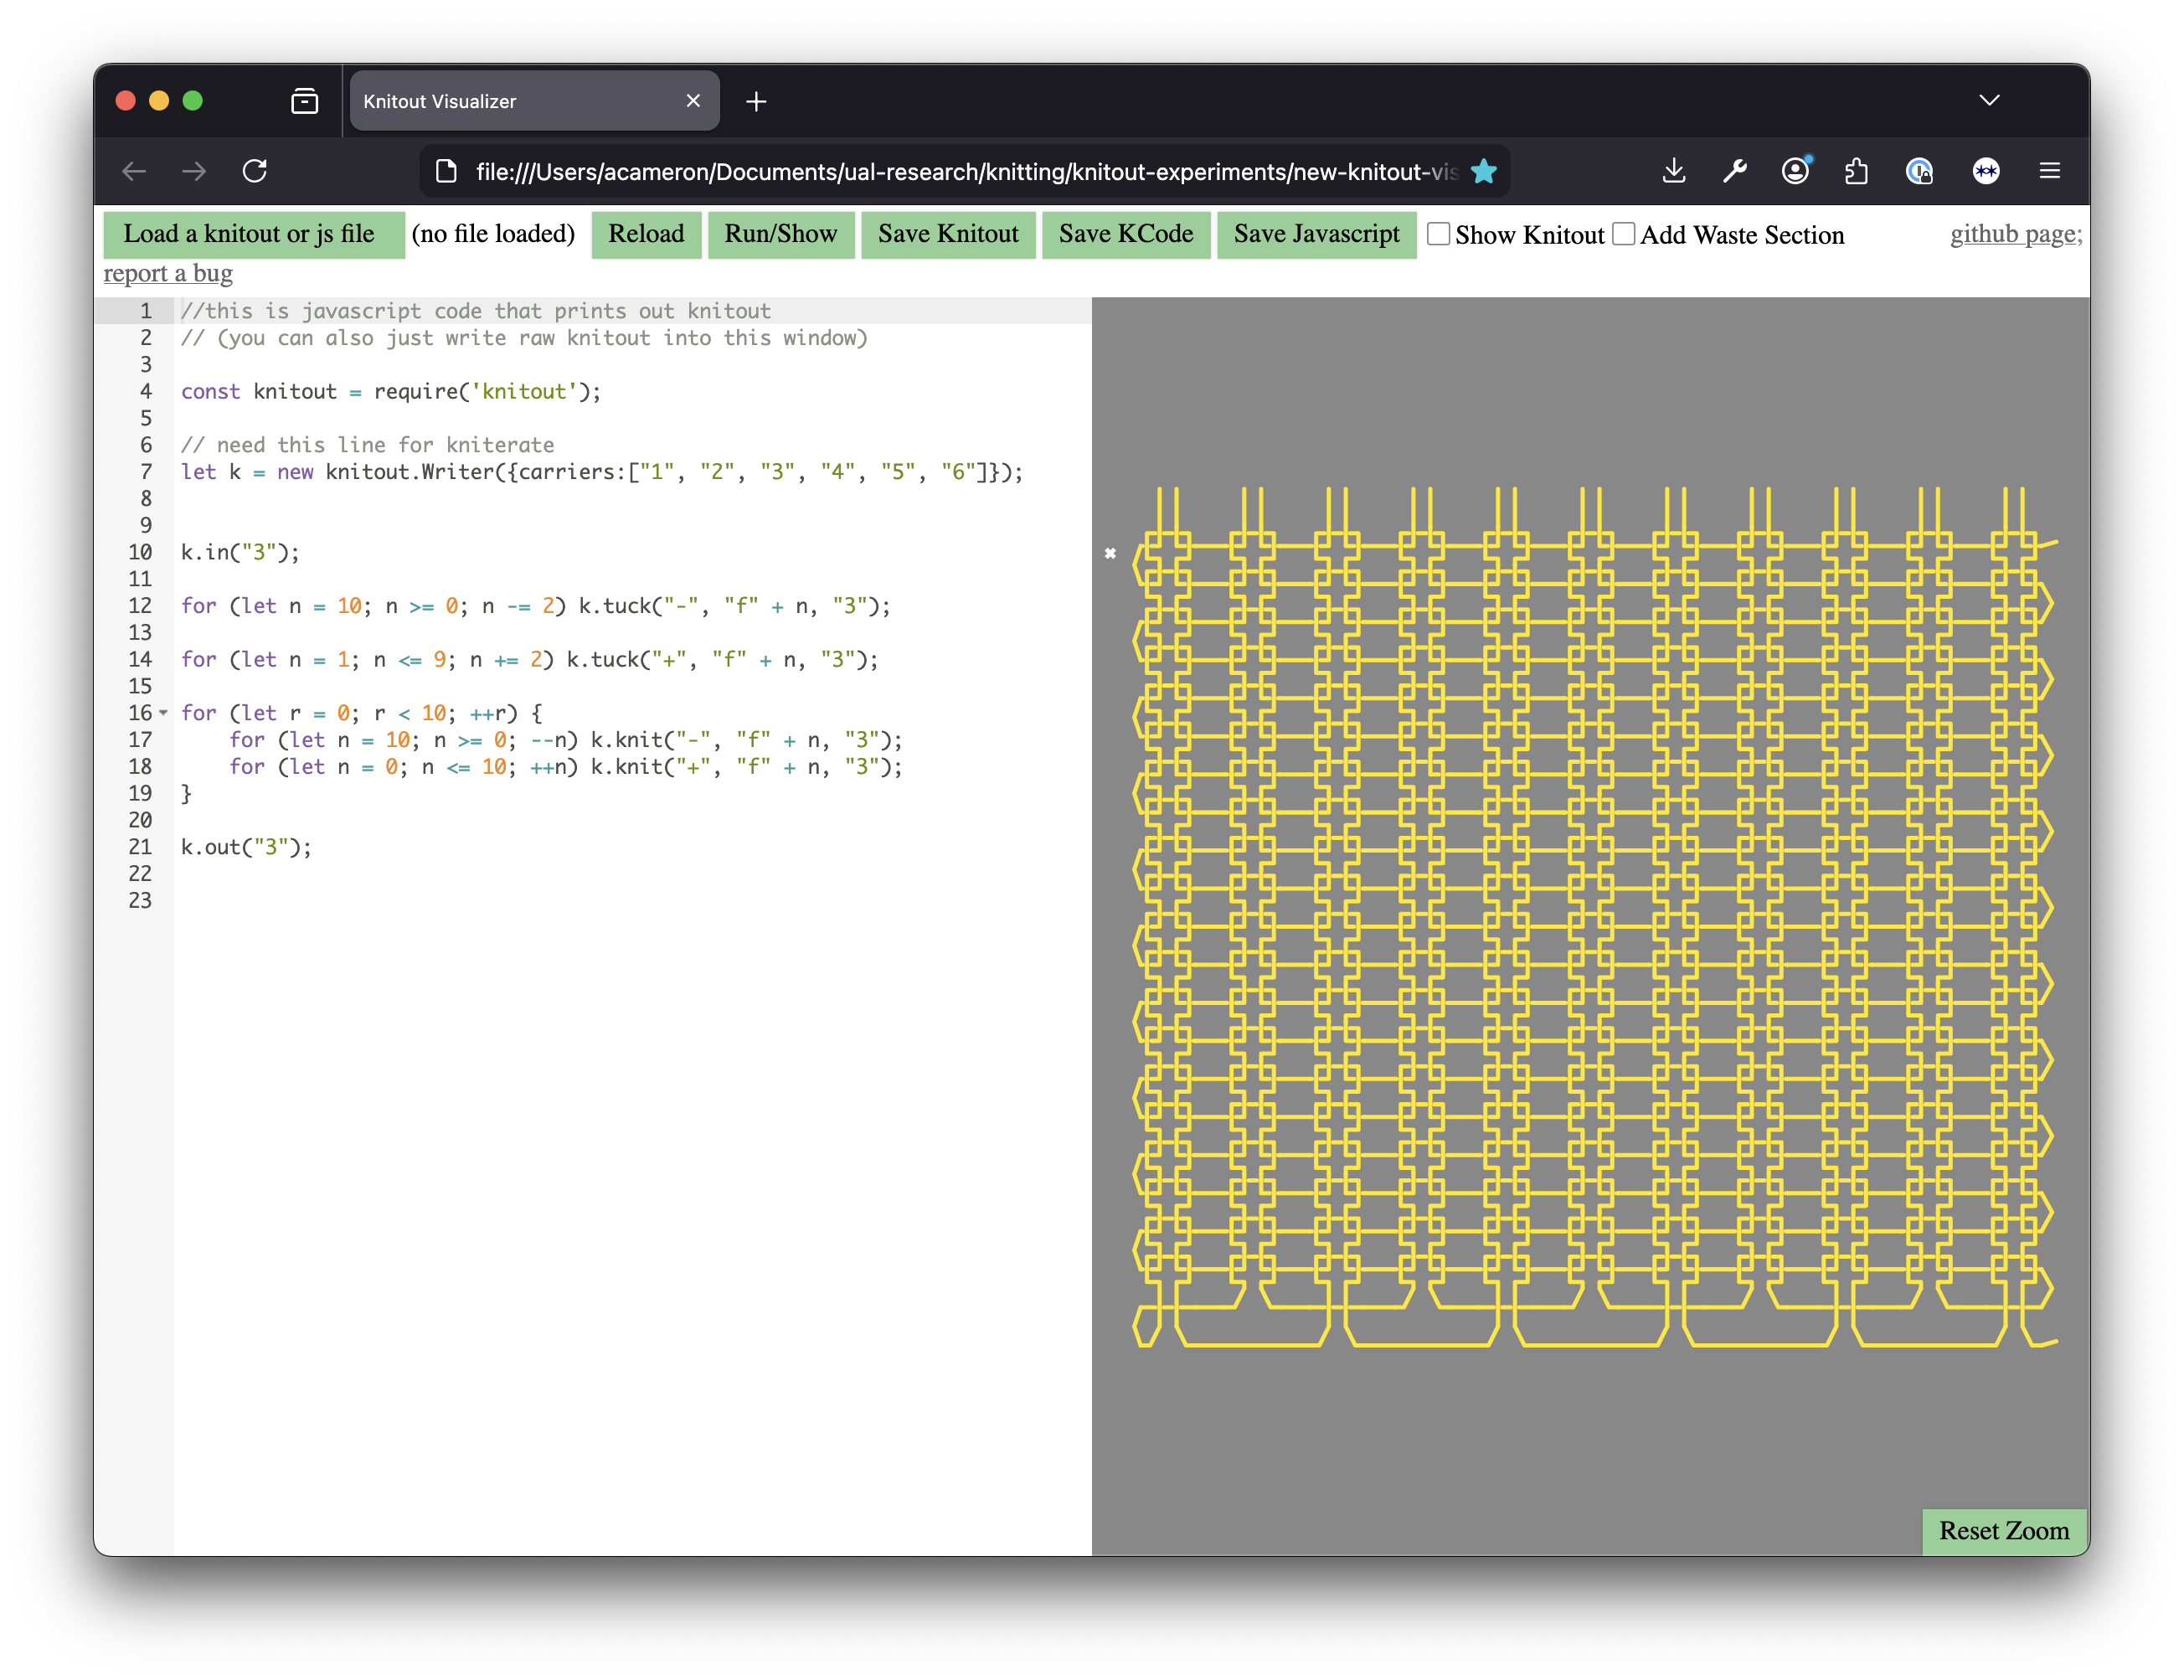 the adapted visualiser, featuring functional KCode export button and buggy waste yarn addition checkbox
The first thing to do was add kcode export button to the visualiser. This was pretty straightforward, I just used Gabrielle’s code, which had already been integrated into a web interface, just a different one. This sped things up a lot once we had knitout code that looked good.
auto exporting the waste section
This requires a more in-depth refactor, partly also to overcome some of the issues we ran into with carrier positioning during the initial waste section tests. My plan is to write a state object (similar to the one used in the knitout-to-kcode file) that tracks the carrier positions and decides the direction of each row based on this.
It’s possible that it might be nice to have this as a callable function where the min and max width, height etc are rendered as arguments (rather than just automatically adding as present), but not sure how that would integrate into the main code parsing.
ideas for helper functions
Kniterate’s “do my transfers” function is really good and helpful. The way it works is that an area of knit where transfers from the front to back should happen, and then apply it as a layer, when they get scheduled correctly.
I wonder if there’s a nice higher level js function that can handle simple cases – e.g. manage transfers between 2 rows that looks at what needs to move from the back bed to the front bed. Some of this seems to happen already: adjacent transfers seem to get split over 2 rows without me needing to do anything. I suppose this gets in to needing a greater understanding of how knitout is generated from js (this file) to understand whether I’d be breaking some kind of parsing law.
NAFA Kniterate Sample
In the Triangle Space at Chelsea, there was an exhibition of a bunch of work made by some exchange students from the Nanyang Academy of Fine Art Singapore with different Chelsea programs, including one group with BA Textile design.
There was a big variety of work, including some really cool samples inspired by images of the sky from the student Chua Yi Jie. The sample was a Double Bed Jacquard, where one yarn was spandex, causing a really interesting bunching form on the right side of the fabric.
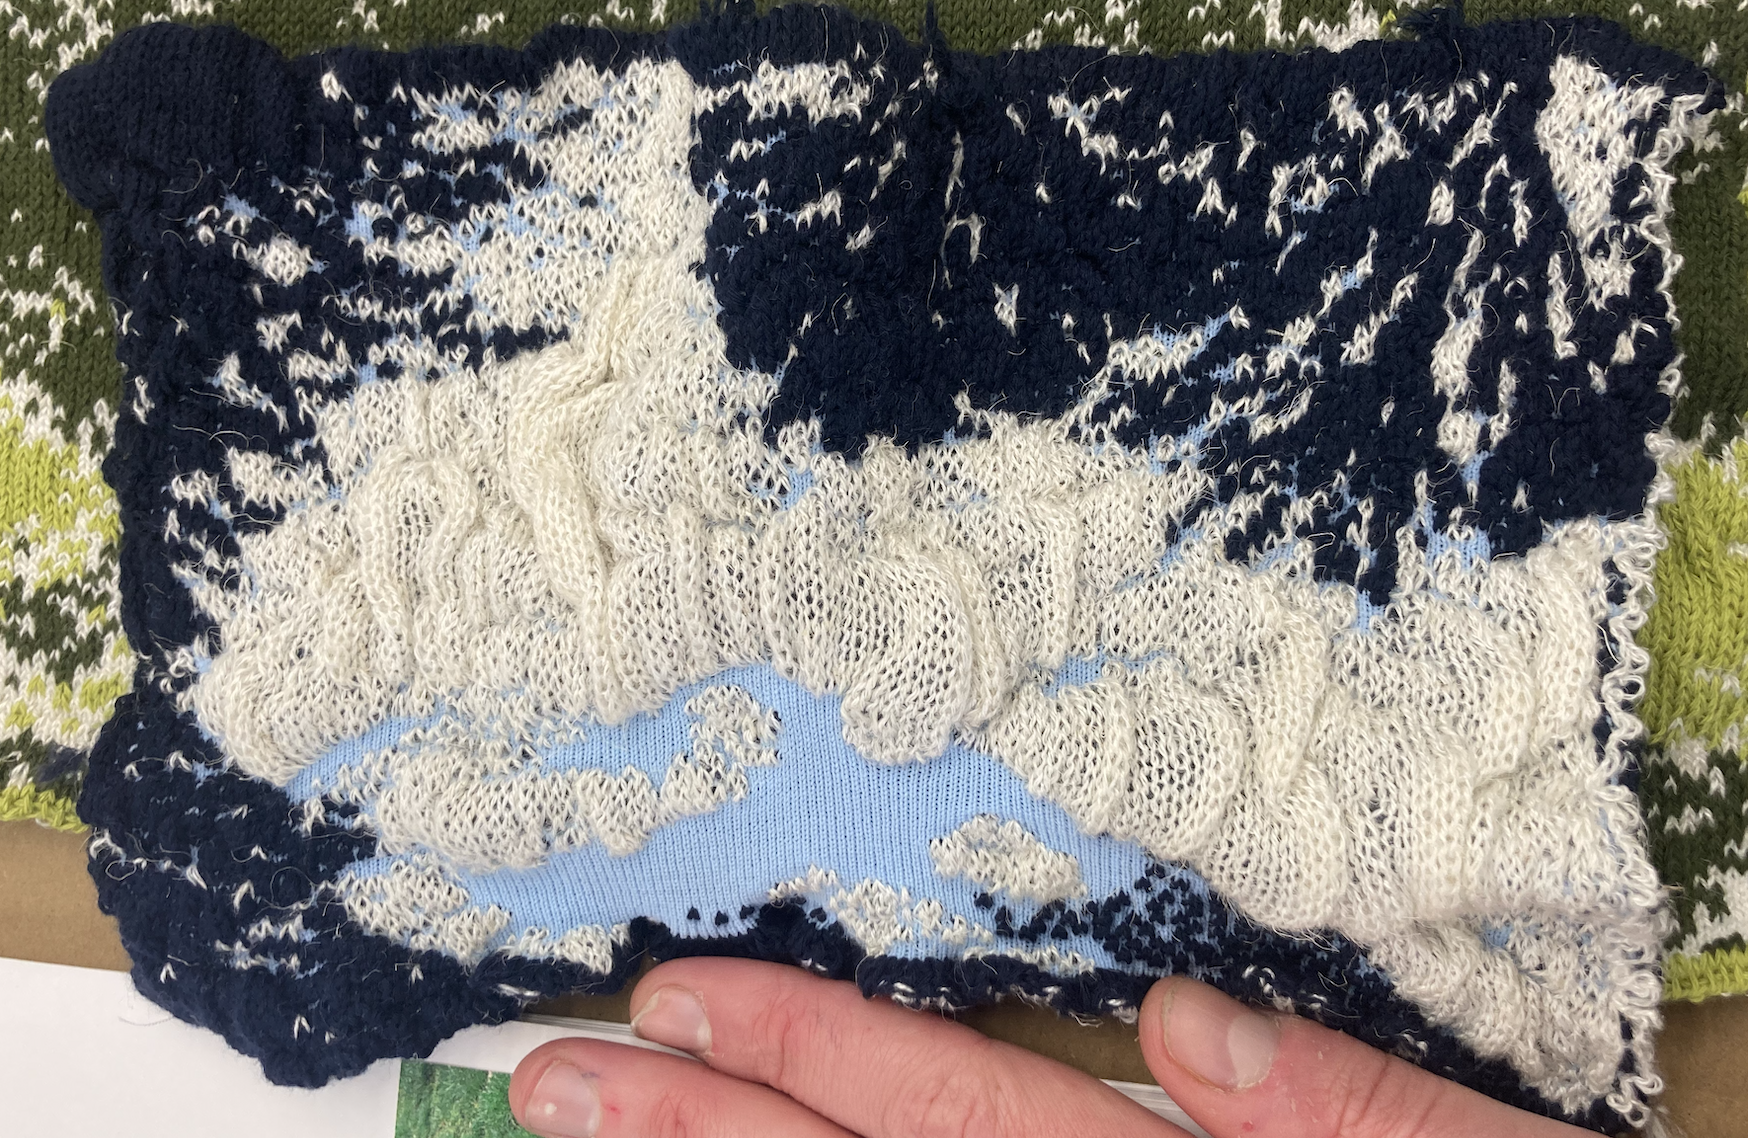 Chua Yi Jie's sample, with the elastic yarn in light blue
This made me think about using elastic to do shaping in knits more generally, potentially producing some really interesting geometries. It might be a nice way to explore 3D knits around the limitations of the kniterate, though I’d imagine it might also make things a lot less predictable.
next steps
- I’d really like to learn more about jacquard, as it’s a technique I’ve never used on either the kniterate or on a ribber.
- Understanding the kcode file format in order to get to the bottom of the carriage errors and understand where they’re being introduced (and whether that happens in hardware or software).